

Salesforce scheduler provides you a really nice component to search for a location. You can enter any address or zip code in the provided input box and get the desired territory (if it’s correctly configured! duh! ).
There are certain tricks involved in this out-of-the-box component you can play around with and make it work according to your need.
Distance measure (kms or miles):
This is a straightforward setting where you can define the search radius to be in miles or kilometers. By default, it is in miles. However, if you want to change it to kilometers, you need to change a flow variable called “distanceUnit”. This variable is of type text and valid values for this are mi or km. If you put any other value, this component will simply reject it and will show default miles. So make sure you have set it only to one of those accepted values.


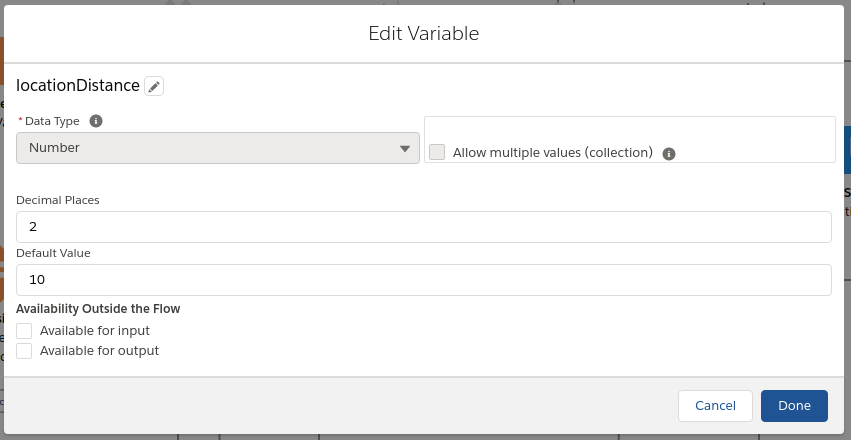
Setting the default distance value
There is another attribute to set the default search radius as well. It’s a flow variable called “locationDistance”. Supported values for this variable are [ 5, 10, 25, 50, 100 ] if the distance unit is miles and [ 10, 20, 50, 100, 200 ] if the distance is kilometers. By default is 5 miles OR 10 kilometers depending on your distance unit setting. If you set any value other than the above specified, it will set back to its default value. So make sure you set it correctly.

Skip Location Screen:
Often customers want to create virtual territories or want to skip the territory selection and instead preselect a service territory in the Scheduler flows. It’s pretty simple to customize the flow (using clicks not code) to make this happen!
Here is one of the way we can do that:
- Copy the Service Territory Id of the Service Territory which you want to auto select in the flow. (xYou can do this by going to your Service Territory record and selecting the Id from the URL as shown below)


- Open your flow. Open Initial Assignment node.

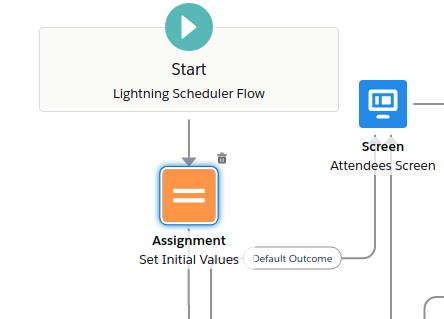
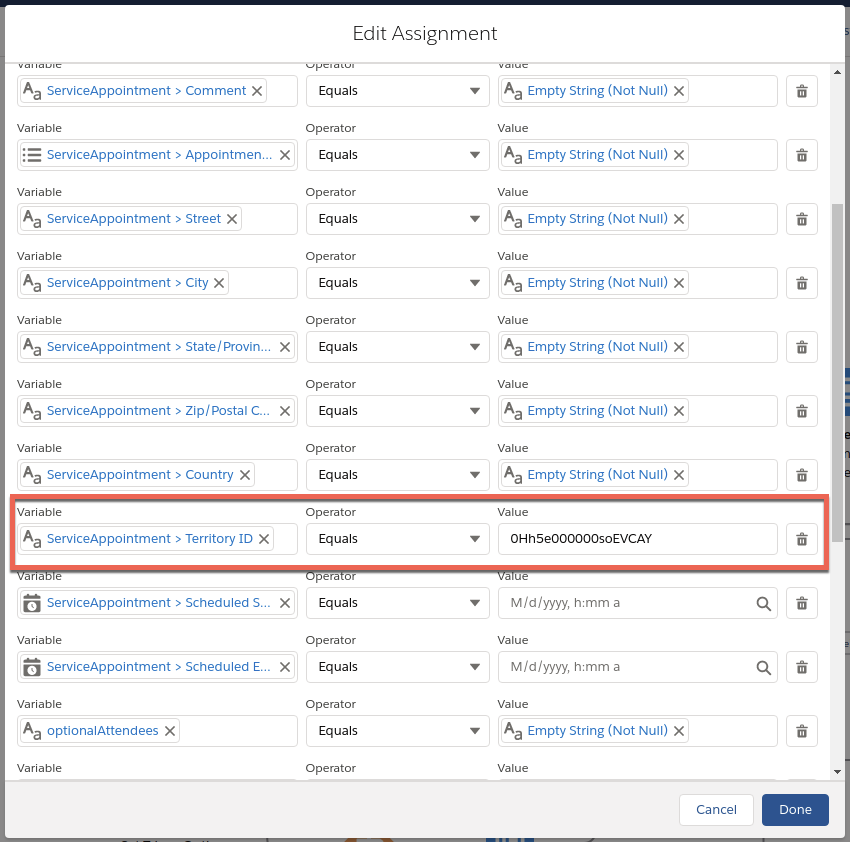
- In the Edit Assignment screen, look for ServiceAppointment > Territory ID field. Put the Id of territory you have copied in earlier stages.

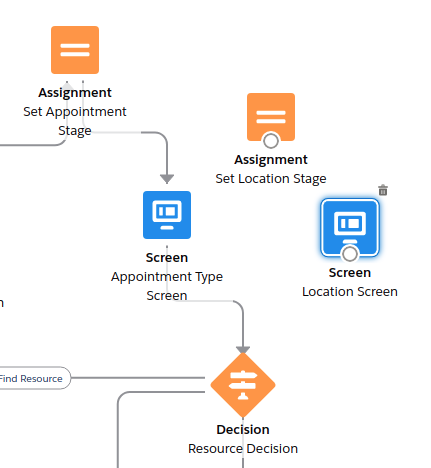
- Since now we have already chosen a territory, we do not need to show the location screen to the user. We can simply remove it from the flow. Just join the lines from the Appointment Type Screen node to the Resource Decision box (considering this is an outbound flow).

- Hit that Save and activate button and voila! You won’t see that location screen anymore!
Just to keep in mind:
- Salesforce scheduler is a Precision Scheduling Engine which checks calendars in real-time so say you have 1000 resources with the same skills, the engine has to parse through calendars (both internal & external) of resources to come up with time slots. So definitively test the performance of this setup.
- Since you will be setting only the service territory id, you will not see Address populated on Service Appointment. So if you need that, make sure you populate those values in the Assignment screen itself ( step number 3 above).
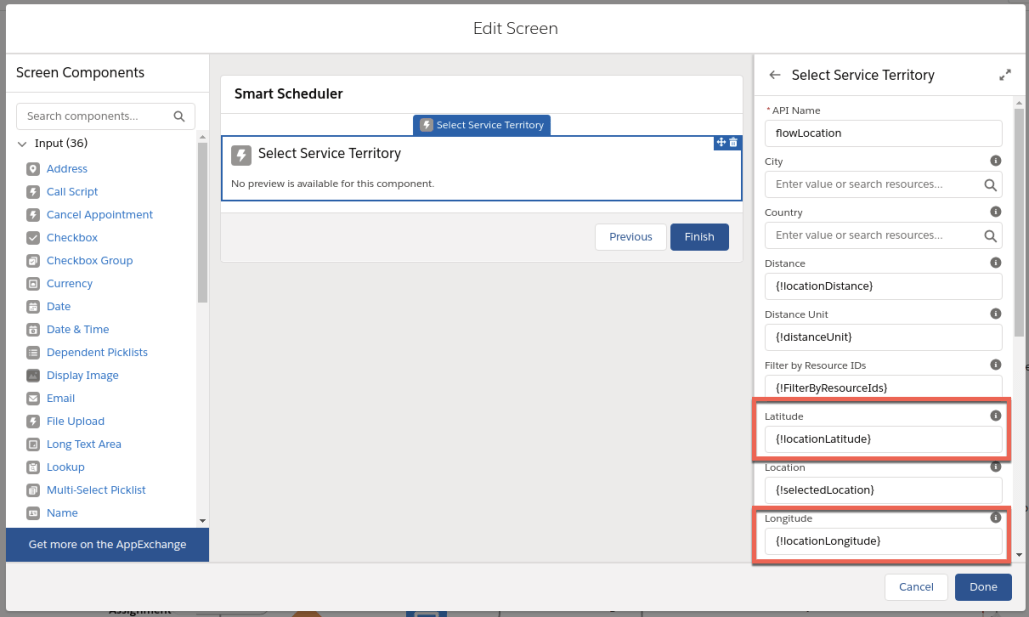
Auto-populate Location:
There are 2 design attributes on the location screen among others. Those are called Latitude and Longitude. These attributes take values set in the flow variables “locationLatitude” and “locationLongitude” respectively. These are geolocation attributes that get set when you select a location on that screen. Since these attributes are available for input in flow builder, we can set those values beforehand so that the location component will populate with a territory as soon as it loads.

Let us take an example of a territory location: Market Street Branch in San Francisco. Geolocation for this would be 37.793872°, -122.394865°. You can get this value if you google for geo-location a certain address or simply query one of the territories with that address [SELECT Latitude, Longitude FROM ServiceTerritory]. We can set these values in the design attributes which take lat lang as input.


Just save this and you will get all the locations selected from the default radius of the search.
Now, to make it more interesting, let us try auto-populating lat lang info from the user’s browser. We can make use of simple HTML Geolocation API. Since location is related to users’ privacy, this API will return the location once the user approves it.
Since the location screen is an OOB component, we will have to create a new component that will run this HTML Geolocation API. Also, this component will have to execute before the location screen is loaded so that as soon as the location screen loads, we will get location coordinates.
Here is a sample component which will give you output as gelocation is design attributes:
<aura:component implements="lightning:availableForFlowScreens" access="global" >

    <aura:attribute name="latitude" type="String" description="latitude of the browser location" />
    <aura:attribute name="longitude" type="String" description="longitude of the browser location" />

    <aura:handler name="init" value="{!this}" action="{!c.doInit}"/>
</aura:component>
its controller:
({
    doInit : function(component, event, helper) {
        navigator.geolocation.getCurrentPosition(function(position){
            var geolocation = {
                lat: position.coords.latitude,
                lng: position.coords.longitude
            };
            component.set("v.latitude", geolocation.lat);
            component.set("v.longitude", geolocation.lng);
        })
    }
})
and design file:
<design:component>
    <design:attribute name="latitude" label="Latitude" />
    <design:attribute name="longitude" label="Longitude" />
</design:component>
Once the component is created, we can add that to any screen before the location screen. Since we are using OOB flow, let’s configure it at the Appointment Type Screen.


That’s it! Activate and run the flow. Once you land on the Select Appointment Type screen, our geolocation component will ask users’ consent to share the location. If the user approves the consent, then you will see service territory getting searched according to the users’ location. If there are no territories available in that geolocation, the user will get a standard message as: No results for that Work Type Group found in that service territory. Try a different address, or expand your search area. Users can then search specific locations from the search bar available on the screen.

All the above code is bundled at https://github.com/snathpatil/smartlocation. It contains the above component and a flow which makes use of it.
Do checkout how you can add a Google maps interface to the location screen in this blog: https://unofficialsf.com/google-maps-in-scheduler/