From Pratyush Kumar : Orchestrate Appointment Experience based on Language selected
Introduction :
This blog suggests a way that allows appointment booking with service resources who have support for a set of languages. Thus, we will be adding language support to our existing Appointment Booking flows.
Problem Statement:
Let’s say we have a Service Resource who can speak only a certain set of languages, say Hindi and English and another who can speak in only Chinese. Even though each of the resources have all the relevant skills for attending a Work Type, he/she will not be able to drive the appointment since they cannot speak a certain language.
By introducing language support we will try to eliminate this problem.
Solution Approach:
- We manage a multi-select pick-list custom field on the Service Resource Object which will store the list of languages the resources can support
- Add a selection to the flow that will display the languages – so that requestor can opt for languages he/she prefers to get the service in
- After selection of languages in flow, the FilterByResourceIds is populated by intersection of ( getAppointmentCandidates API call and SOSL to fetch resources supporting the list of languages)
- List the available service resources by filtering out those who know a specific language by leveraging “filterByResources”
Setup Steps:
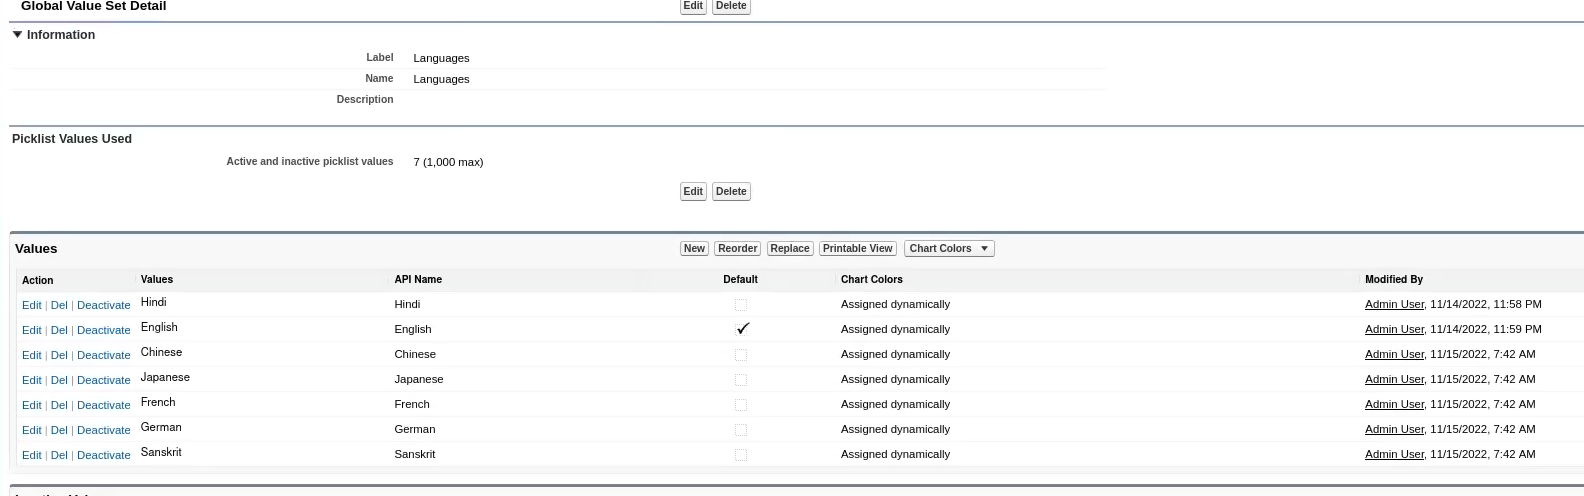
Create a Global Value Set
Create a new Global Value Set , with a defined set of language values.
Add a Multi-Select Picklist Field on Service Resource
Add a multi-select picklist field on Service Resource which takes values from the earlier defined global value set.

Create an Apex Class
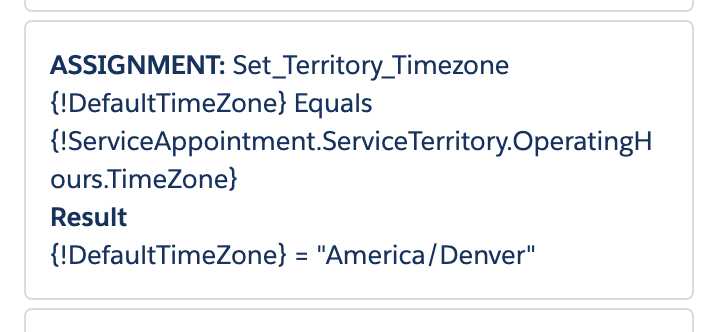
Add following code to create an Apex Class ( Note that this class method will be used to set the FilterByResourceIds parameter):
There are two ways in which we can create this action.:
- When there are many STM records for the selected ServiceTerritory, an extra API call can be used to reduce the scope of our query.
public class MultiLanguage {
@InvocableMethod(label=’Get Service Resource Ids’)
public static List<String> getServiceResourceIds(List<Input> inputs){
lxscheduler.GetAppointmentCandidatesInput input = new lxscheduler.GetAppointmentCandidatesInputBuilder()
.setWorkTypeGroupId(inputs.get(0).workTypeGroupId)
.setTerritoryIds(new List<String>{
inputs.get(0).serviceTerritoryId
})
.setStartTime(System.now().format(‘yyyy-MM-dd\’T\’HH:mm:ssZ’))
.setEndTime(System.now().addDays(14).format(‘yyyy-MM-dd\’T\’HH:mm:ssZ’))
.setAccountId(inputs.get(0).accountId)
.build();
String vString = lxscheduler.SchedulerResources.getAppointmentCandidates(input);
List<Object> list1 = (List<Object>)Json.deserializeUntyped(vString);
Set<String> test1 = new Set<String>();
for(Object obj:list1){
Map<String,Object> map1 = (Map<String,Object>)obj;
List<Object> test2 = (List<Object>)map1.get(‘resources’);
for(Object s:test2){
test1.add((String)s);
}
}
System.debug(‘[RETURNED_RESULT]’ + test1);
String languages = inputs.get(0).languagesSelected;
List<String>languagesList = languages.split(‘;’);
languages = ‘(\” + String.join(languagesList, ‘\’,\”) + ‘\’)’;
List<ServiceResource> resources = DataBase.query(‘select id from ServiceResource where Languages__c includes ‘ + languages + ‘and id in :test1 and IsActive = true’);
List<String> list2 = new List<String>();
for(ServiceResource r:resources){
list2.add(r.id);
}
return new List<String>{String.join(list2, ‘,’)};
}
public class Input{
@InvocableVariable
public String serviceTerritoryId;
@InvocableVariable
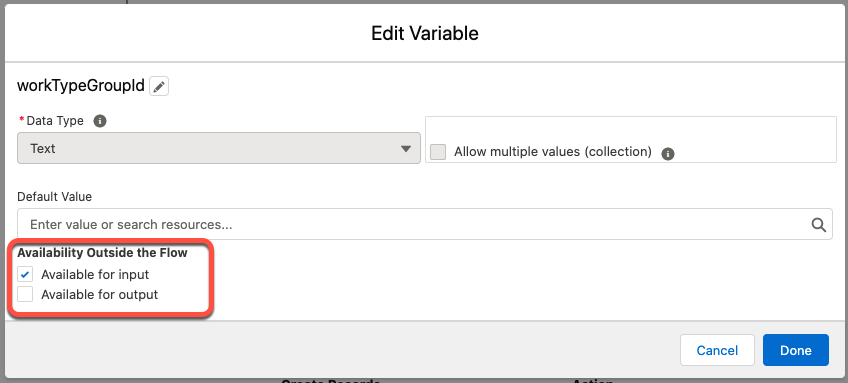
public String workTypeGroupId;
@InvocableVariable
public String accountId;
@InvocableVariable
public String languagesSelected;
}
}
- In cases when the count of STM is not that large we can directly query without an extra API call.
public class MultiLanguage2 {
@InvocableMethod(label=’Get Service Resource Ids2′)
public static List<String> getServiceResourceIds(List<Input> inputs){
String languages = inputs.get(0).languagesSelected;
List<String>languagesList = languages.split(‘;’);
languages = ‘(\” + String.join(languagesList, ‘\’,\”) + ‘\’)’;
String serviceTerritoryId = inputs.get(0).serviceTerritoryId;
List<ServiceTerritoryMember> resources = DataBase.query(‘select ServiceResource.Id from ServiceTerritoryMember where ServiceResource.Languages__c includes’ + languages + ‘and ServiceResource.IsActive = true and ServiceTerritory.Id =:serviceTerritoryId’);
List<String> list2 = new List<String>();
for(ServiceTerritoryMember r:resources){
list2.add(r.ServiceResource.Id);
}
return new List<String>{String.join(list2, ‘,’)};
}
public class Input{
@InvocableVariable
public String serviceTerritoryId;
@InvocableVariable
public String workTypeGroupId;
@InvocableVariable
public String accountId;
@InvocableVariable
public String languagesSelected;
}
}
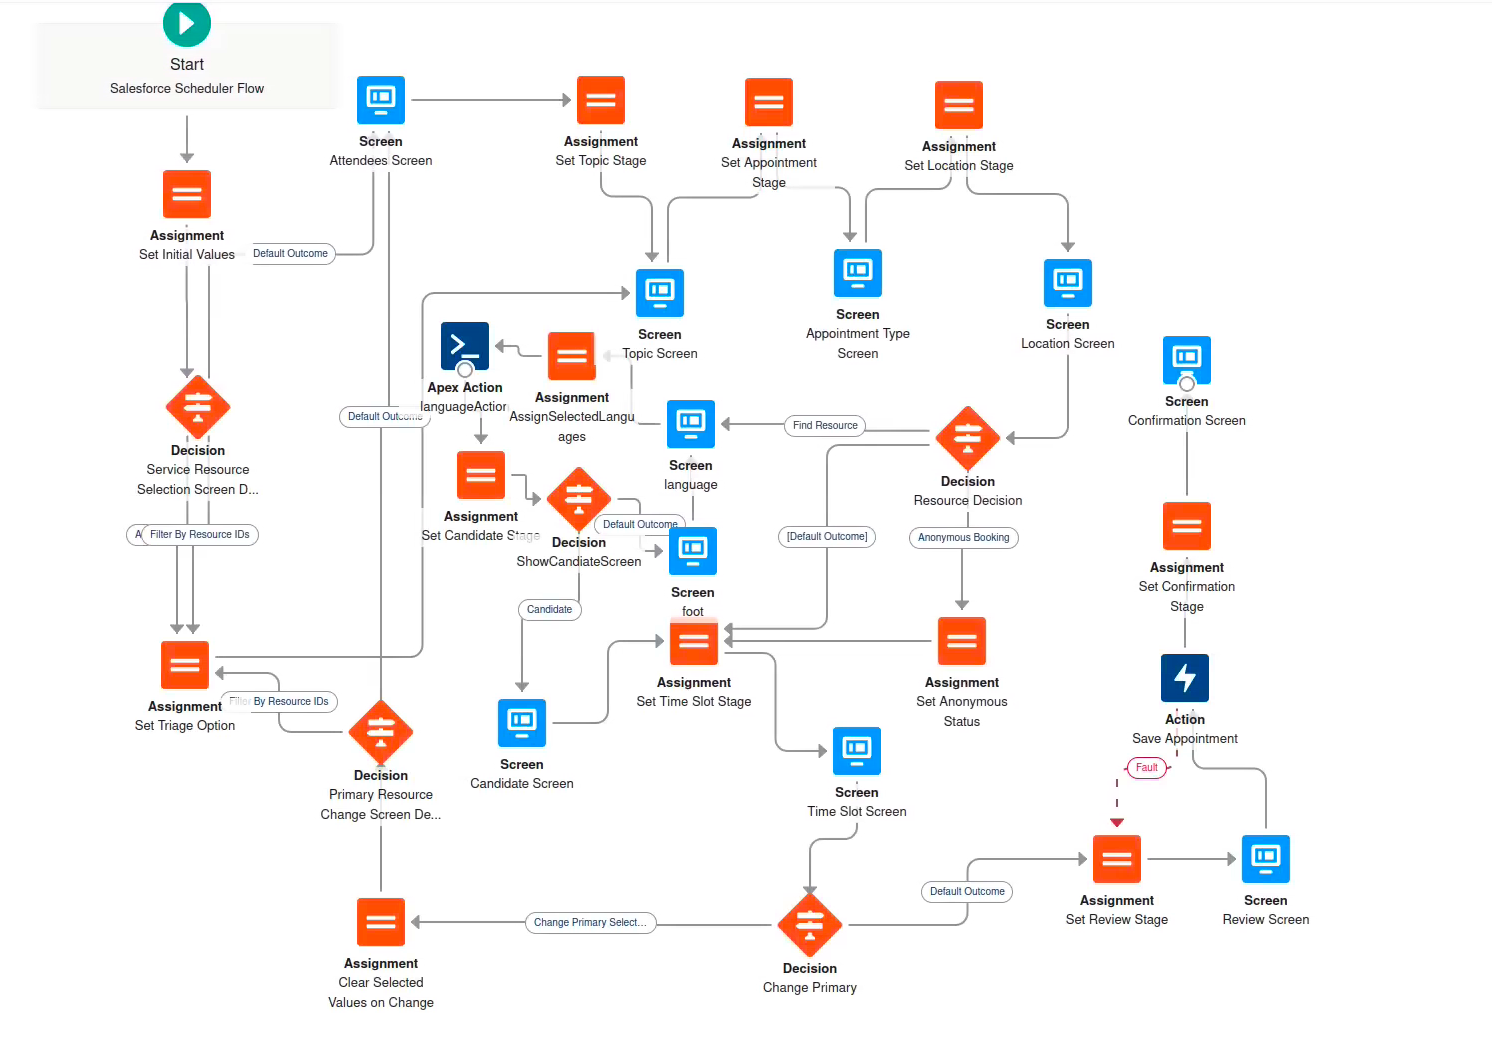
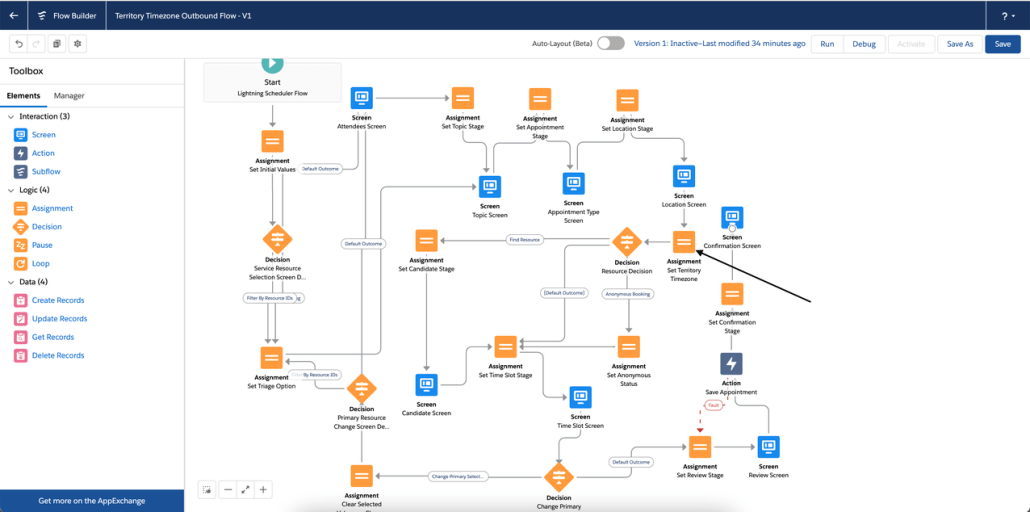
Flow:
- Clone the existing Outbound New Appointment Flow.
- Add following Elements:
- Variable : selectedLanguages of type Text.
- Screen : Language Screen ( This screen will show the picklist values of Global Value Set to choose from set of languages )
- Add a Multi-Select Picklist Component to the Screen
- Under the Choice setup, add a New Choice Resource with theses values
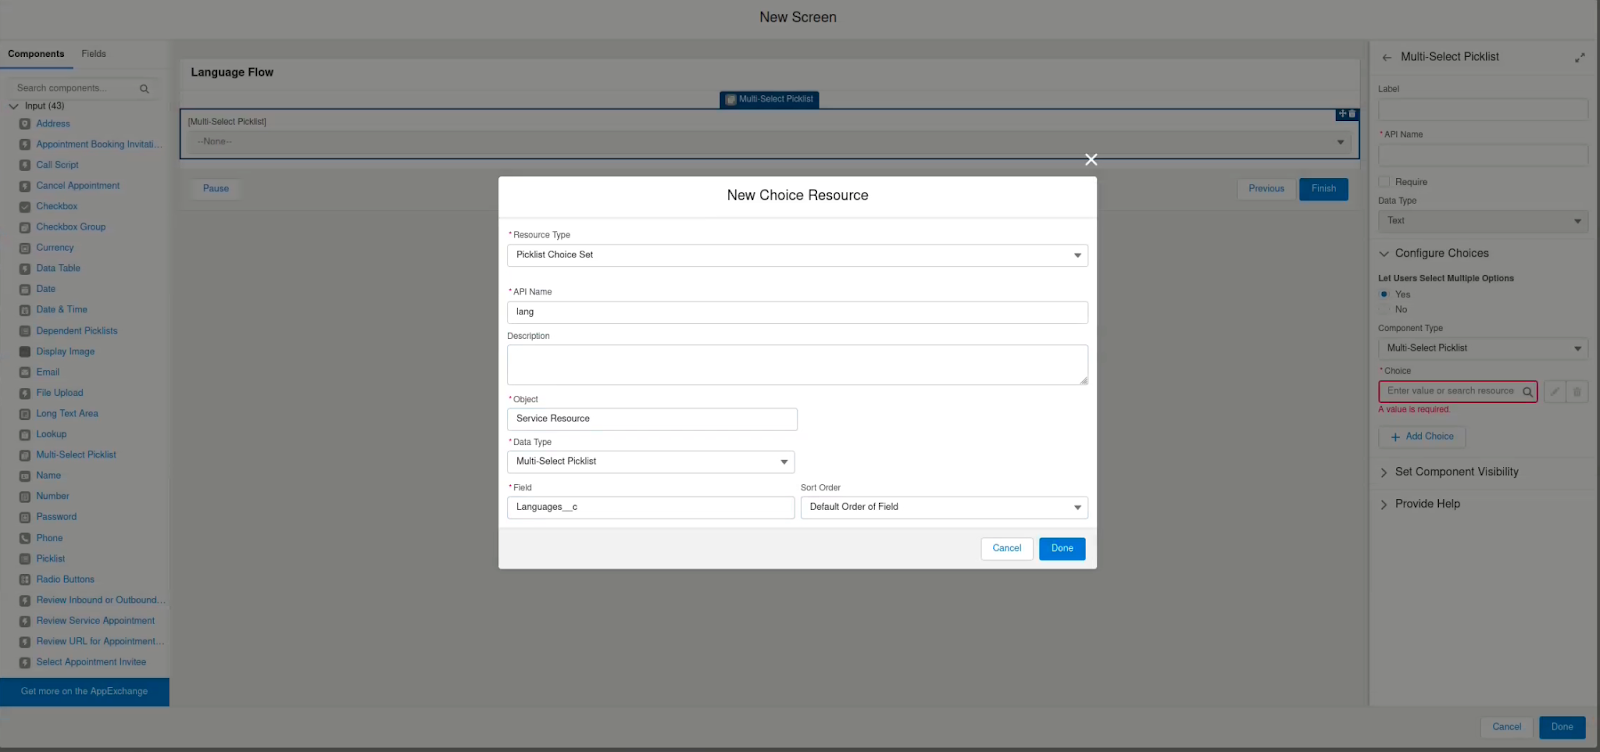
- Add Label and API Names to this screen

- Assignment( Assign Selected Languages):

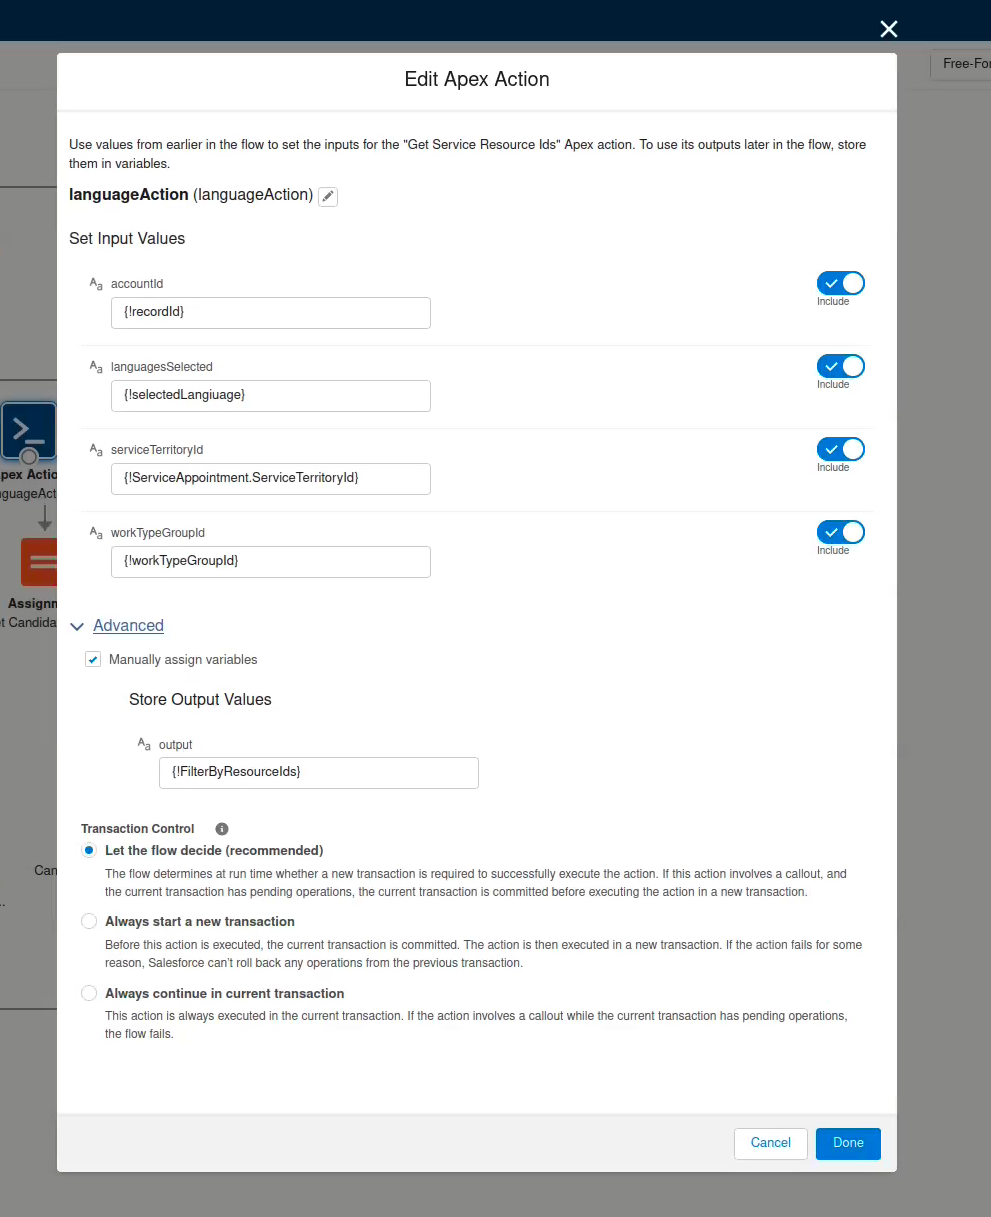
- Apex Action ( languageAction )
- Choose Uncategorized under Filter By Category
- Add the apex action which was created earlier i.e “Get Service Resource Ids”
- Decision : (ShowCandidateScreen)
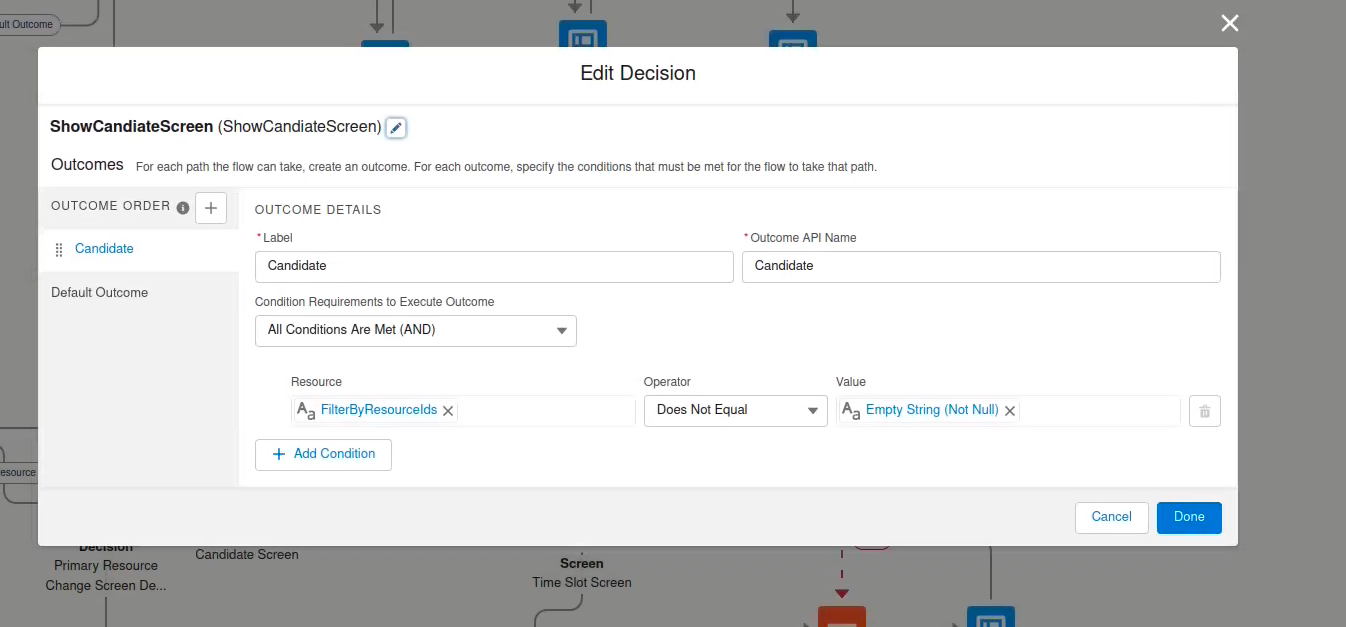
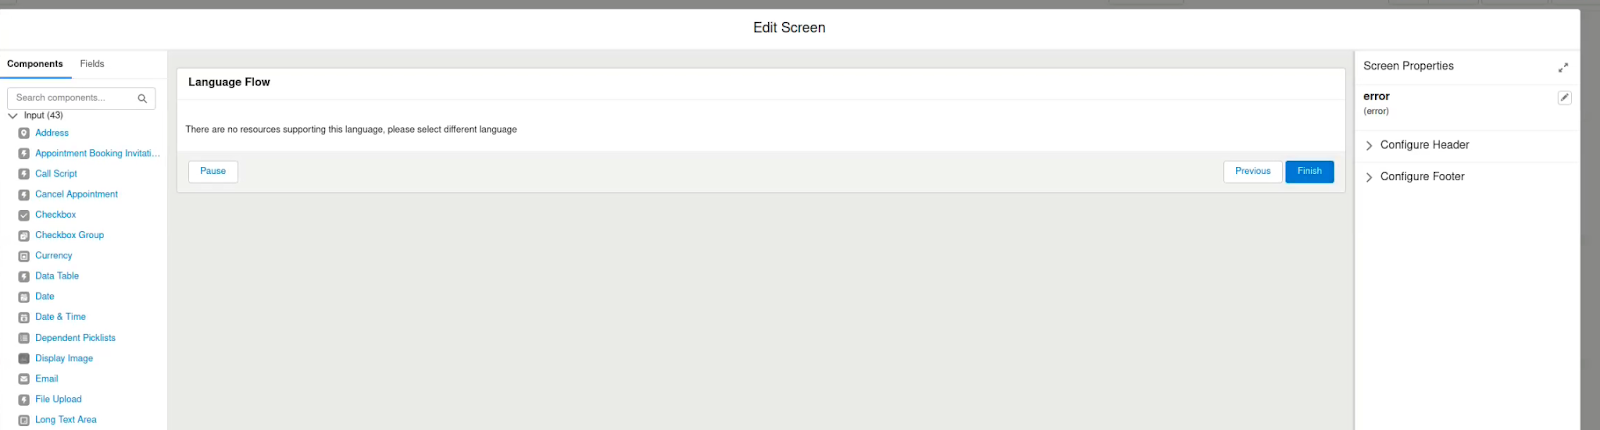
- Screen(Error) : This will show error if there exists no resource which supports the languages selected.
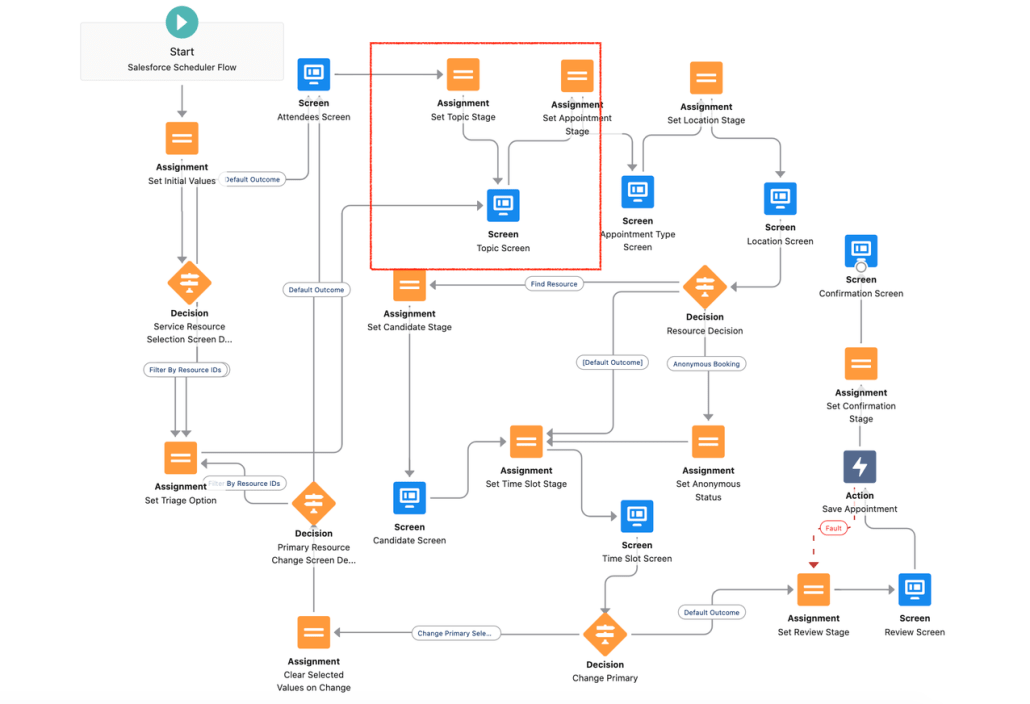
- Order the flow as suggested in the image below