
FROM KAZUTAKA TSUJI: USE CUSTOM APPOINTMENT REVIEW SCREEN LWC FOR SALESFORCE SCHEDULER
Introduction
The OOTB Flow available in Salesforce Scheduler makes it easy and fast to manage reservations/appointments on Salesforce. However, there are several things that cannot be achieved with the standard functionality.
This article introduces a LWC to solve the things that cannot be done with the standard functions in the Review Inbound or Outbound Service Appointment component (it is used in the appointment review screen, see the Salesforce help) that can be used in the Salesforce Scheduler Flow.
What the standard OOTB Flow cannot archive:
- In the Scheduler OOTB Flow, when allowing end-users to enter data for custom fields on Service Appointment object, which are not displayed as populated values on the Review Inbound or Outbound Service Appointment component (e.g., custom reference field for Asset).
- Service Appointment layout is synchronized with the fields displayed in the [Review Inbound or Outbound Service Appointment] component, so if you delete the above custom fields from the layout, it will also be deleted from the record layout (if the custom field is important for your appointment, you will not be able to understand what the appointment is for).
- In order to save custom field values in the Service Appointment record entered during the Scheduler Flow, a JSON variable must be created in the Flow with using a formula (see this Chris’s article in What if I wanted to set the values for the serviceAppointmentFields variable myself? section)
- Certain fields cannot be removed from the [Review Inbound or Outbound Service Appointment] component (e.g. Work Type, Parent record, Address)
Therefore, if you want to utilize the OOTB Flow, but do not want to develop all appointment screens and have issues with the standard appointment review screen, the LWC presented here may work for you.
Configuration
- Install the unmanaged package from this URL.
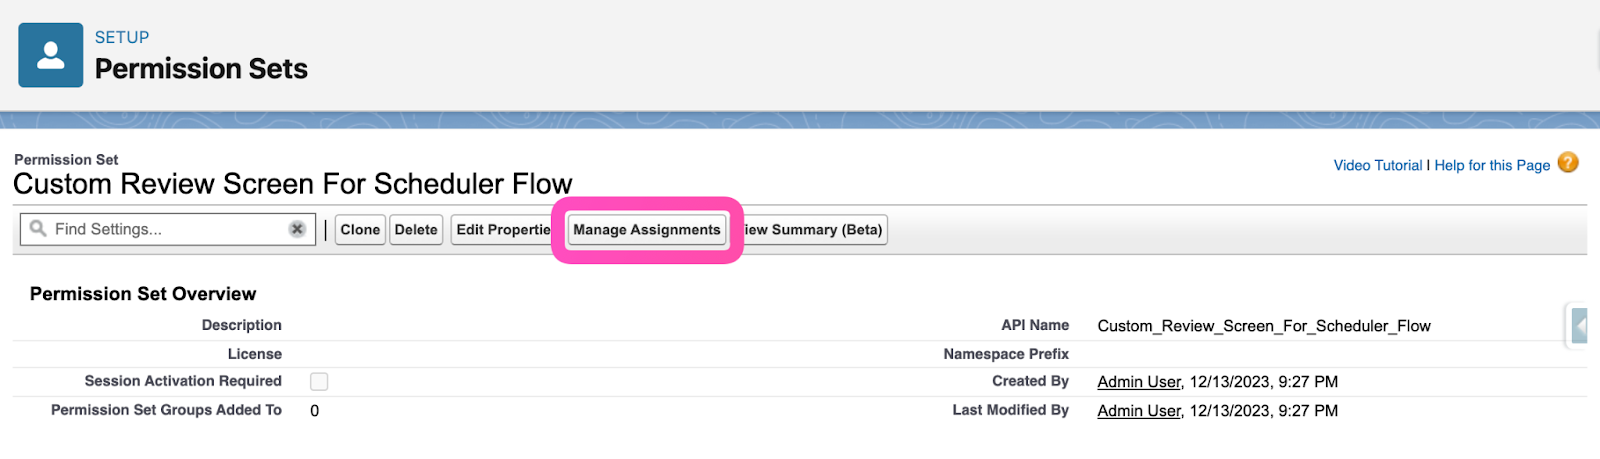
- After installing the package, assign the Permission Set to the Flow execution user.
Note: This Permission Set gives only Apex Class access that is used by LWC, there is no problem with granting Apex Class (FieldLabelController) access directly to the target user profile.
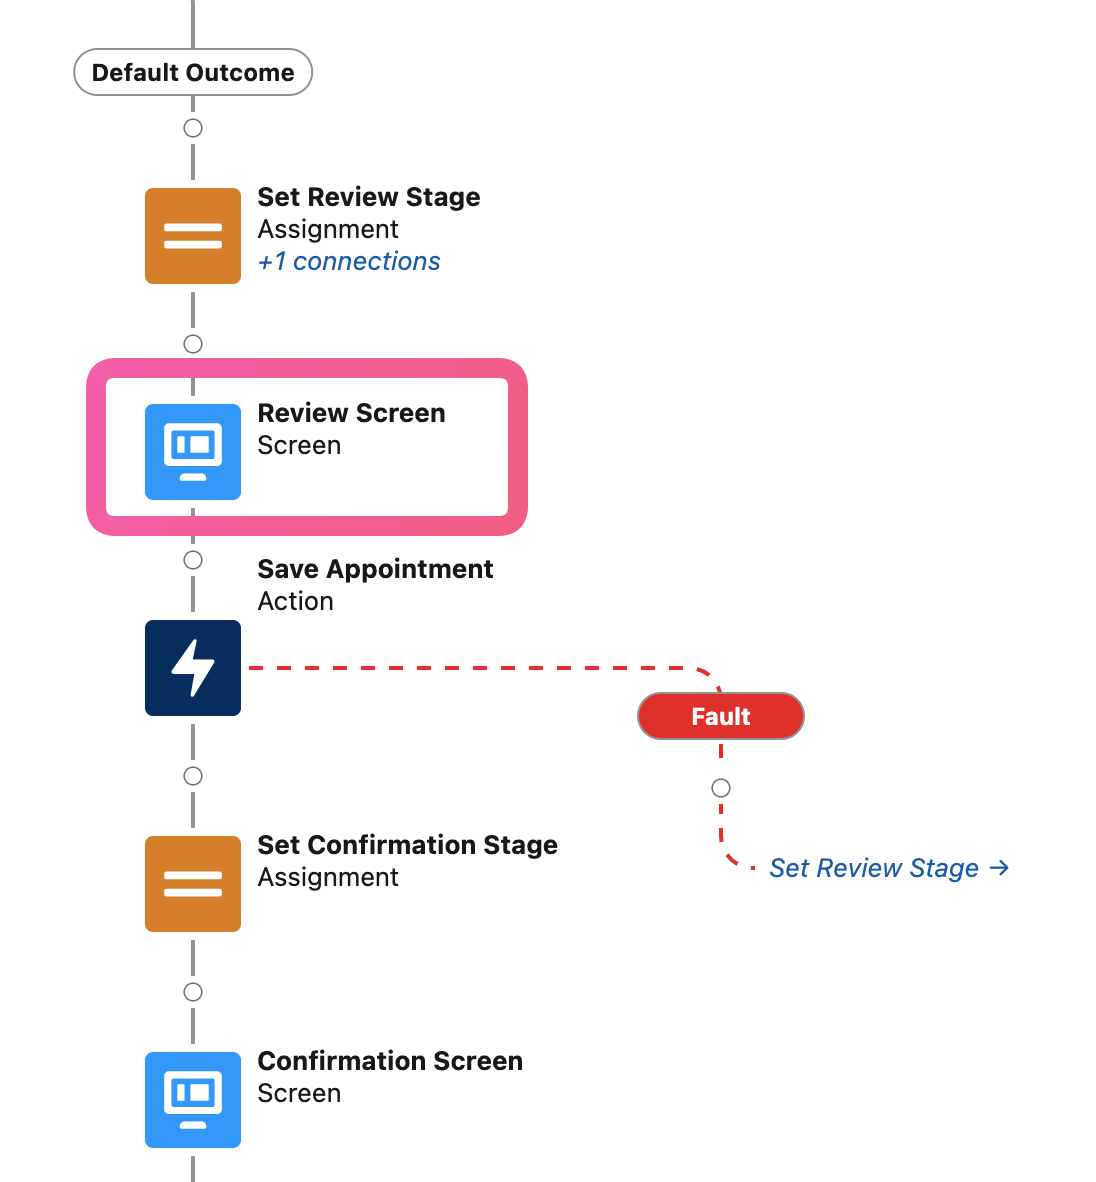
- Click on the Review Screen element of the Scheduler Flow you want to use.
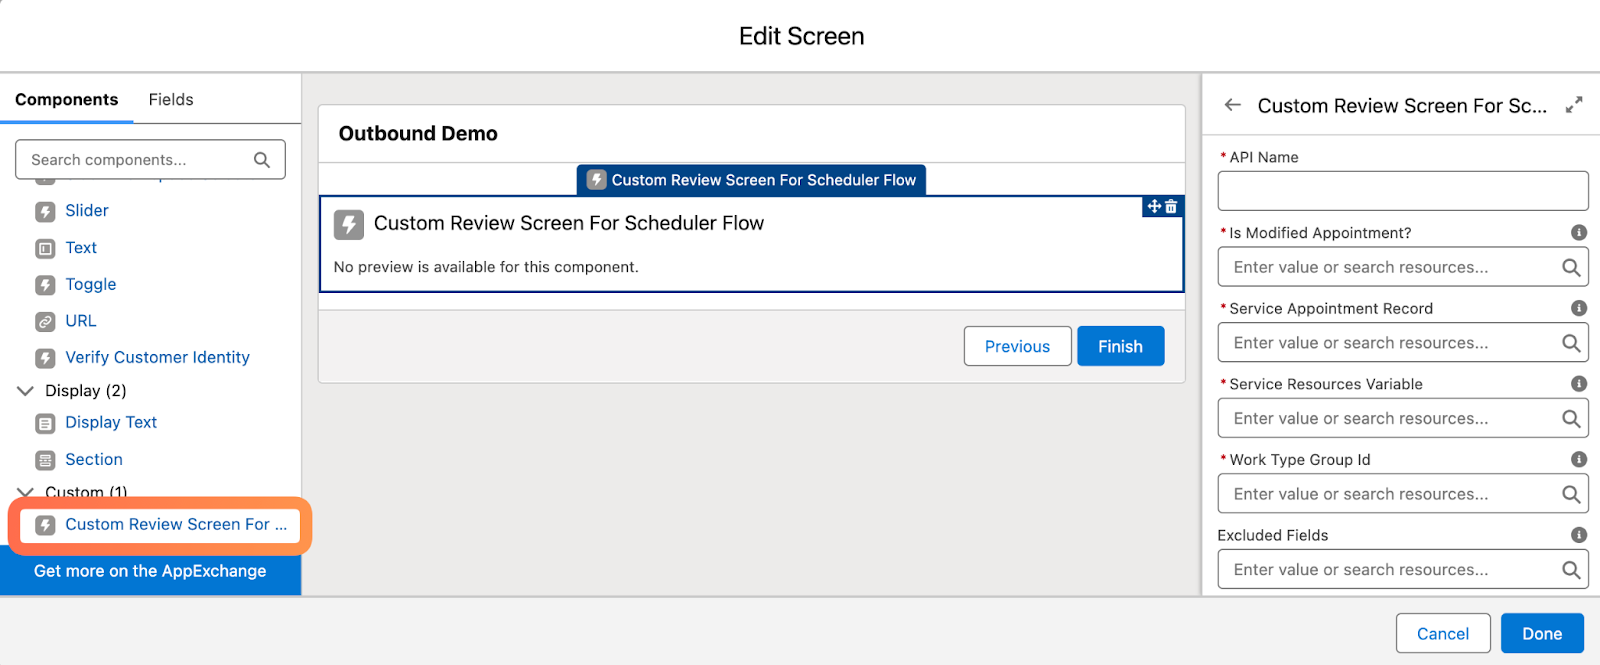
- Replace standard [Review Inbound or Outbound Service Appointment] component to Custom Review Screen For Scheduler Flow from the Custom section as shown below.
- There are 8 parameters to configure:
- Is Modified Appointment? (Required)
Set to False for new appointments. Set to True for modified appointments.
- Service Appointment Record (Required)
Set the record variable ServiceAppointment.
- Service Resources Variable (Required)
For anonymous booking: set serviceResourceId text variable.
For multi-resource booking: set serviceResources text variable.
- Work Type Group Id (Required)
Set WorkTypeGroupId text variable.
- Excluded Fields
Specify field API names that you do not want to display on the appointment review screen, separated by comma.
Example: Comments,AdditionalInformation,IsAnonymousBooking,EngagementChannelTypeId
- Lead Record
Required for guest user booking. Set the Lead Record variable.
- Show Map
Specify whether to show Google Map for the appointment address. Default is False.
- Show Service Resources
Whether or not to show service resource information on the review screen. Default is False.
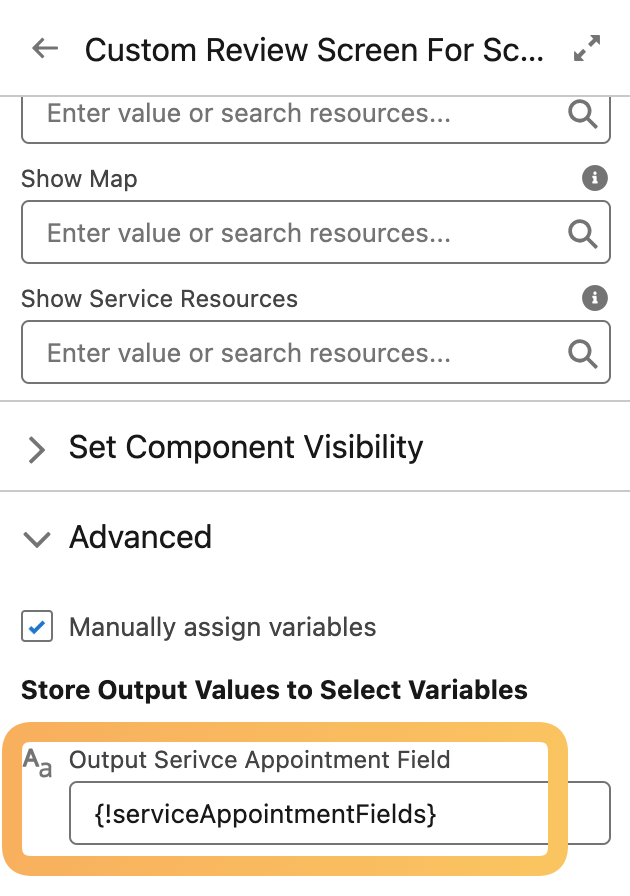
- As per Chris’ article (From Chris Albanese: Build your own appointment review screen), a JSON variable must be set on the “Save Appointment” element in order to create/modify a Service Appointment record, Set serviceAppointmentFields variable to the output.
That’s it for the setup!
What does this LWC look like?
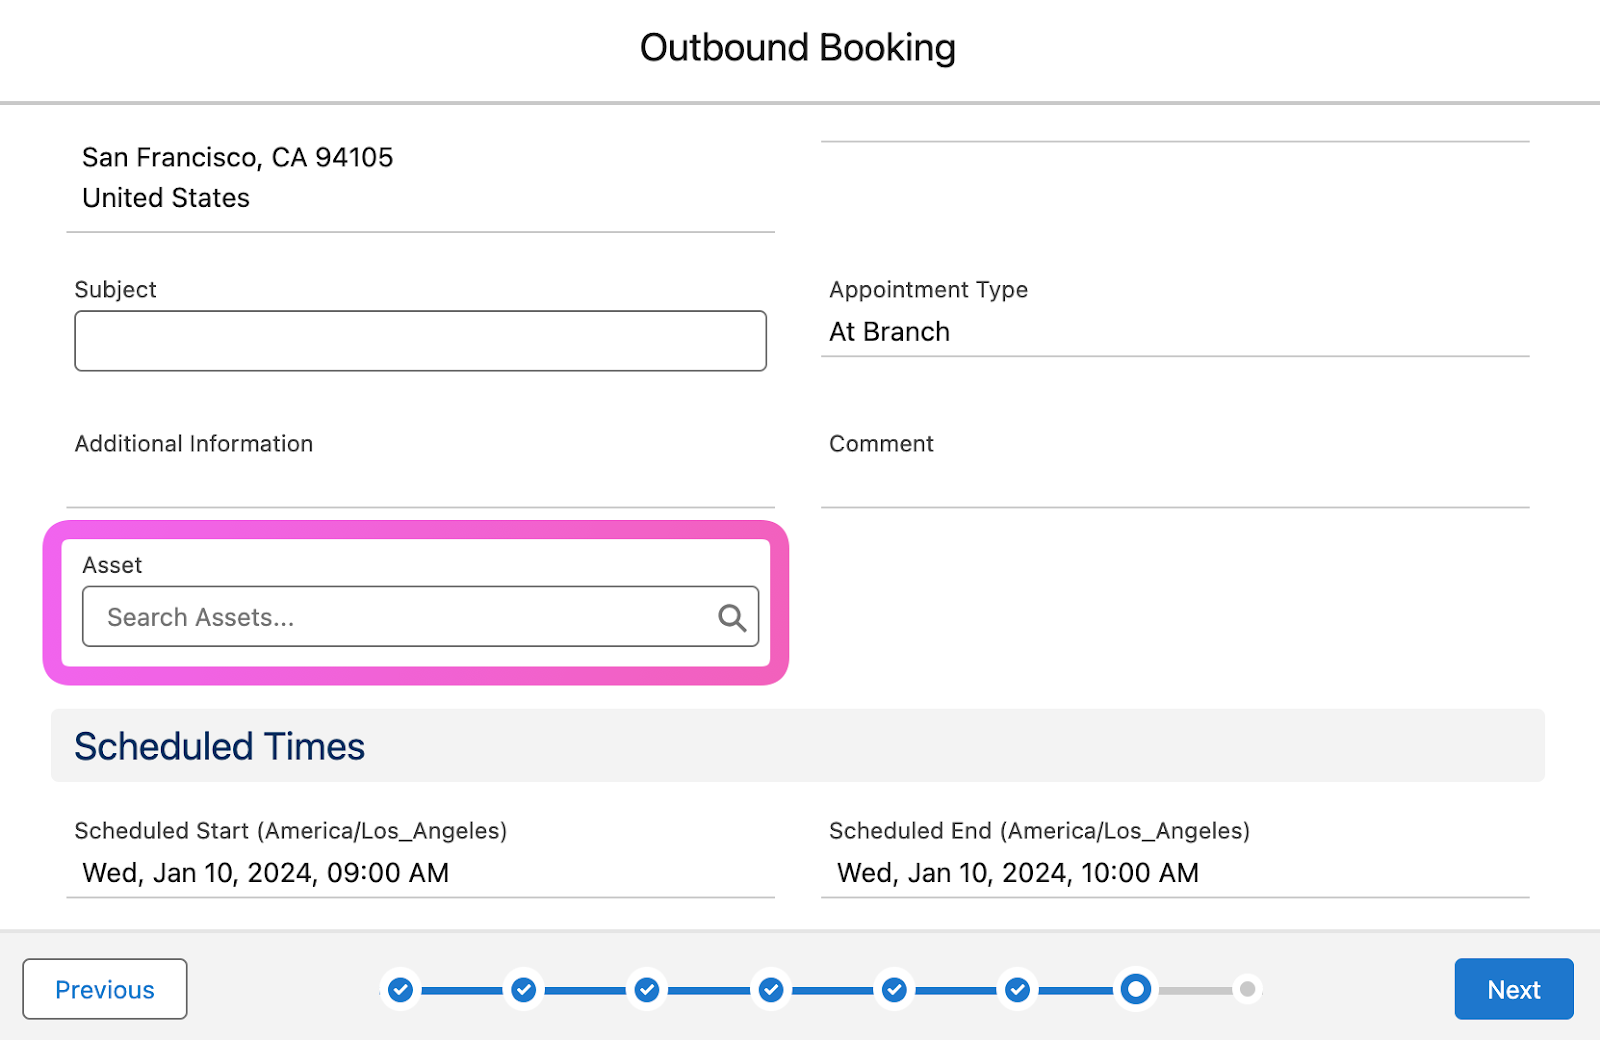
As shown below, it is possible to display only the fields you really want to display, or to set up an appointment review screen with the populated values for the custom fields in the Service Appointment object.
Needless to say, this will not be synchronized with the Service Appointment layout.
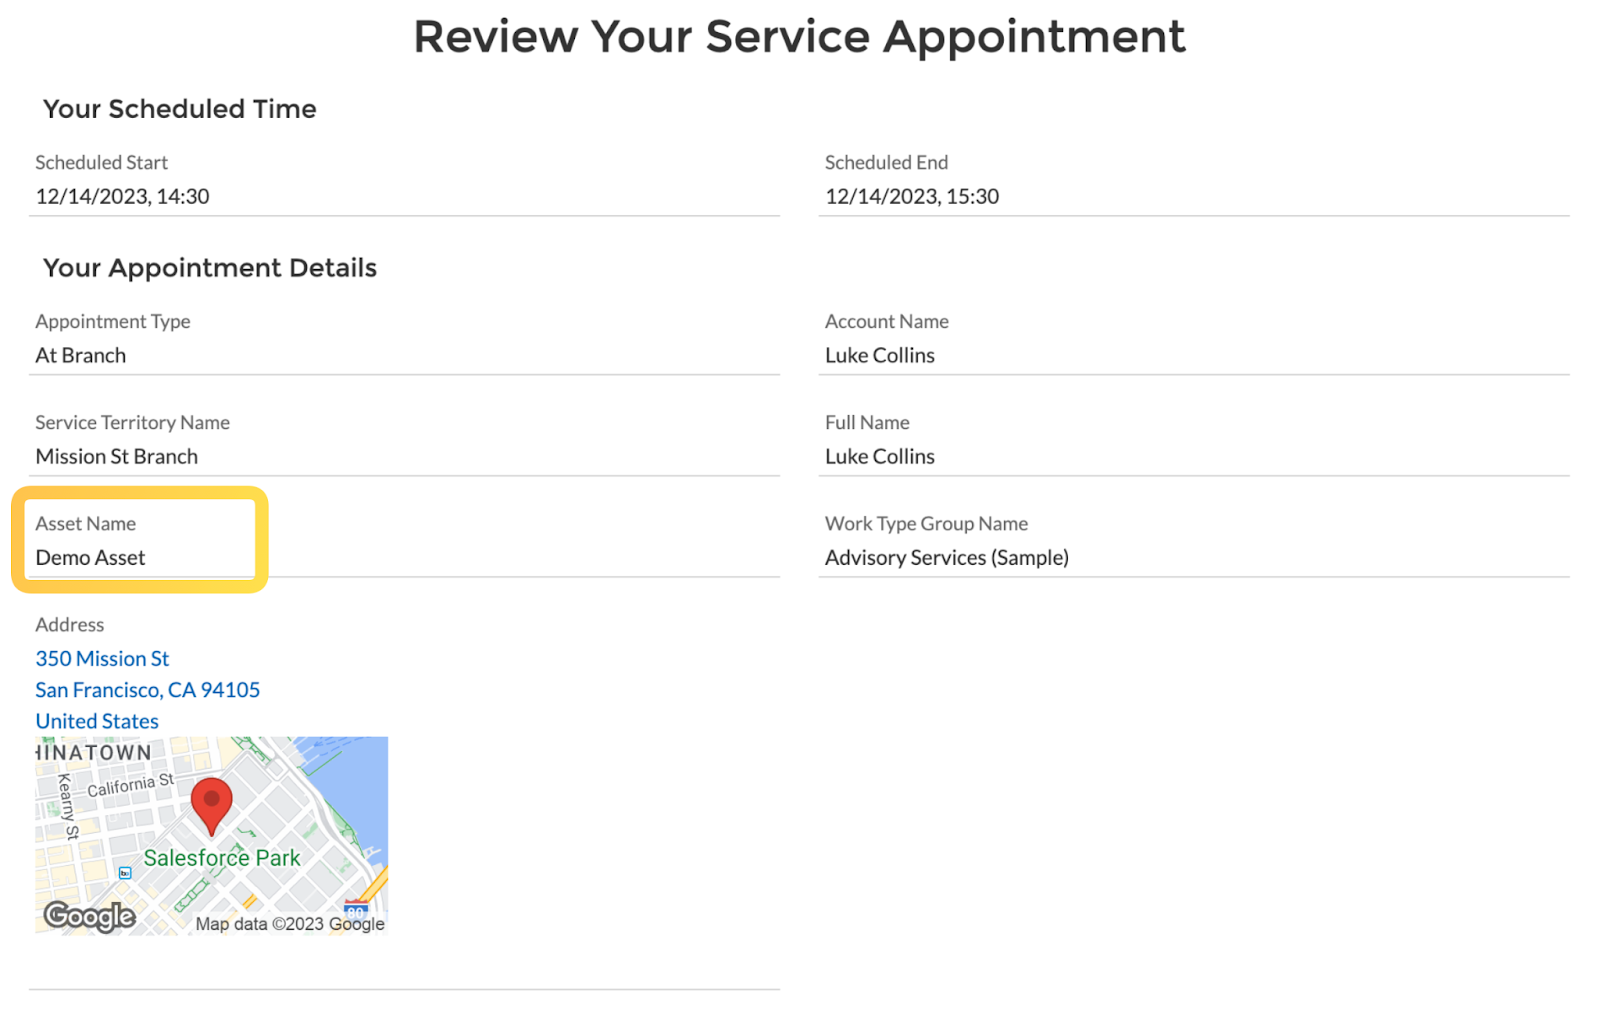
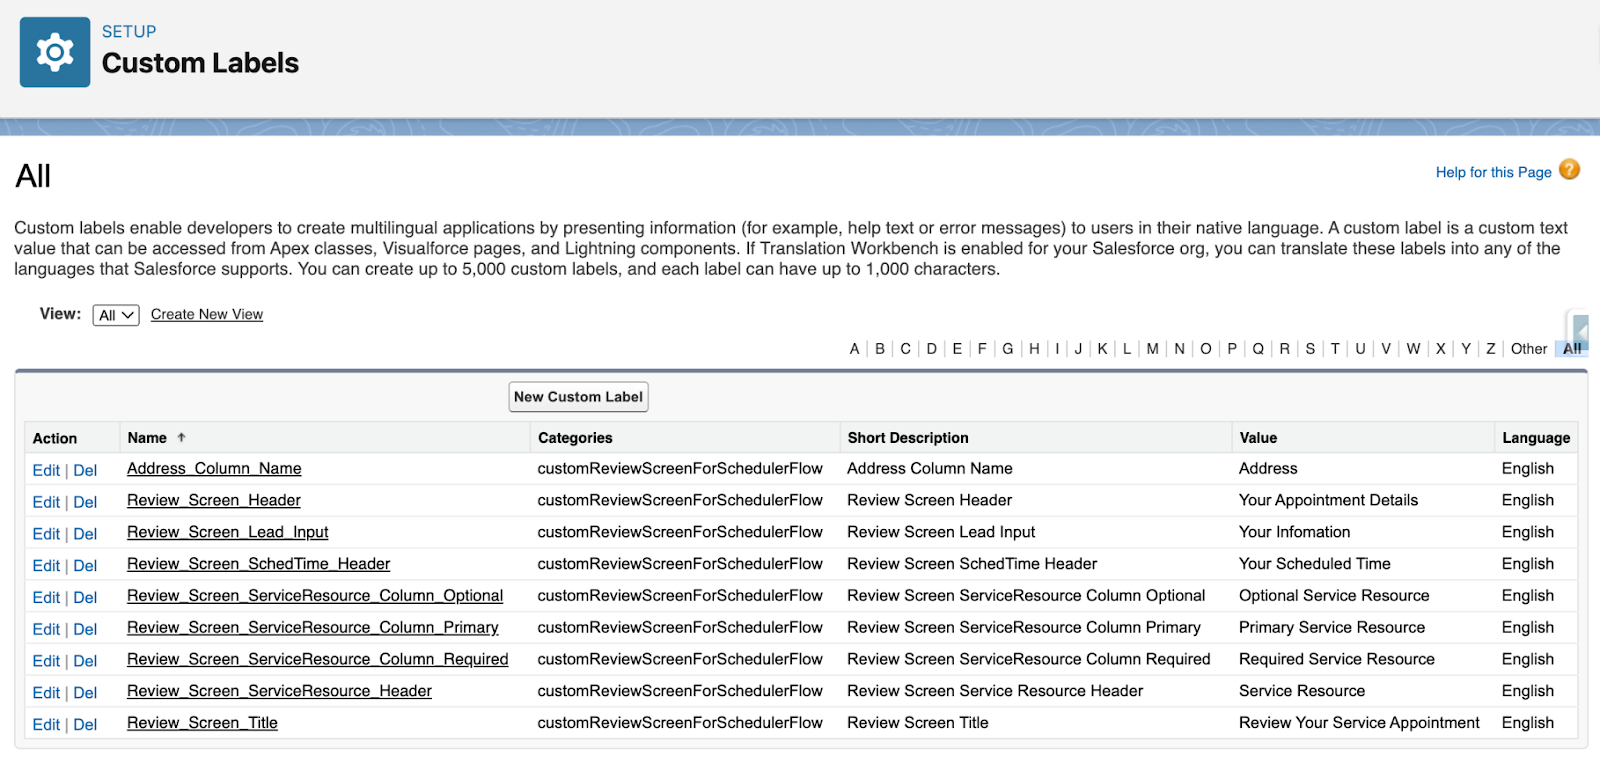
In addition, since Custom Labels are used for header items in LWC, they can be freely changed, and translations can be added.
P.S.
- This LWC does not have a feature of sorting fields. Although It can be added as a parameter to sort by API name in ascending or descending order, I want to make this LWC simple, so I decided not to consider it at this time.
- This LWC is an unmanaged package and is treated as open source. Any bugs and pull requests can be sent to this GitHub repository, and you are free to Fork and modify it as you wish.
日本語
Salesforce Schedulerにて、予約確認画面のLWCを使用する
初めに
Salesforce Schedulerで使用できるOOTBフローを使えば、予約管理を簡単・迅速にSalesforce上で行うことができる。しかし、標準機能で実現できないこともいくつかある。
こちらの記事では、Salesforce Schedulerフローで使用できる[受信または送信サービス予定をレビュー]コンポーネント(予約確認画面)で標準機能では出来ないことを解決するために開発したLWCを紹介する。
標準OOTBフローでできないこと
- Scheduler OOTBフローで、サービス予定のカスタム項目に対してエンドユーザにデータ入力させる場合に、サービス予定のカスタム項目が[受信または送信サービス予定をレビュー]コンポーネントにデータが入力された状態で表示されない(例: 納入商品のカスタム参照項目など)
- サービス予定のレイアウトと[受信または送信サービス予定をレビュー]コンポーネントに表示される項目は同期されているため、上記カスタム項目をレイアウトから消した場合、レコードのレイアウトからも削除されてしまう(カスタム項目が重要な場合、何に対する予約なのかわからなくなってしまう)
- 予約完了時に入力されたサービス予定のカスタム項目をサービス予定レコードに保存するためには、別途フロー内で数式でJSON変数を作成する必要がある (Chrisのこちらの記事のWhat if I wanted to set the values for the serviceAppointmentFields variable myself?を参照)
- 特定のフィールドは[受信または送信サービス予定をレビュー]コンポーネントから削除することができない(例: 作業種別、親レコード、住所)
よって、OOTBフローを最大限活用したいが、全ての予約画面を開発したくなく、標準の予約確認画面に課題がある場合、今回紹介するLWCは効果を発揮するかもしれない。
設定
- こちらのURLから非管理パッケージをインストールする。
- パッケージインストール後、権限セットをフロー実行ユーザへ割り当てる
- ※LWCで使用するApexクラスのアクセスのみなので、FieldLabelController のApexアクセスを対象ユーザに直接付与しても問題ない。
- 使用したいSchedulerフローのReview Screen要素をクリックする
- 下記のように、Customセクションから、Custom Review Screen For Scheduler Flow を設置する。標準の[受信または送信サービス予定をレビュー]コンポーネントは削除する。
設定パラメータは下記の8つ:
- Is Modified Appointment? (Required)
- 新規予約の場合、Falseを設定する。予約変更の場合はTrueを設定する
- Service Appointment Record (Required)
- レコード変数の ServiceAppointment を設定する
- Service Resources Variable (Required)
- 匿名予約の場合: serviceResourceId テキスト変数を設定する
- マルチリソース予約の場合: serviceResources テキスト変数を設定する
- Work Type Group Id (Required)
- WorkTypeGroupId テキスト変数を設定する
- Excluded Fields
- 予約確認画面に表示したくない項目のAPI名をカンマ区切りで指定する
例: Comments,AdditionalInformation,IsAnonymousBooking,EngagementChannelTypeId
- 予約確認画面に表示したくない項目のAPI名をカンマ区切りで指定する
- Lead Record
- ゲストユーザ予約の場合に設定必須. Lead レコード変数を設定する
- Show Map
- 予約住所に対してGoogle Mapを表示するかどうか。True / False を指定する。デフォルトはFalse.
- Show Service Resources
- サービスリソース情報を予約確認画面に表示するかどうか。True / False を指定する。デフォルトはFalse.
- Chrisの記事 (From Chris Albanese: Build your own appointment review screen) にあるように、Save Appointment要素にはサービス予定を作成するためのJSONを設定しなければいけないので、serviceAppointmentFields 変数をアウトプットに設定する。
以上で設定は終了です。
動作
下記のように、表示したい項目だけを表示したり、サービス予定のカスタム項目が値がセットされた状態で予約確認画面を設定することが可能になる。もちろん、サービス予定のレイアウトとは同期されない。
また、ヘッダー部分の項目などはカスタム表示ラベルを使用しているため、自由に変更が可能かつ、多言語対応も可能。
補足情報
- こちらのLWCでは、項目の並び替えが出来ない。もちろん、API名での昇順・降順などの並び替えは設定に追加することは可能だったのだが、今回は考慮していない。
- 紹介したLWCは非管理パッケージのため、オープンソースの扱いとなる。BugやPull RequestはこちらのGitHubレポジトリまで。Forkしてご自由に変更していただいて構いません 🙂
