Omni Channel Pilot: Interruptible Capacity

The Omni team is a month or so into a very interesting Pilot just now, moving to allow admins to define two capacities for Agents instead of just one. I thought I’d write a short blog post to share what we’re learning from customers, and also a bit about what the feature is an how to try it.

As with any Pilot, reach out to your Account Executive if you want to take part! 😉

What’s the problem we’re solving?

One of the more unique/interesting parts of Omni that makes it different from standalone Contact Center systems is that we route both Work (Cases/Incidents/Leads) as well as Communication Channels (Voice Calls, Chats, Messaging Sessions, Video calls etc.).

That introduces several interesting challenges, for example:

Cases blocking Channels
Customers who want to route Phone/Chats to Agents at the same time as Cases might find it tough. The problem is that Agents might be working on a Case for hours or days, but the Call or Chat for minutes, thus the case blocks the Call.

P1 items sat in the queue
When a Priority 1 case comes in, it can go straight to the top of the queue, but if all agents are busy on long-running work then it might still not get delivered right away.

….and more

So what’s the feature we’ve built to solve it?

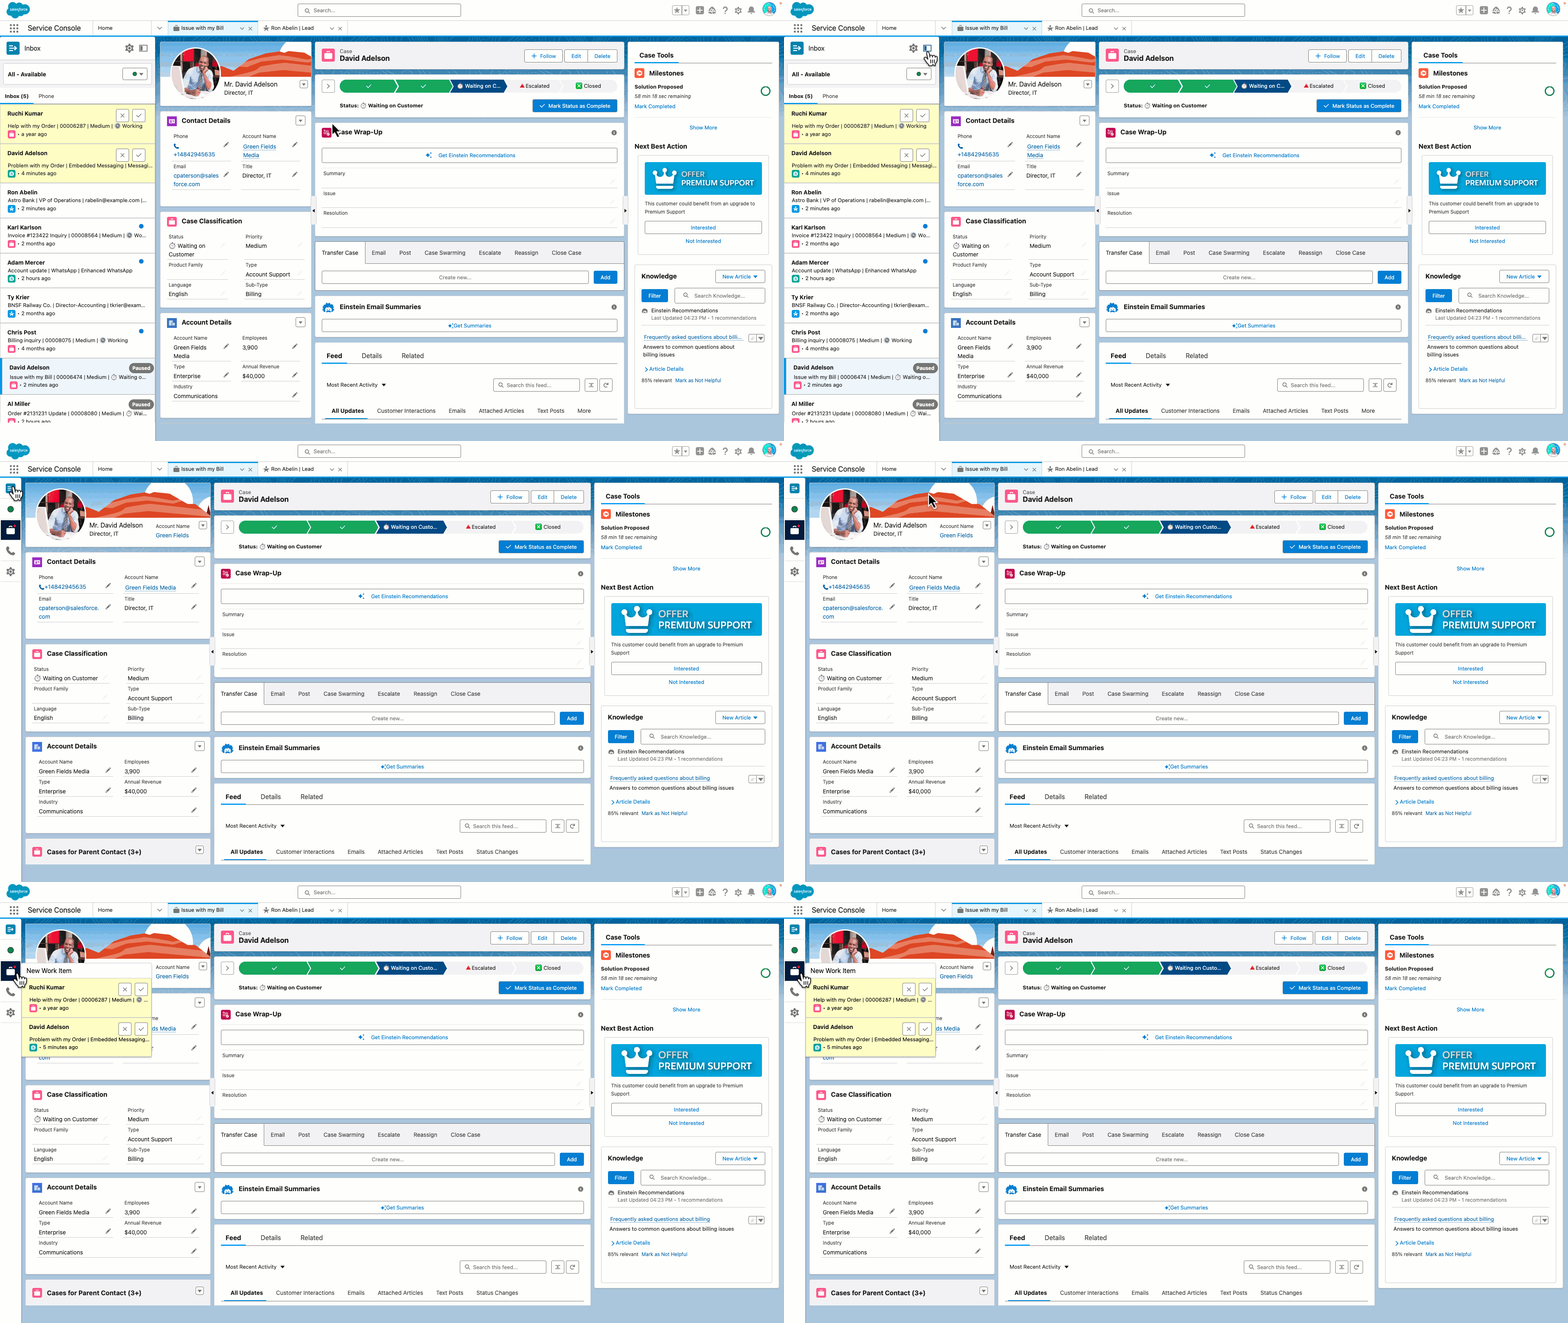
In the Spring release we introduced Interruptible Capacity, where Agents now can have two capacities on their Presence Configuration instead of the traditional one. A Primary, and an Interruptible capacity, work items can be marked to. consume from one of the two, thus not blocking each other.

Primary work items will come in on top of Interruptible items, but Interruptible items will only be delivered if the agent has free space in both buckets.

Work items that come in marked as Primary (e.g. a Chat) will check to see if the Agent has free capacity in their primary bucket only, ignoring (interrupting) any interruptible work items (e.g.a Case) that they have.
In reverse though, if an Interruptible item is in the queue, then it’ll only get assigned to an Agent if they have free space in both buckets.

And what are some success stories we’re hearing?

A lot of customers are getting excited by this, but a couple of interesting stories that I heard recently:

Reduced Idle time
An interesting metric captured by Omni is Idle time, the amount of time where agents don’t have any work to do.

One customer we spoke to had separate teams for Chats, Calls, and Cases. Cases were their busiest channel, but they were blocking the calls and chats and so they had standalone teams of agents to handle them.

They wrote a report on the Idle time across the Chat and Call teams and identified 4000 hours per week that an agent somewhere was free with no work to do. They updated the agents to have a second capacity, and then added them to the low priority Case queues. They managed to reduce the Idle time across the teams by >90%, and a commensurate reduction in the time to response for their support cases.

Reduced Manual Intervention
Another customer we spoke to had a big challenge with their P1 cases not getting picked up quickly enough. They’d tried putting the agent capacity right up high to make sure there was always space, but the agents were getting swamped as a result. So their only solution was to have supervisors monitoring the queue and manually assigning out the P1’s.

By marking the P1’s as Primary and all the others as Interruptible, they could confidently make sure that the top cases would always get picked up right away. One of the managers at that customer insisted that they want to give a hug to everyone on the team for rescuing them from this one 😀

Where can we learn more?

I’ve attached a link to the pilot guide, and also linked below to a great Youtube video that another blogger put together after trying it out. Fire us over a note if you have any questions!

How to Optimize Omni Supervisor with Supervisor Configurations

In recent releases there have been some big changes to Omni Supervisor setup to make life easier and more efficient for Supervisors. In the Winter ’23 release it has been taken a step further, by adding the ability to create your own Custom Actions using Salesforce Flow – this puts the power in your Salesforce Administrators hands to add the most impactful actions for your supervisors to each Omni Supervisor screen.

This configuration is all setup through ‘Supervisor Configurations’ – some of the key benefits of using these are:

  • Only see the agents that are most relevant to each Supervisor
  • Only see the work that is relevant to each Supervisor (through Queues or Skills)
  • Have custom actions that are most relevant to each Supervisor

The goal of this post is to walk you through setting up Omni Supervisor in the most optimal way in Salesforce.

Setup guide

First, I want to cover the basics – getting and setting access to Omni Supervisor and some of the Omni Supervisor settings available, before we move onto optimizing the Supervisor experience.

Access to Omni Supervisor

Included with Service Cloud (or any other way you have gained access to Omni-Channel) is the ability to monitor agents and work in real-time with the Omni Supervisor tool. Once Omni-Channel is enabled, it will become available – however we recommend that you limit who has access to it. You can do this by:

  • Editing all of your profiles to set ‘Omni Supervisor’ to ‘Tab Hidden’ under Tab Settings (or Object Settings) for your profiles
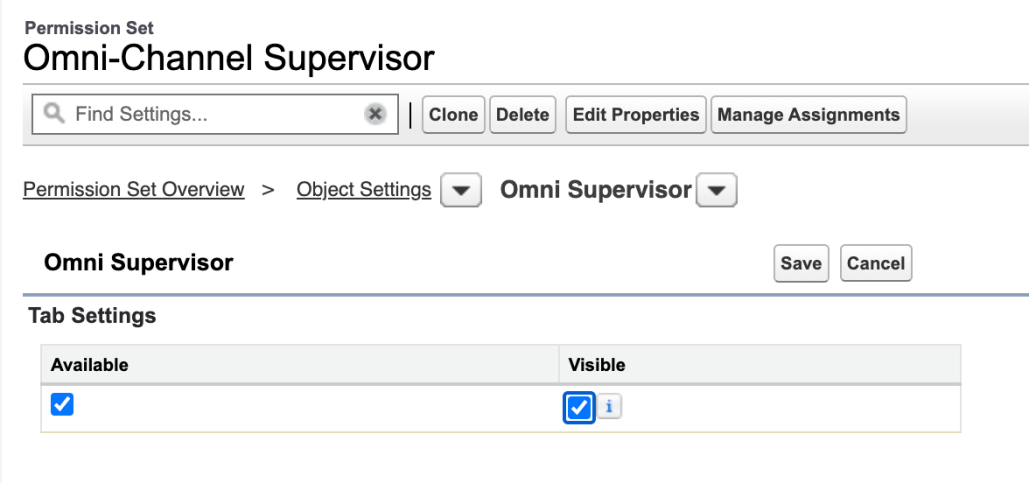
  • Create a Permission Set that grants access to this tab – similar to the screenshot below. You can then assign this permission set to your managers, supervisors and team leaders. Ideally you may want to include this option with other Supervisor settings, or create a Permission Set Group which includes this access.
Use a Permission Set to control the visibility of the Omni Supervisor Tab

Now that you have configured who can see it – you can add ‘Omni Supervisor’ to your Service Console by following the instructions in our help docs.

Supervisor Settings

On the ‘Supervisor Settings’ admin screen, there are various options you can enable – we recommend you enable all of them (learn more about each setting here), unless your country has particular restrictions on these items (the sneak-peek options need to be disabled in some countries due to privacy concerns).

Optimizing Omni Supervisor

Now that you have Omni Supervisor showing up for your Supervisors, let’s improve their experience. All of the configuration for optimizing Omni Supervisor can be done on one screen, the ‘Supervisor Configurations’ admin screen. We recommend that you create a Supervisor Configuration for each team or department in your organization – this will allow your supervisors to just see the agents and work that is relevant to them, removing any extra noise from other teams or departments.

Configure which Users Supervisors can see

Select the Public Groups you want your supervisor to see in Omni Supervisor

The first part of Supervisor Configuration is restricting which agents the Supervisor with this configuration will be able to see in Omni Supervisor – this is done through Public Groups. There are many other benefits to assigning your agents to Public Groups on top of using them with Supervisor Configurations – you can even nest Public Groups, so this is a great practice even without using them here.

As we suggest a Supervisor for each team and department, we also suggest you have a Public Group setup for each of your teams or departments. Once created, it is as simple as assigning the public group(s) to a Supervisor Configuration, this will mean that Supervisors assigned this configuration will only see agents within the assigned public group(s), reducing the noise in Omni Supervisor.

Configure which Work Supervisors can see

The next step is to filter the amount of work that the Supervisor sees in the Queue Backlog, Assigned Work and Skills backlog Tabs. For queue based work, this is as easy as assigning the appropriate queue(s) to the Supervisor Configuration – this will once again reduce the noise, and ensure the assigned Supervisor(s) only see the queues and work most relevant to them.

Select the Queues you want your supervisor to see in Omni Supervisor

If you are using Skills based routing, it is a little more complex as you have the option to either display work with ANY of the skills you add to the configuration, or only display work that includes at least ALL of the assigned skills. The ‘ALL’ setting can be particularly helpful if you split your work by particular departments and/or countries or languages, and assign skills to work in this way. For instance, if you could add ‘French’ & ‘Tech Support’ to this list, and all work assigned at least the ‘French’ and ‘Tech Support’ skills would show up, but not any with only ‘France’ & ‘Finance Support’ skills assigned.

Select the Skills you want your supervisor to see in Omni Supervisor

Configure which Actions Supervisors can take

This part is so exciting we have created out own blog about it! Check it out here.

However at a minimum, we recommend that you add the standard buttons to the screens – these are ‘Change Queues’ & ‘Change Skills’ (if you are using Skills based routing) on the ‘All Agents’ tab, and add the ‘Assign Agents’ button to the ‘Queues Backlog’ tab.

Assign Supervisor Configuration

Now you have created a configuration for each team and department, you can assign them to the appropriate supervisors and/or team leaders, and watch their productivity soar!

Assign your new configuration to the appropriate users

Add super powers to supervisors with new Configurable Flow Actions

In the Winter ’23 release, an exciting new feature was shipped allowing admins to put more power in the hands of Supervisors to run their teams’ with a new configurable action framework from Omni Supervisor.

You can leverage the power of live data on Omni Supervisor, across all of the tabs (lists of Agents, Queues, Skills, work items in a given Queue, etc.) to execute contextual Screen Flow actions.

Make changes to agents configurations, Re-route work from a Queue, Order a Pizza for your team! The possibilities are endless – I’ve created a few examples that you can try out to get you started, you can find the details, including the installation link in this post.

New Omni Supervisor Actions can be found in the top right of each screen

To get the most our of this great new feature, you will want to find out what are some of the common actions Supervisors need to take on users or work items which require many clicks or manual steps today – these going to be perfect candidates to create new custom actions for, which can speed up their day tremendously (making you a hero). There may also be common actions IT or admins need to make, that could be delegated down to Supervisors, which are also great candidates (e.g. reset a users password).

To make use of these actions, you will need to assign Supervisors a ‘Supervisor Configuration’ – more details on those here.

Creating Custom Actions

A Custom Action is just a Screen Flow – however, the powerful part of these custom actions is the context you can pass to them – that is the list of records users select before invoking the action. That list of records gets converted to a list of IDs and put into an input variable for the flow, called ‘ids’, which the Flow can then take action on.

Each page passes in different types of data to the Flow – you can find more information in our help docs about each, but they fall into 1 of these 3 options:

  • User(s)
  • Queue(s)
  • Work Record IDs (i.e. the ID of the work item being routed – so a Case or Voice Call for instance)

Once you have your use case, creating the custom action is pretty straight forward and is outlined in our help docs, but here are the quick steps:

  1. Create a new Flow of type ‘Screen Flow’
  2. Create an input variable called ‘ids’ that is a Text Collection variable and is ‘Available for Input’
  3. Now perform the action(s) on the records that are passed in as appropriate, looping where required
  4. Save & Activate, giving it a sensible label as this is what will show up to your Supervisors as the button label

How easy is that??!! However, I want to help you out even more by diving into a few extra hints and tips when creating these:

  • Use a Toast to display success or failure instead of an extra screen to reduce clicks for the supervisor. You can find a package with this component on this site, here: https://unofficialsf.com/show-toast-flow-action/
  • Use the ‘Collection Filter’ element to quickly create a list of record IDs of all the same type (e.g. Cases), by checking the IDs in the list all start with the same 3 character prefix. You can then iterate each list independently with the Loop element
  • You can use the Flow feature of running Flows in System Context to delegate down extra powers to the Supervisors, so that the actions they run can manipulate admin data (such as Presence Configurations or Routing Configurations), or even objects/fields that they otherwise wouldn’t have access to – within the guardrails of the Flow that restricts what they can and can’t do to those objects.
  • You can add Emoticons 👍🙏❗️ to the Label of the Flow, which will then show up on the Supervisor screen to stand out more
  • The order you assign these is important – the first 4 will be shown on the page, while you can have up to 6 more in the dropdown (for a total of 10).
  • To test your actions, create a test Screen Flow that calls your new Flows as sub-flows, passing in the list of appropriate IDs to each.

Now you can go ahead and assign this action to your Supervisor Configurations, and see your Supervisors productivity skyrocket!

I’m excited to see how our customers will make use of this exciting new feature! Don’t forget, to get you started I have created some examples of some common Flows you may want to use, and even packaged them up – details can be found in this page.

Example Custom Flow Actions for Omni Supervisor

In the Winter ’23 release, an exciting new feature was shipped allowing admins to put more power in the hands of Supervisors to run their teams’ with a new configurable action framework from Omni Supervisor. I’ve gone into some details on creating your own actions in this post, but this page is here to describe a package of custom actions that I’ve created that you can install and use make use of as you see fit.

You can install these Supervisor Flow Actions as a standalone package from this link (unmanaged) – Now updated for Spring ’23 to include Skills and bulk reassignment!

  • Ensure that Omni Channel is enabled before installing

Once installed – check for each flow below as to whether you need to make updates, before adding it to a Supervisor Configuration (as detailed in the help docs) – all Flows that reassign work will need updating.

Flow list:


Password Reset

Description:
This flow is designed to be used on the ‘Agent Summary’ tab of Omni Supervisor, and expects a list of User record Ids to be passed in (to the input variable ‘ids’ – this is done by default from Omni Supervisor). This will show the above screen – where you can choose to send a notification to the affected Users – choosing to send the notification will result in the users getting a Salesforce notification (bell icon), informing them that their password has been reset. They will also get the standard password reset email (whether you select the checkbox or not).

Note – this Flow is set to ‘Run as System’ as it is calling Apex, and the ‘system.resetPassword()’ function.

Required Updates

  • Add this action to the appropriate ‘Supervisor Configurations’ (or create one) that you want this to appear for.
  • Ensure you have a ‘Custom Notification’ in the Setup screens which is active, and applies for both Desktop and Mobile (for the checkbox to send a notification to work)
  • Ensure the user has access to the ‘ResetUserPassword’ Apex Class (via Permission set or Profile)

Optional Updates
None


Update Capacity

Description:
This flow is designed to be used on the ‘Agent Summary’ tab of Omni-Supervisor, and expects a list of User record Ids to be passed in (to the input variable ‘ids’ – this is done by default from Omni-Supervisor). This will show the above screen – where you can enter the new capacity to use for the selected user(s). Note that in doing this, it may create a new ‘Presence Configuration’ in the back end – this is why this Flow needs to be ‘Run as System’, as a standard user won’t have permission to create or edit those admin records.

If a Presence Configuration with the entered Capacity doesn’t exist, then the Flow will clone the ‘default_presence_configuration’ (created when you turn on Omni-Channel) to create a new one, using the capacity entered – therefore you may end up with a lot of different Presence Configurations when using this Flow. Therefore, please update the default presence configuration to have the values you expect/want for each of these new Presence Configurations.

Choosing to send the notification will result in the users getting a Salesforce notification (bell icon), informing them that their capacity has been updated, and they need to log out and back in to Omni-Channel.

Required Updates

  • Add this action to the appropriate ‘Supervisor Configurations’ (or create one) that you want this to appear for
  • Ensure you have a ‘Custom Notification’ in the Setup screens which is active, and applies for both Desktop and Mobile (for the checkbox to send a notification to work)
  • Update the ‘default_presence_configuration’ to have any settings you want replicated across new Presence Configurations

Optional Updates

  • You can change this to create a Presence Configuration per agent – this creates a lot of overhead, but means that their capacity change can take effect right away (i.e. without logging in & out of Omni). The risk with this is updating the capacity of an existing Presence Configuration, will result in all assigned users having the new capacity, which may not be what you expect or want.

Send Notification

Description:
This flow is designed to be used on the ‘Agent Summary’ tab of Omni-Supervisor, and expects a list of User record Ids to be passed in (to the input variable ‘ids’ – this is done by default from Omni-Supervisor). This will show the above screen – where you can enter the subject and body of the notification you want to send the selected User(s).

Sending the notification will result in the users getting a Salesforce notification (bell icon), with the entered values. Clicking on this notification will take them to their ‘Home’ screen

Required Updates

  • Add this action to the appropriate ‘Supervisor Configurations’ (or create one) that you want this to appear for.
  • Ensure you have a ‘Custom Notification’ in the Setup screens which is active, and applies for both Desktop and Mobile (for the checkbox to send a notification to work)

Optional Updates

  • You can copy/clone this Flow to send a message in your appropriate messaging platform (e.g. Slack, Teams or SMS) or to send an Email, using the various Flow actions available (either OOB, or via install).
  • You can update the navigation from the ‘Send Navigation’ action to go to a different location as appropriate for you (but a navigation target of some sort must be defined).

Reassign All

Description:
This flow is designed to be used on the ‘Queues Backlog’ tab of Omni-Supervisor, and expects a list of Queue (Group) record Ids to be passed in (to the input variable ‘ids’ – this is done by default from Omni-Supervisor). This will show the above screen – where you can select the appropriate Queue or User you want to assign all of the work in the selected Queue(s) to. Today, this only supports Queues, Skills and Agents.

Required Updates

  • Each of the Route Work actions need to be updated for your Org – select the appropriate channel and routing configuration (where appropriate) to a valid value.
  • For any other types of work you have in your org, you will need to add another ‘Collection Filter’ element to filter for that work, and loop through it.

Optional Updates
None


Reassign

Description:
This flow is designed to be used on any of the tabs in Omni-Supervisor that lists work – such as the Skills Backlog, or any of the sub-tabs of each page. The Flow expects a list of record Ids to be passed in (to the input variable ‘ids’ – this is done by default from Omni-Supervisor) – these could be of many different types. This will show the above screen – where you can select the appropriate Queue, Skills or User you want to assign all of the selected work items to.

Warnings

  • Reassigning work that is currently assigned directly to an agent to a Queue will fail – workaround is to assign to a skill first, before assigning to the queue (can be added to the Flow)
  • Using this action on the ‘Assigned Work’ page may have unexpected consequences – as that work is currently with an agent, and will be re-routed while they are still working on it, potentially leading to multiple people working on the same work item.

Required Updates

  • Each of the Route Work actions need to be updated for your Org – select the appropriate channel and routing configuration (where appropriate) to a valid value.
  • For any other types of work you have in your org, you will need to add another ‘Collection Filter’ element to filter for that work, and loop through it.

Optional Updates


Assign to Me

Description:
This flow is designed to be used on any of the tabs in Omni-Supervisor that lists work – such as the Skills Backlog, or any of the sub-tabs of each page. The Flow expects a list of record Ids to be passed in (to the input variable ‘ids’ – this is done by default from Omni-Supervisor) – these could be of many different types. This will show the above screen – where you can select the appropriate Queue or User you want to assign all of the selected work items to. Today, this only supports Queues and Agents, due to limitations with the setup of dynamically adding skills in Flow – it is on the near term roadmap to resolve this short-coming.

This is the same as the Reassign Flow above, but a faster way to assign to yourself if you want to quickly grab a work item out of the backlog.

Warning – using this action on the ‘Assigned Work’ page may have unexpected consequences – as that work is currently with an agent, and will be re-routed while they are still working on it, potentially leading to multiple people working on the same work item.

Required Updates

  • Each of the Route Work actions need to be updated for your Org – select the appropriate routing configuration to a valid value.
  • For any other types of work you have in your org, you will need to add another ‘Collection Filter’ element to filter for that work, and loop through it.

Optional Updates
None

Salesforce Field Service: Create Batches of Appointments with Service Appointment Generator

Last update: January 31, 2022

Authors: Leigh-Anne Nugent and Christopher Albanese

Watch the Video. Send us Feedback!

Business Requirements 

Customers need to be able to build a solution that supports the following scenarios for teamwork and multi-stage work:

  1. Wanting in day changes to the Crew Member/Job Assignment i.e. a crew member called in sick on Monday and we need to send someone in just for that day
  2. Partial job assignment to a new Crew Member for a single day of the multi-day i.e. tech assigned on Monday but will see the whole week on the mobile app and also doesn’t get alerted or have an Assigned Resource created
  3. When various resources are required throughout the duration of the job i.e. need someone with troubleshooting skills for the first day, then a mechanic the second day, then an electrician the third day (team approach)

This will provide a stop-gap accelerator-style solution that will be an unmanaged package with access to the source code for customers to modify.

General Capabilities and Principles

  • Leverage the knowledge of the dispatcher to generate a collection of Service Appointments (SAs), assigned to designated Service Resources (SRs or techs) by creating Assigned Resource (AR) records. It improves the end-user experience for the creation and maintenance of a large number of SAs which would be administratively burdensome, if not impossible, to do with the out of the box capabilities.  
  • This tool provides an alternative to using the Salesforce Field Service Crew Management and Multiday Work features.  This does not provide an automatic, project-like scheduling tool, it’s intended to enhance multi-resource assignment capabilities.  
  • Generate SAs and Assignments based on the Dispatcher’s direction.
    • Create 2 weeks’ worth of SAs, with the option to include Saturday and/or Sunday, for Gloria and Alan for this Work Order.
  • Generate an ad hoc batch of SAs to staff a night shift for a given period of time.
    • The customer reduced the due date which requires an overnight shift to be added for the job to finish on time.
  • View the SAs for a Work Order and edit them in an easy, spreadsheet-style way.
    • The customer wants the job finished sooner, which means we need to add 2 hours to each SA Duration.
  • Selectively Delete SA and Delete all SAs. 
    • The customer called and says we can’t be on-site for a set of days or wanted to cancel the whole job.
  • Move jobs from one resource to another.
    • Fred is out for 3 days so move a set of his appointments to another Service Resource.
  • Push some or all of the jobs N days into the future or to a new date.
    • The customer says we can’t be on-site for a set of days, so shift all appointments to when we can go back on site.

Phase 1  Features

(MVP) As a Scheduler, I know what jobs my resources are working on. I should be able to:

  • Set the Service Appointment Parameters I need to determine the first date on-site, the last date on-site (or in the batch), the Start Time, the Duration on-site. 
  • When I’m scheduling jobs outside of my Timezone, I want to be able to be clear about what Timezone I am creating the Service Appointments for so that I can properly offset the Start Time in the Service Appointment Creation Parameters screen.  
  • I need to be able to select from a list of Service Resources that have a Primary or Secondary Territory Membership record of the Service Territory of the Work Order (or manually selected). 
  • In the Resource selection list, I want to know if the Service Resources have any existing Absences and/or Service Appointments already assigned to them during the date range selected so I can select the Service Resources that have the most availability.  
  • In the Service Appointment Creation Review list, I need the ability to NOT create some Service Appointments for some Service Resources on some dates because they only need to be on-site for some of the days in the batch.
  • I need all created and Assigned Service Appointments to appear on the dispatcher console as soon as they are assigned and I need any updates made in the dispatcher console to reflect in the data table Service Appointment review screen (and vice versa).
  • I need the ability to create and assign additional batches of Service Appointments that may include night shift and/or off-shift coverage to shorten the elapsed duration of the job. 
  • When I create new assignments, I’d like to be guided by the dates of the SAs that have already been created so I know where to create the next batch of SAs (visibility on the summary table).
  • When I create additional assignments, I’d like to be guided by the overall Work Order Start and End Dates so I don’t create SAs outside of this date range (visibility on the summary table).
  • I want the option to create a single batch of Service Appointments for more than 14 days (up to 16 weeks) if I know I only need 1 or 2 resources to assign work and know I will be well below the tool limits of 1000 SAs in the Data Table.
  • I want to be able to review all of the Service Appointments and Assignments across all of the days so I can see everyone who has been assigned.
  • I need to be able to move all or some of the Service Appointments to another start date so I don’t have to manually update each appointment start date/time.
  • I want to be able to edit the Scheduled Stat and/or the Duration of selected Service Appointments and have the Scheduled End recalculate for me so I don’t have to worry about calculating and updating that field myself.
  • I want to mass delete all or selected open assignments if the job gets rescheduled or canceled to simplify the data management of deleting each one manually.
  • I want to reassign all or some of the open assignments if a resource becomes unavailable (team shuffle) to simplify the data management of reassigning each one manually.

End-User Guide

  1. Create SA Screen
    1. Parameter screen
      1. When there aren’t any Service Appointments for the Work Order, you will be presented with the Service Appointment Parameters including the technicians you want to surface.
      2. The Start Time is presented in the Users Salesforce Time Zone. Consider the TimeZone offset if you are creating Service Appointments in a different TimeZone.
    2. Service Resource selection table
      1. This Data Table will show you all the Service Resources a dispatcher can select to assign work to.
      2. Select as many resources you would want to add to the job.
    3. Service Appointment selection table
      1. This Data Table will show you all draft SAs for the entire duration of the job and for each tech.
      2. Select the SAs to keep; you can select all the rows and deselect the ones you don’t want. 
      3. Can sort by Scheduled Start Date or Service Appointment.
      4. Can inline edit the Scheduled Start Time and Duration. 
  2. Edit SA Screen
    1. When there are Service Appointments for the Work Order, you will be presented with two options: Edit SAs or Create SAs.
    2. Edit SAs
      1. This Data Table will show you all Final SAs for the entire duration of the job and for each tech.  Can inline edit the Scheduled Start Time and Duration. 
      2. You will have three new options as well as a Data Table.
        1. Change Service Resource – Use this feature when you have to shift a set of SAs to new Service Resource.
          1. Select the SAs you would like to reassign in the Data Table.
          2. Select the Service Territory and Skills to build the list of Service Resources to select.
          3. Select the Service Resource from the Data Table.
          4. All Assigned Resource records will be updated to the new Service Resource.
        2. Shift Appointment Dates – Use this feature when you have to shift a set of SAs to new start date.
          1. Input the start date and the end date range of the SAs to move.
          2. Input the new date to shift the SAs to.
        3. Delete Service Appointments – Use this feature when you have to delete an ad hoc set of SAs.
          1. Select the SAs you would like to delete in the Data Table.
    3. Create SAs
      1. You will be redirected to the create Service Appointment parameters screen.
  3. Delete All SAs
    1. Use this when you need to delete all of the Service Appointments.

Considerations

  1. Datatable presents date/time in the user’s machine settings, not Salesforce User TimeZone or the Service Territory TimeZone. 
  2. The max number of rows of Service Appointments the Data Table can display is 1000 rows.  Keep this in mind when creating your Service Appointment batches. Its recommended to create batches 2 weeks at a time to keep the numbers down for performance.
  3. Validation rules are caught when you try to save the records (you won’t see them in the table).
  4. Any scheduling conflicts will have to be resolved in the Gantt based on rule violations.
  5. You won’t see the list of Skills each Service Resource has in the table.
  6. If you don’t select any rows in the Service Appointment creation table, you could possibly not create any SAs.
  7. It’s not recommended to mass edit the Date/Time fields in the Data Table Service Appointment.  It will update all the records to be the same date and time; you won’t only just update the date value. 
  8. If you back out of the flow or sit in the flow screen for over 10 minutes, you might have SAs in a Draft status until the Delete Service Appointment Triggered Flow comes in to delete them (but this time frame can be changed in the flow).
  9. If an appointment is shifted and crossed a daylight saving transition period, this will have to be manually adjusted as it is not accounted for in the solution.
  10. The Service Appointment edit table is not filtered by status but can be configured if desired.
  11. Consider the implications when the package is retired if/when this feature is added to the Product long term roadmap
    1. It is recommended to document the configuration in detail to then determine if something would require refactoring or removal.   

Developer Guide

Data Model

Service Appointment Fields

  • MR Service Resource – this is the Service Resource that the Dispatcher has assigned. It is used to create the Assigned Resource record when creating a new Service Appointment.
  • MR Parent Work Order – this is the Work Order that owns the Service Appointment.
  • MR Creation Status – Picklist of Draft, Confirmed, Deleted, This is used to drive the creation process as well as the automatic deletion of Draft SAs that don’t get confirmed or deleted (user just exits the flow with completing)

Work Order Fields

  • MR_Estimated_Calendar_Days__c
  • MR_Hours_Actual__c
  • MR_Hours_Completed__c
  • MR_Hours_Created__c
  • MR_Hours_Scheduled__c
  • MR_Hours_To_Be_Assigned__c
  • MR_Hours_To_Be_Created__c
  • MR_Number_of_Techs_Needed__c
  • MR_Total_Hours_Required__c
  • MR_Trigger_Cleanup__c – Used by the time based workflow to delete Draft SAs
  • MR_Trigger_Date_Time__c – Used by the time based workflow to delete Draft SAs

Service Territory Member Fields

  • MR Resource Name – formula field to display Service Resource Name
  • MR Service Territory – formula field to display Service Territory Name

Automation

Flows

  • MR DT Service Appointment Main (name = Multi Resource Assignment Wizard) – calls Creator, Review and Delete
  • MR DT Service Appointment Creator
  • MR DT Delete Service Appointments – Mass delete all of the SAs for a Work order
  • MR DT Service Appointment Review – Update, Change Techs and Delete selected SAs
  • MR DT Trigger Delete Flow – Time Based flow which deletes Draft SAs that have not been confirmed within 10 minutes (parameter can be changed)
  • MR DT Update sched end time – Record Triggered flow to recalculate SchedEndTime if SchedStartTime and/or Duration change. 

Apex Classes

  • WOSchedulePayload – Class  used to contain the parameters set by the user and pass them to the batch apex job
  • MRDTAssignment – Assigns SAs to their Assigned Resource – called by MR DT Service Appointment Creator
  • MRDTGETSTMs – Returns filtered list of STMs based on Territory and Skills and Start / End Dates
  • MRDTReassignTechs – Called by MR DT Service Appointment Review Flow and used to reassign existing SAs to a new Resource
  • MRDTSchedMultiVisit – called by MR DT Service Appointment Creator and is used to create the SAs initially
  • MRDTDateShift – move selected appointments to a new date
  • MRDTSAValidateUpdate – update any discrepancies between manual updates to SA, like a drag and drop, with the MR_Service_Resource field. return list of SAs to the Review flow along with count of SAs.
  • MRDTGetTimeZoneInfo – returns the timezone offset between the running users timezone and selected service territory’s timezone. This is used by the MR DT Service Appointment Creator flow to generate a warning message to the user if the timezone offset is not 0.

Test Classes

  • WOSchedulePayloadTestClass
  • MRDTAssignmentTestClass
  • MRDTGETSTMsTestClass
  • MRDTReassignTechsTestClass
  • MRDTSchedMultiVisitTestClass
  • MRDTDateShiftTestClass
  • MRDTSAValidateUpdate
  • MRDTGetTimeZoneInfoTestClass

Platform

Permission Sets

  • MR DT Permission Set – grants access to all of the fields and classes above

Other Requirements

  • Prior to use, you must deactivate Service Appointment Validation Rule called: Dont_allow_scheduled_or_dispatched

Installation Steps

  1. Install Base and Screen Base packs
  2. Install Datatable
  3. Install the Service Appointment Generator package 
    1. Sandbox Installation Link: https://test.salesforce.com/packaging/installPackage.apexp?p0=04t8c000000NRzz
    2. GitHub Repository: https://github.com/cxalbanese/multiresource.git 
  4. Deactivate Validation Rule on Service Appointment called: Dont_allow_scheduled_or_dispatched
  5. Assign Permission Set to Users who will use this package: MR DT Permission Set
  6. Add flow to work order page: Multi Resource Assignment Wizard

Optional Configuration Steps

  1. Update Flow Screen messaging to suit your business process 
  2. Other fields to display in the Data Tables to suit your business process

Related Requests, that are not related to the SA Generator solution

We heard these other requirements that would improve the end-user experience.  Consider building something yourself to help with these.

  1. As a Scheduler, I want to be able to go to the Dispatcher console and visibly identify the Service Appointments for the Work Order so I don’t get confused with all the jobs on the Gantt. 
  2. As a Scheduler, I want an easy way to clone a Service Appointment from another Service Appointment on the Dispatcher Console so that it is easy to add another appointment for one more day.

Feature Requests

Jobs to be DoneStatusNext Steps
As a Scheduler, I’d like the flexibility to select the Timezone I’d like the Service Appointments to be scheduled in when setting up the initial parameters.  Design note: Data table renders the Date/Time fields in the context of the MACHINE settings.  Also, mass edit doesn’t only update the start time, it updates the date and the times.CapturedReview and determine next step
As a Scheduler, in the draft Service Appointments list, I want to know if that SA has an existing Absence or Service Appointment on that date so I can immediately see the conflicting record for that specific Service Appointment (or use any ensuing Gantt violations as guard rails for the dispatcher to use to tweak the schedule for a given Work Order).CapturedReview and determine next step
As a Scheduler, I want to define the Skills required at the Work Order and have the Match Skills rule consider that the combined Skills of the people I have Assigned to the WO will fulfill the Work Order Skill Requirements.CapturedReview and determine next step
As an Admin, I want to be able to modify the screen flow so that I can insert another Data Table displaying the individual dates with start times and durations before seeing the Resources to select so that the rough schedule can be created before selecting the resources that will be assigned.CapturedReview and determine next step
As a Scheduler, when I am deleting a set of SAs, I’d like an additional confirmation screen so that I don’t accidentally delete records.CapturedReview and determine next step
As a Scheduler, I want the option to let the scheduling engine select the resource based on a defined Role required for each SA (extended match).CapturedReview and determine next step
As a Scheduler, I’d like to have a job template that could create WOLIs with the required skills (sub-work types) that can be applied for each Task.CapturedReview and determine next step
As a Tech using the app, I need to see who else is going to be on-site on the same day so that I can see if I can carpool with someone.CapturedReview and determine next step
As a Tech using the app, I need to see the tool that was assigned to me so that I can bring the right tool on site.CapturedReview and determine next step
As a Site Supervisor using the app, I need to see all of the people who are staffed on the job each day so that I know who to expect and when (they are ok seeing the data table in the App).CapturedReview and determine next step
As an Admin, I’d like to have access to Setup Controls to help identify which automation to enable.

– Status Filters for SA edits
– Align Earliest Start and Due date if the Scheduled Start/Scheduled End is updated
– Set how long the Draft SAs stay in Draft
– Error Message and Screen Message Templates
CapturedReview and determine next step
As an Admin, I want to be able to bring the component into Custom Gantt Actions to Create SAs, Edit SAs (make the component a VF Custom Gantt Action)CapturedReview and determine next step

Use Voice IVR data in an Omni Flow

I wrote a post recently about how to set up routing for Service Cloud Voice, which now uses Flows in Salesforce to decide what queue to route to. One of the questions I got back was how to leverage data captured from the IVR to drive the routing decision. It’s a great use-case, as it allows us to take the power of an AWS LEX Voice Bot and combine it with both the CRM data in Salesforce and the end Routing decisions, to enhance the customer and the agent experience.

One simple approach is to set fields on the Voice Call record, but it’s actually possible to pass any field from an Amazon Contact Flow into a variable in Salesforce with just two simple steps laid out below.

Step 1: Map the Variables

To get IVR data (or any other inputs) from Amazon Connect into a Salesforce Flow, we just need to pass in the parameters when the Omni routing flow gets invoked.

To do this, we can define input parameters to the Invoke AWS Lambda Function action where we’re running the executeOmniFlow method. For those of us using the default Subflow ‘Sample SCV Inbound Subflow’ this is just the first node.

The input parameter in AWS should have the destination key value of flowInput-[variableName], where variableName is the name of the variable in the Omni Flow.

In the below example, imagine that we had our AWS IVR configured to ask the customer what product they were calling about, and want to pass it into the Omni Flow. We stored the customer’s answer in a variable on the AWS Contact flow called productAnswer, and then we pass it into an equivalent variable in the Omni Flow called customerProduct. Make sure that the Flow variable is set to be Available for Input.

Step 2: Use the IVR data to do powerful stuff in the Omni Flow

Once we’ve got the IVR data into Salesforce, the opportunities are endless for us to use it both to lookup/update Salesforce data, and then to combine the two in defining the routing behaviour.

In the example below, I did a few things:

  1. Grabbed the contact from the phone number
  2. Looked to see if there’s an Asset linked to the contact with the name that the customer gave in the IVR
  3. Created a Case with the Contact and Asset details
  4. Marked all three to Screen-pop when the agent accepts the call
  5. Checked the Product Type field on the Asset to route the call to the correct team

There are many, many, more things that could be done. This is just one example, and hopefully it is helpful, but I’ll look forward to seeing what exciting use-cases others come up with.

Routing for Salesforce Chat

Overview

Traditionally with Chat, there was a 1:1 relationship between the Chat Button and a Queue, so it was never easy to build dynamic routing logic in. If we wanted some chats to go to the sales team, and others to service, or if we wanted to prioritize VIP customers over others, we had to either use a Chatbot as a proxy, or code it into the pre-chat form somehow.

As of Winter ’22 though, it’s so much easier, with the launch of Omni Flows for Chat, and this post will help show us how to do that.

Two notes before we start, Omni Flow routing isn’t supported when using an Einstein Bot, though it is on the roadmap.

Also, make sure that you’ve read Build your first Omni Flow

Setup guide

We start off by building an Omni Flow. There’s a pre-built template for Chat or we can make it from scratch. The good thing about the template is that it gives an example of loading pre-chat data and using it to route based on that data.

Pre-chat data

When an Omni Flow is configured on a chat button, any customer inputs collected in the Embedded Service pre-chat form will be passed in automatically. If you’re not using the template, make sure to define an input variable of type Conversation Context Entry, with the ‘Allow multiple values’ checkbox selected.

Within the flow, you can loop over that collection, and check the Title (pre-chat field name) and Value (customer input) of each entry. This can then be used for whatever you need in the flow, linking the Contact, Creating a Lead or Case, or informing a Routing decision.

Decide where to Route the Chat

Once we’ve got the pre-chat data and loaded the Contact or other related information, we need to decide where to Route it.

The Route Work action will support us sending to a Queue, to a set of Skill Requirements, or Direct to a named Agent.

We can also set the Priority and Size of the Chat by changing the Routing Config or moving into a Queue with different values (allowing for us to escalate VIP customers to the front of the queue), and define what records will open when the agent accepts the chat via the Screen Pop action.

The below screenshot shows a simple example of a routing decision based on the subject in pre-chat, but we can ultimately define any logic that we want to (which is the great power of Flow, combined with all of the data about the Chat).

Add routing requirements to the Chat Button

Once we’ve built the Omni Flow, the last step is to map it to the Chat Button.
Now, if selecting the Omni-Channel routing type, you have the option to either provide a Queue (for simple scenarios) or to define an Omni Flow (for dynamic routing).

Update it by checking the box and selecting the Omni Flow that we just created, then we’re good to go. All new chats to this button will use that Flow to decide where to go!

Note: The go-forward routing type is Omni-Channel and we should use this for all newly configured Chat Buttons.

Extra notes

Heads up, when configuring the Flow from one of the templates, the Route Work actions are pointed to placeholder Channels, Queues, and Routing Configurations, and so you’ll need to swap these out for your own routing requirements before the Flow will work.

Service Cloud Voice Routing – Technical deep dive

How it works (under the covers)

The great thing about the upgrades for Routing of Service Cloud Voice that are GA in Spring is that it makes setup for Voice routing simpler and more powerful at the same time. It keeps all of the existing flexibility of Amazon, but enhances it with Salesforce data, and unifies it with other channels, such that the admin doesn’t need to worry about how it’s working in the back-end. What’s even better is that it’s all taken care of for us, so we just need to go into the Contact Center setup screen and point to the Routing rules.

But it’s interesting to know how it’s actually working, and I’ve seen quite a few folks wanting to understand more, so I thought I’d type up a quick post walking through the underlying details.

What’s been done is to deliver the best of both worlds, where the Routing Requirements (which queue does a call go into) are defined upfront inside Salesforce, while the Routing Execution (which agent in the Queue receives the call) is run inside Amazon.

When the call gets to the stage of doing the routing, the AWS Contact Flow invokes a dedicated routing API in Salesforce via Lambda (this is all pre-configured in a sub-flow for you), which runs the Omni Flow to get the routing requirements and returns a Queue ID to place the call into. There’s a queue mapping stored in Salesforce, pairing a Salesforce Queue to an equivalent Amazon queue which is what makes the whole thing work.

This allows the admin and supervisor to get a unified experience with all of their other channels, while the full power of the AWS connect system is still delivering the call in exactly the same way as before in the background.

Architecture

The below diagram shows the data flow across channels. The conversation (Email, Chat, Phone) first goes into its respective automation layer (IVR, Chatbot, Case Classification) before being passed to Omni where the business rules for routing and queues are defined.

For Voice, within Salesforce, three key things are synced to the back-end phone engine,

  1. The Agents presence (are they online for this channel or not)
  2. Capacity (does the agent have capacity to receive work or not)
  3. Routing requirements (where do we want to send the phone call)

With all of that info sent back, the phone engine can then determine which agent to deliver the call to and pass that request into Salesforce.

Routing for Service Cloud Voice with Omni Flow

Overview

In Spring 22 there’s a massive leap forward in making the setup for Routing both easier and more powerful with the GA of Omni Flows for Service Cloud Voice (for Amazon Connect).

In the past, we needed to configure all of the Routing Requirements inside an Amazon Contact Flow. While an incredibly powerful tool, this comes with a few challenges that are resolved by moving the Routing Setup inside of Salesforce.

Some key benefits:

  1. Configure routing rules for ALL channels in one place, inside Salesforce
  2. Easily leverage Salesforce data and shared business rules in Routing requirements for Voice and other channels
  3. Share all Voice Queue data to Omni Supervisor, and in general for Reports inside Salesforce

This Blog post is to get you a quick start in trying out, but make sure that you’ve read Build your first Omni Flow before going any further.

Setup guide

For more information on how this works under the covers, see Service Cloud Voice Routing – Technical deep dive. There’s a video version of this at the bottom of the post as well.

We start off by building an Omni Flow. There’s a pre-built template for Voice or we can make it from scratch. The good thing about the template is that it gives a simple but great example right from the start of the power that we get, where we can easily look up the Contact, and use data in Salesforce to drive the Routing decision.

Note: As inputs to the Flow, you should get in both the Voice Call record (with data on it like the customer phone number) and any custom IVR variables that you choose to pass in from Amazon.

Create the Queues inside Salesforce and Amazon

The key to making this work is mapping of the Queues. To do this, we create the queues in both systems (stay tuned for an upcoming release where we’ll be automating the Amazon part!).
There’s a simple 3-step process to do this.

Step 1: Create the queues in Salesforce
Create the queue the same way that you would any Omni Channel queue, but with a few key and critical notes to make sure:

  1. Voice Call is the only object in the Queue
  2. The Routing Configuration is marked as External Routing in the Routing Model field

Optional: If you want to report on it or see in Omni Supervisor, you should add users to the Queue. Note that currently this data isn’t used, as membership is defined in Amazon (step 2). Also note that Amazon doesn’t support adding individuals to queues, only groups (via Routing Profiles) so I’d recommend managing the membership via Public Groups to keep it easy.

Step 2: Create the queues in Amazon

As above, log into the Amazon Connect management console and configure the same queues.
Note that these queues are the master source for queue membership.

Step 3: Map the Queues in Salesforce

Inside Setup→Amazon Contact Centers, select your contact center and scroll down to see a few new sections. This first of these, Queue Mapping, allows you to add a new entry for each Queue.

Mapping the Omni Flow to the Phone Number

The last step to do is to define the Routing requirements for the Phone number.

Inside Setup→Amazon Contact Centers, for your CC, you can now add each Phone number as a Channel (exactly like how we setup SMS phone numbers in Messaging). Within that, we’re offered the option to either route all queues to a specific queue (for simple use-cases) or to define our Omni Flow created above. And that’s it! No need to configure anything more in Amazon, the system will automatically take care of it for us.

[Upgrade notes] for Voice Orgs created before Spring ’22 or without Omni Flows

If your Org was created prior to Spring ‘22, or didn’t have these new features enabled, then it’s likely that the routing rules are defined inside an AWS Contact Flow and you’ll need to make some small changes to get it working. Don’t fear though, we’ve made it really easy to do.

Just go into the Contact Flow, remove any existing routing logic (Transfer to Queue nodes), drag on the Subflow node, and point it to the new “Sample SCV Inbound Subflow”. And that’s it, no need to do anything else. We’ll cover in other posts how to pass in IVR data, but for now you should be good to go, Salesforce will use the details from the setup screens above to drive everything else.

Video walkthrough

A video guide of setting it up in an org.

UnofficialSF has a new Service Cloud Channels Section

UnofficialSF.com has added a new section devoted to Service Cloud channel functionality, which is increasingly driven by flow-based services.

Check it out here. If you know of a good post or page on the topic, don’t hesitate to let us know via the form on the home page.