
From Ryan Mercer: Enabling File Uploads Without Having To Pre-Create Records
Which came first: the record or the files? Unlike the age old egg or chicken riddle, I can definitely say that the record comes before the files. This can be a challenge for admins to navigate, however, given the fact that File Upload Improved (and the standard File Upload Screen Component for that matter) ask for the Related Record Id by the time the component renders. In other words, in order to upload files to a particular record using either component, the record must already exist in Salesforce prior to getting to the screen with the File Upload component.
What happens if the record (and Related Record Id) doesn’t yet exist? Let’s say you have a Screen Flow to allow users to submit Cases to your team for support. You’d like the option for those users to upload files to provide additional context – maybe a screenshot of an error message? – but the Case record isn’t created until after they click ‘Next’.
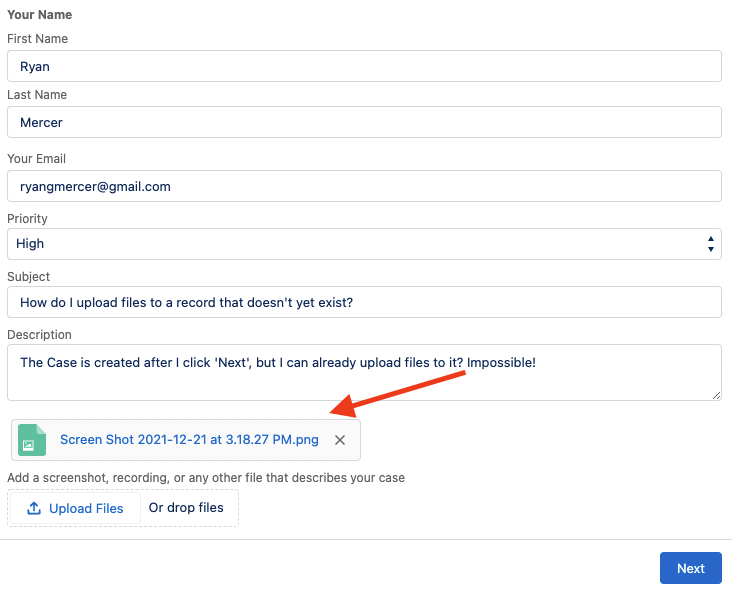
This is impossible, you say? Version 1.6 of File Upload Improved makes this a cinch! Before we dive in, let’s take a crash course on the Salesforce Files object architecture.
Content documents and versions and links, oh my!
There are three main objects when dealing with files in Salesforce:
- ContentDocument which “represents a document that has been uploaded”;
- ContentVersion which “represents a specific version of a document”; and
- ContentDocumentLink which “represents the link between a document and where it’s shared”.
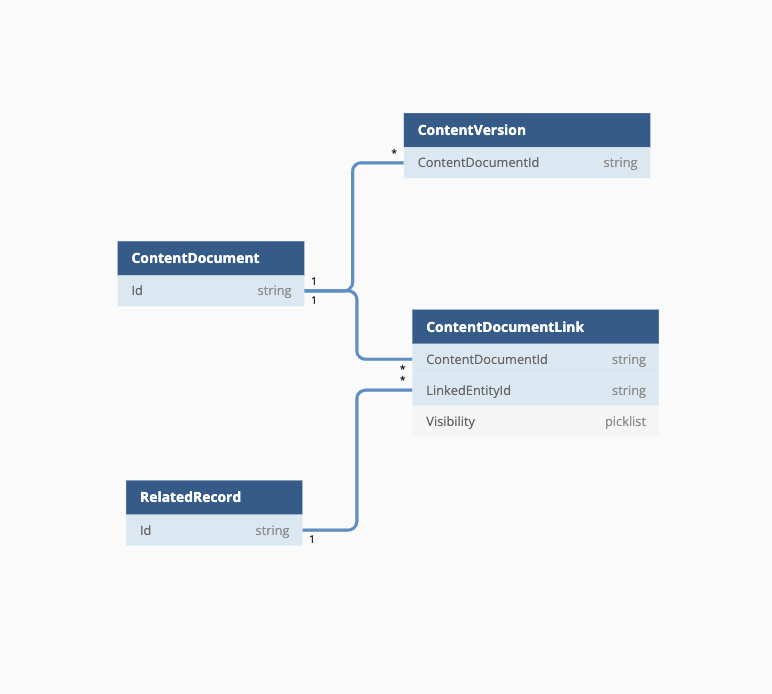
Whenever you upload files using File Upload Improved, we automatically create a ContentVersion and a ContentDocument for each file. If you also specify a Related Record Id, we automatically create a ContentDocumentLink from the ContentDocument to the related record. A ContentDocumentLink is a junction object that allows a single file to be ‘uploaded’ (though technically the more accurate word is ‘related’) to many different records in Salesforce.
ContentDocumentLinks are simple records – you really only need two pieces of data:
- the Id from the ContentDocument, aka the ContentDocumentId; and
- the Id from the Related Record, aka the LinkedEntityId.
If you want to get fancy, a third data point (aka the Visibility) will make the file more (or less) visible to users.
Now, what happens if you leave the Related Record Id field on the File Upload Improved configuration screen blank? We still create the ContentVersion and the ContentDocument, but we do NOT create the ContentDocumentLink (because there’s no related record to which to relate it).
Soooo… in order to upload files to a record that doesn’t yet exist, all we have to do is create the ContentDocumentLinks… which is easily done with flow! How? Let’s take a look.
How to Create ContentDocumentLinks in Flow
Obligatory screenshot of the finished flow first.
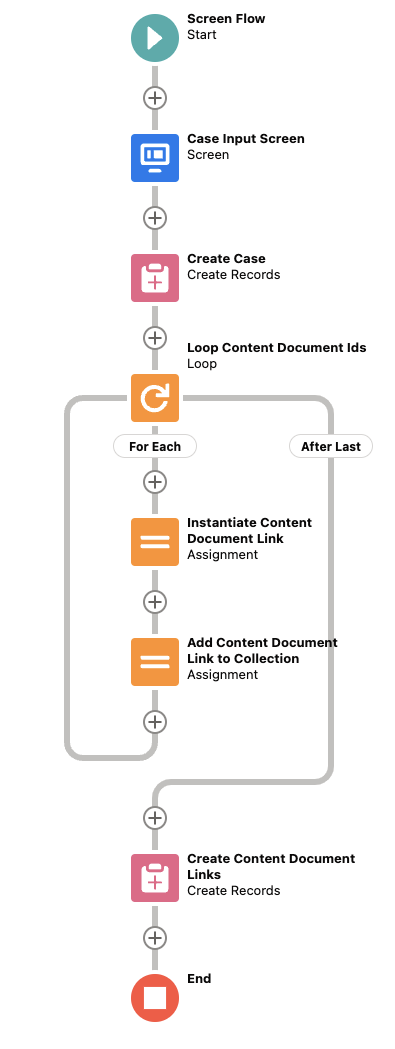
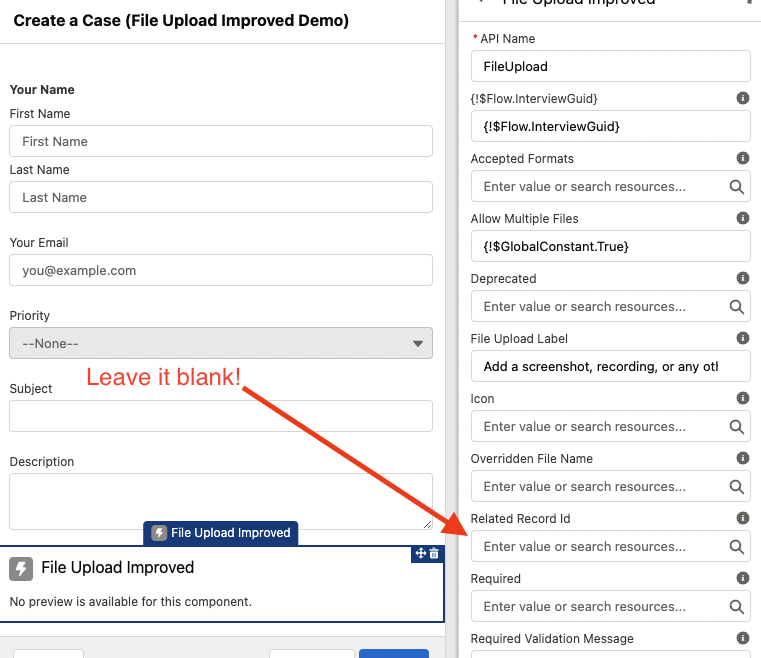
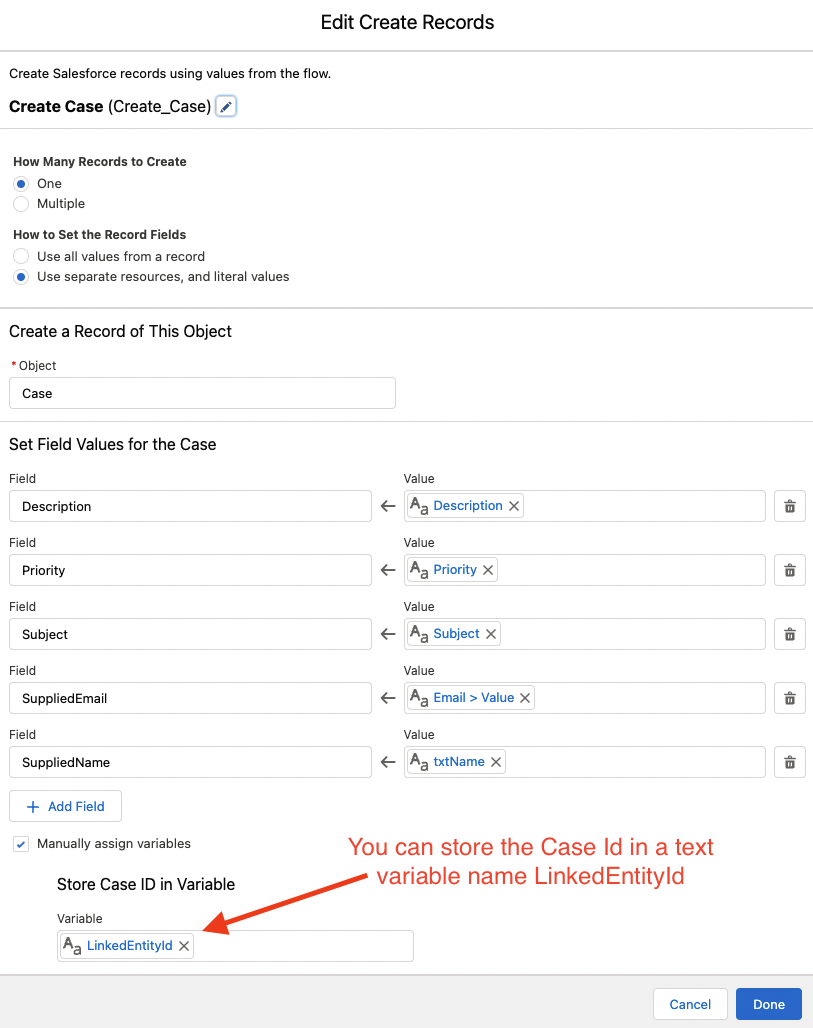
The first element of this Screen Flow is the Case Input screen, which allows your users to specify their name, email, and case priority, subject, description. There’s also a File Upload Improved component to allow your users to upload a file to their Case. Remember to leave the Related Record Id blank on the configuration screen!
Next, create the Case. You can store the Case Id in a text variable named LinkedEntityId, which we’ll use in a second.
One of the features of File Upload Improved is that once you upload files, we return a collection of all of the newly created ContentDocument Ids. This collection can be used in a flow loop, which is the third element of this screen flow.

Now we get the fun part of actually creating the ContentDocumentLinks. We do so by creating a ContentDocumentLink record variable and assigning the ContentDocumentId as the current item in the loop and the LinkedEntityId as the Case Id text variable.

It’s best practice to never put a CREATE, GET, UPDATE, or DELETE element in a loop to avoid hitting pesky governor limits, so in the fifth element of this screen flow we add the single ContentDocumentLink record variable to a collection of ContentDocumentLinks.

In the sixth, and final, element of this Screen Flow, we exit the loop and create all of the ContentDocumentLinks in one fell swoop.

Boom! Wasn’t that easy? But wait… version 1.6 of File Upload Improved will make your life even easier!
How to create ContentDocumentLinks with version 1.6 of File Upload Improved
Version 1.6 of File Upload Improved introduces a nifty Apex Action that allows you to create ContentDocumentLinks downstream in flow. Essentially, this invocable method does the exact same thing that element three onwards does in the previous example. As such, you can skip creating a loop, building single ContentDocumentLink record variables, adding them to a collection, and finally creating them.
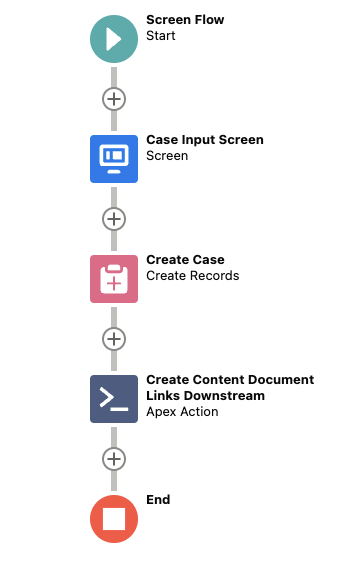
The configuration of the first screen is exactly the same as the previous example (Related Record Id on the File Upload Improved configuration screen should still be blank).
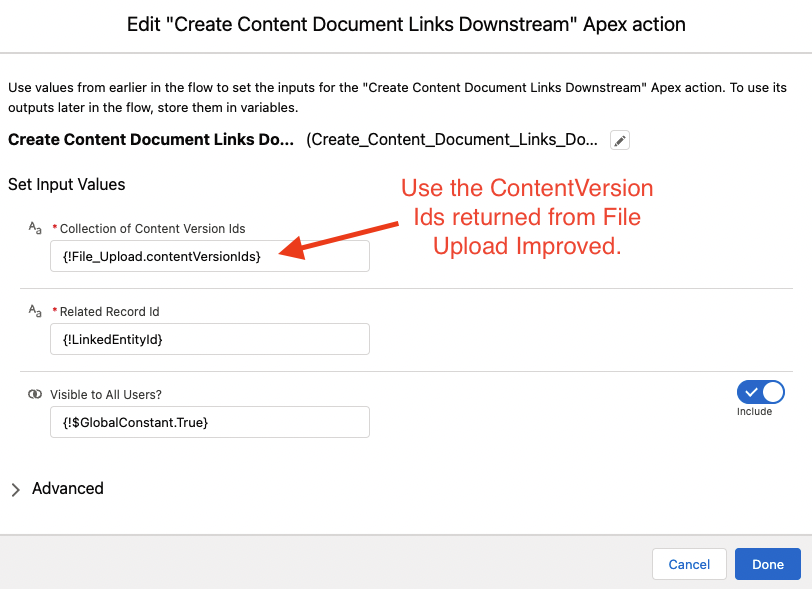
After the Create Case element, drop in the Create Content Document Links Downstream Apex Action. Be sure to use the ContentVersion Ids returned from File Upload Improved in the input (you looped through the ContentDocument Ids in the previous example, which is different than what needs to be used in the Action. Why? More on that soon…)!
Wasn’t THAT easy?
What are the benefits of using the Apex Action?
The most obvious benefit of using the new Apex Action provided by version 1.6 of File Upload Improved is the ease of configuration. Configuring one element on the canvas replaces the need to create four elements. We all know our time is stretched thin as is, so let’s celebrate any opportunity to put some time back in the bank!
The second benefit is less obvious, but arguably more important. If you remember, when configuring the Apex Action we use the ContentVersion Ids returned from File Upload Improved as the input value rather than the ContentDocument Ids. We do this because whenever a Community User uploads a file using File Upload Improved, the ContentDocument Id is NOT visible to them – that collection is returned empty (or ‘[]’ when you debug it).
File Upload Improved DOES return the ContentVersion Ids to Community Users, however. So the Apex Action grabs the ContentDocumentId from the ContentVersion in order to create the ContentDocumentLinks. This logic makes File Upload Improved the easiest and most efficient way Improve the File Upload experience for Community Users. Talk about magical!
In summary…
Please use the brand new Create Content Document Links Downstream action to upload Files to Records that don’t (yet) exist in Salesforce.
How can you download it? Hop over to the main post of File Upload Improved and install the latest version.
Go to Main Post of File Upload Improved >>
Inputs
| Property Name | Data Type | Description |
| Collection of Content Version Ids | Text Collection | The collection of ContentVersion Ids returned from File Upload Improved. |
| Related Record Id | Text | The Id of the record to which you want to upload the Files. |
| Visible to All Users? | Boolean | By default, when an internal user uploads a file, the file is only visible to other internal users (meaning community users can’t see it). If you’d like to make the uploaded file visible to all users, set this to TRUE. When a community user uploads a file, the file is already visible to all users. From a technical perspective, this sets ContentDocumentLink.Visibility = AllUsers. |