
How easy would it be if key themes just popped out of bulky text data, rather than you going through each word and analyzing what is important? Lucky for you, we have got it covered with Word Cloud! Word Cloud offers a visual analysis of your free text and identifies insights that help you quickly understand the points that need your attention. The way the Word cloud works is simple. The higher the count of a word in source text data, the bigger and bolder it appears in the word cloud. The importance of each word is visualized with bigger font size or color to get the reader’s attention. With the Word Cloud you can:
- Understand the top topics customers talk about
- Track how frequently a topic is mentioned.
- Identify what is important to your customers
- Highlight upfront and take pro-active actions on topics coming in new
- Integrate with sentiment insights to understand top areas which are causing dissatisfaction or delight
Current Use case: Salesforce Feedback Management helps to understand your customer deeper by engaging customers and users with relevant, personalized surveys and analyzing the feedback as it evolves. You can incorporate survey data into your feedback management process and gain actionable insights at every stage of the customer lifecycle. It collects customer feedback in terms of NPS, CSAT, etc., and also allows free text responses where customers can give their opinions. Studies have shown that even though quantitative data points such as overall NPS, or average CSAT enable us to know the overall customer pulse, the free text responses contain qualitative feedback, which is crucial in understanding the customer. Analysis of qualitative feedback helps in deriving actionability and insights into the reason for a customer’s negative response and also helps to identify the factors that made your customer delighted. But, analyzing free-text responses by manually screening the text is time-consuming and cannot be achieved for most organizations. Luckily, we can help get you start understanding trends quickly with two steps.
The first step is enabling Sentiment Insights within Feedback Management to view and analyze the customer sentiment from the text. This helps identify emotions attached to free form responses, like positive or mixed sentiment, and automate follow-ups to action it. It also helps identify sentiment trends, tying the stage in the lifecycle journey where the customer has expressed positive sentiment or negative sentiment, allow companies to take action to improve overall customer experiences.
The second step, is creating the World Cloud to get the visual cues of responses, highlighting recurring themes in an easy-to-digest way. The below section explains how you can add a word cloud to the survey question response data.
Important Note: The approach below uses third-party libraries and is purely for demonstrating how LWC can be used to display word cloud on the survey response data. This approach is not currently supported or maintained as part of the Analytics for Salesforce Feedback Management application or by the CRM Analytics. In addition, each user that wants the word cloud will need to implement this themselves.
Demo of Word Cloud for Salesforce Feedback Management
Here is the final demo of the Word Cloud that you will be building by the end of this document.

Deploy CRMA World Cloud with SFDX and VS Code
In this section, we will look at deploying CRMA Word Cloud Lightning Web Component into a target Salesforce org.
We work with the following softwares throughout this document.
- SFDX CLI: It has a suite of command line instructions that help develop for Salesforce platform
- VS Code: VS Code acts as a text editor to write code targeting the Salesforce platform.
What we don’t cover in this document?
We won’t be talking about the intricate details of each of the software we use in this document. We will be strictly focusing on how to use this suite of softwares to deploy World Cloud Lightning Web Component to a target org.
How to read this document?
You can’t connect dots looking forward. You can only connect them looking backward. – Steve Jobs
This document won’t make sense while you are working with it. It starts to make sense only after you complete the setup as suggested in this document. If you feel lost, understand that it is totally normal for anyone who is setting up their system for the first time.
Installation and Setup: SFDX CLI Installation:
SFDX as described on the official website: The Salesforce CLI is a powerful command line interface that simplifies development and builds automation when working with your Salesforce org
We will be using SFDX CLI to retrieve and deploy analytics assets. Install SFDX CLI from this link: https://developer.salesforce.com/tools/sfdxcli
Optionally, you can also install the Analytics plugin for SFDX to get features to create and maintain templated apps in Tableau CRM, but we don’t need it for this session. Installation steps for Analytics plugin here: https://help.salesforce.com/articleView?id=bi_cli_analytics_plugin_install.htm&type=5
VS Code Installation and Setup:
Visual Studio Code is an open-source text editor that Salesforce officially recommends for development. If you are looking for an in-depth guide on VS Code setup, follow this trailhead: https://trailhead.salesforce.com/content/learn/projects/quickstart-vscode-salesforce. Otherwise, here is the gist of it:
- Download and install VS Code from this link: https://code.visualstudio.com/
- Now launch VS Code, go to extensions to install Salesforce Extension Pack, and re-launch the application if necessary.

Salesforce Extension Pack contains plugins to integrate SFDX CLI with VS Code. These plugins abstract the command line instructions that we will have to write when working with SDFX CLI with a simple and easy-to-use interface.
Downloading World Cloud Project
To make the Lightning Web Component (LWC) deployment easier, we have created the SFDX project that you can download, explore and deploy to a specific org. Follow the steps mentioned below:
- First go to the Github repository: https://github.com/nanu146/crma_word_cloud
- Now, download the repository as a zip file by clicking on Code → Download Zip

Now, extract the zip file into a separate folder. In the next section, we will use this folder in VS Code to deploy the LWC into a target org
Working with VS Code
Working with VS Code is going to be a two step process:
- Authenticating to an org
- Deploying TCRM assets to a specific Org
Authenticating to an Org
Before we deploy any assets in Salesforce, first authenticate to Salesforce and authorize the VS Code and SFDX to deploy assets into an org. Our ability to deploy assets is limited to the orgs that we authenticate and the privileges we hold in those orgs. So ensure that we have sufficient privileges to deploy assets to a Salesforce org.
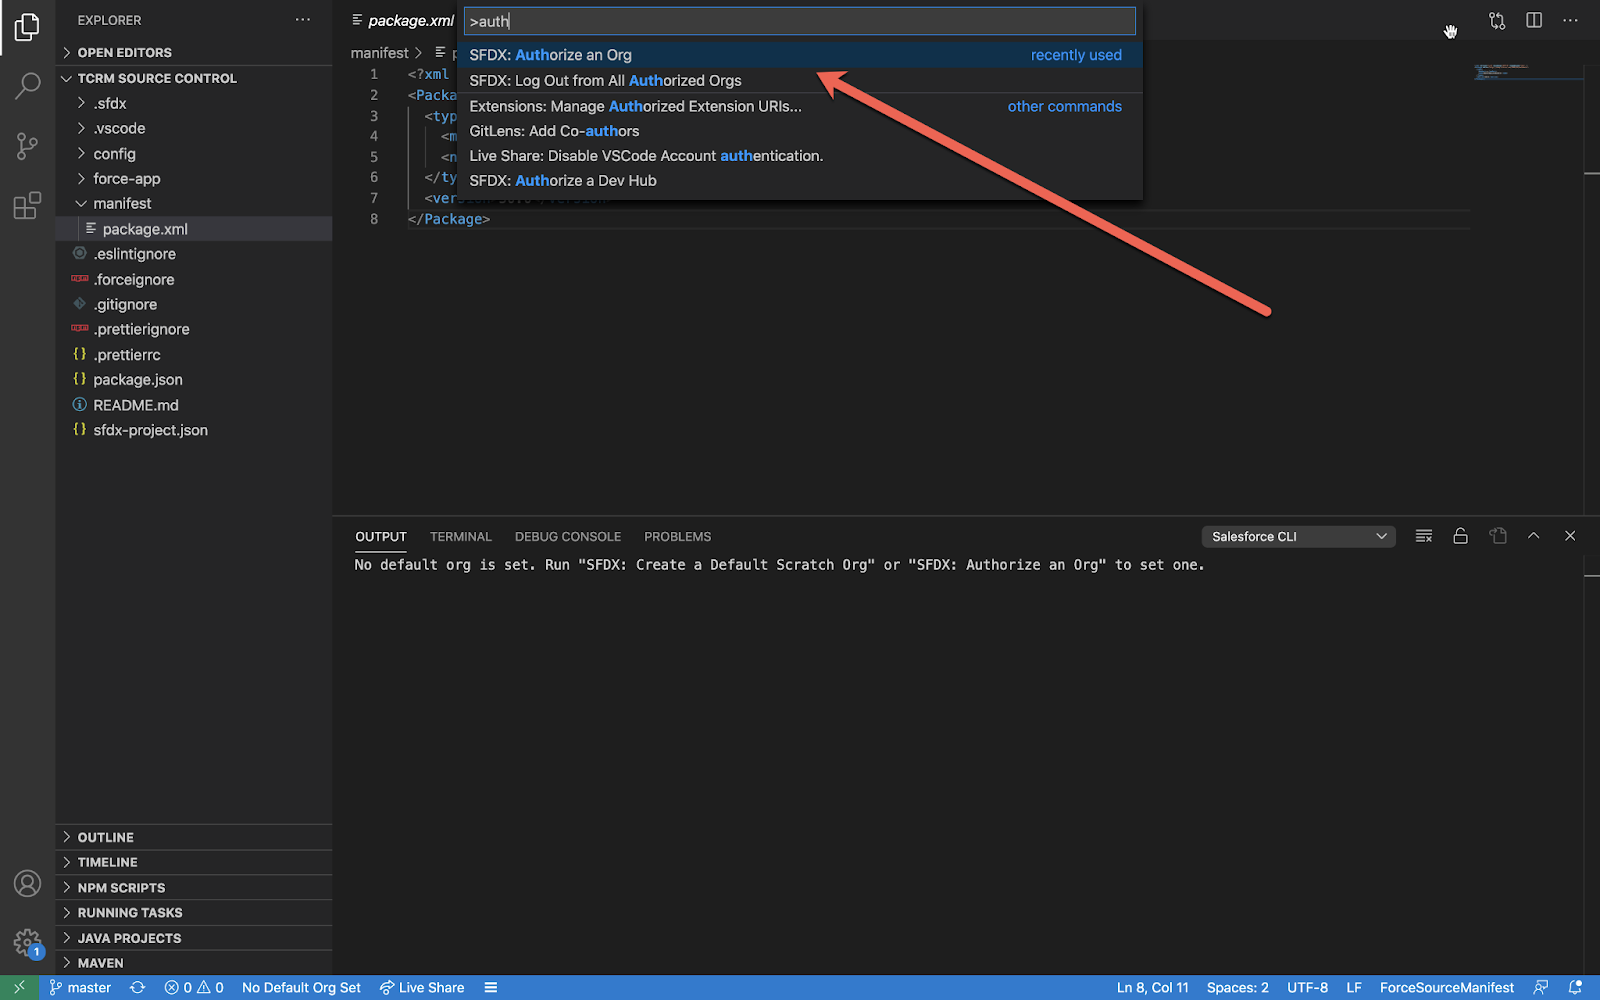
To Authorize, press Cmd + Shift + P in mac or Ctrl + Shift + P in windows and type and choose SFDX: Authorize an Org
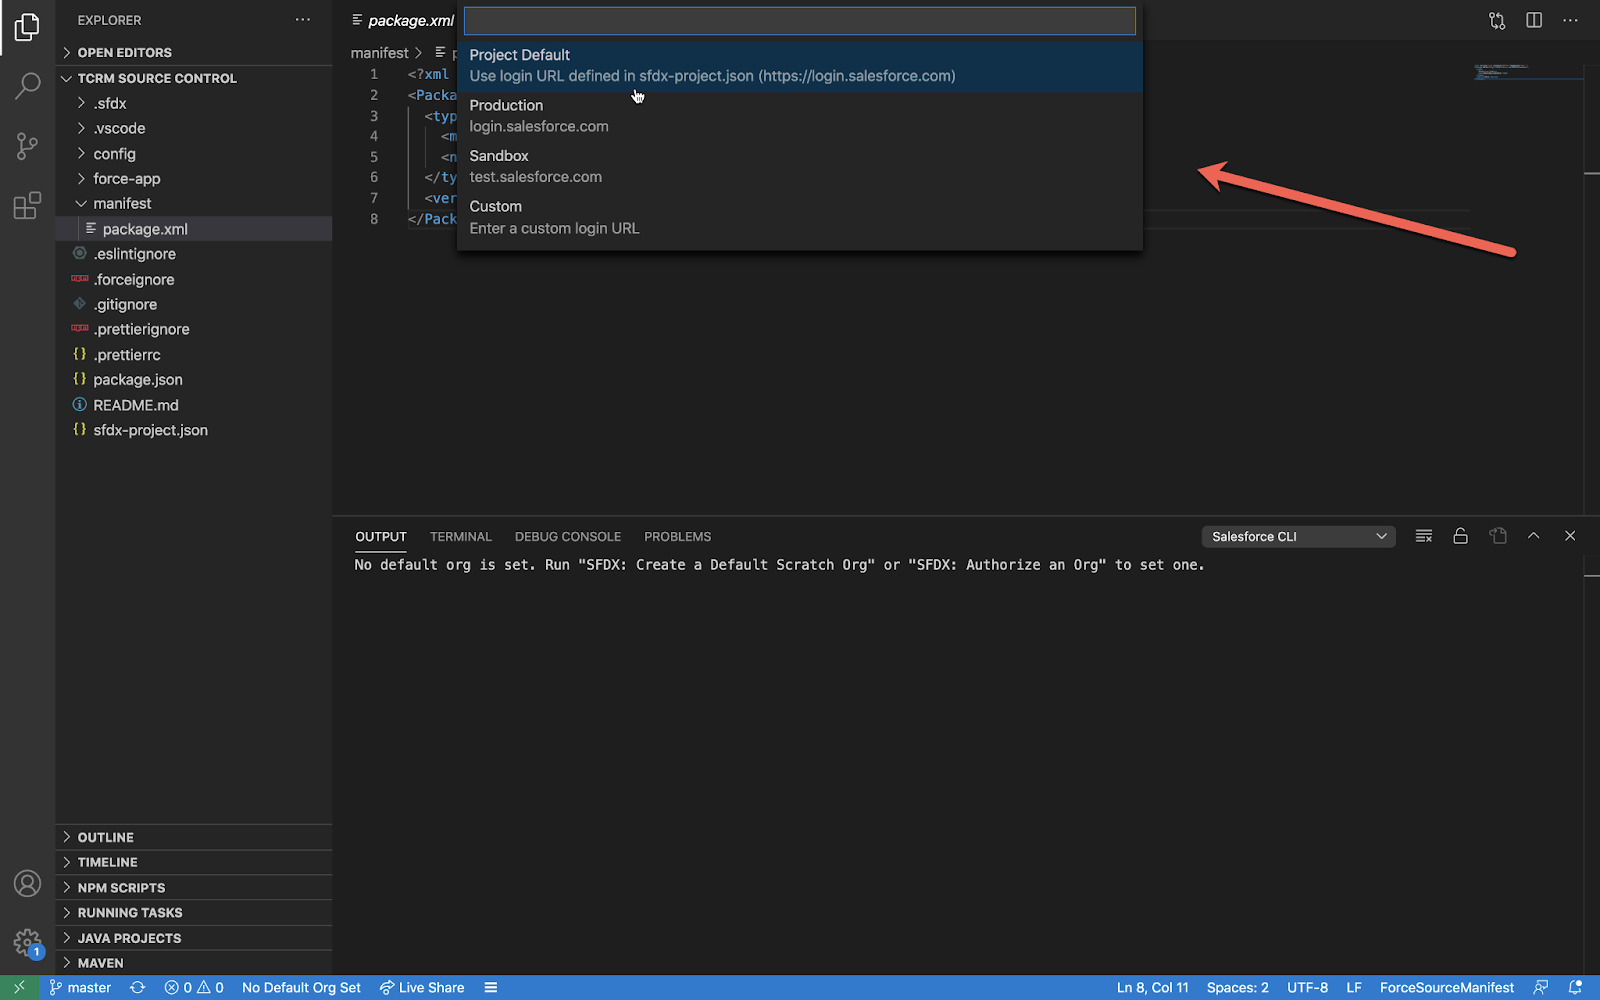
Then choose either a production or sandbox org to authenticate and authorize. If your org uses a custom domain, choose the Custom option
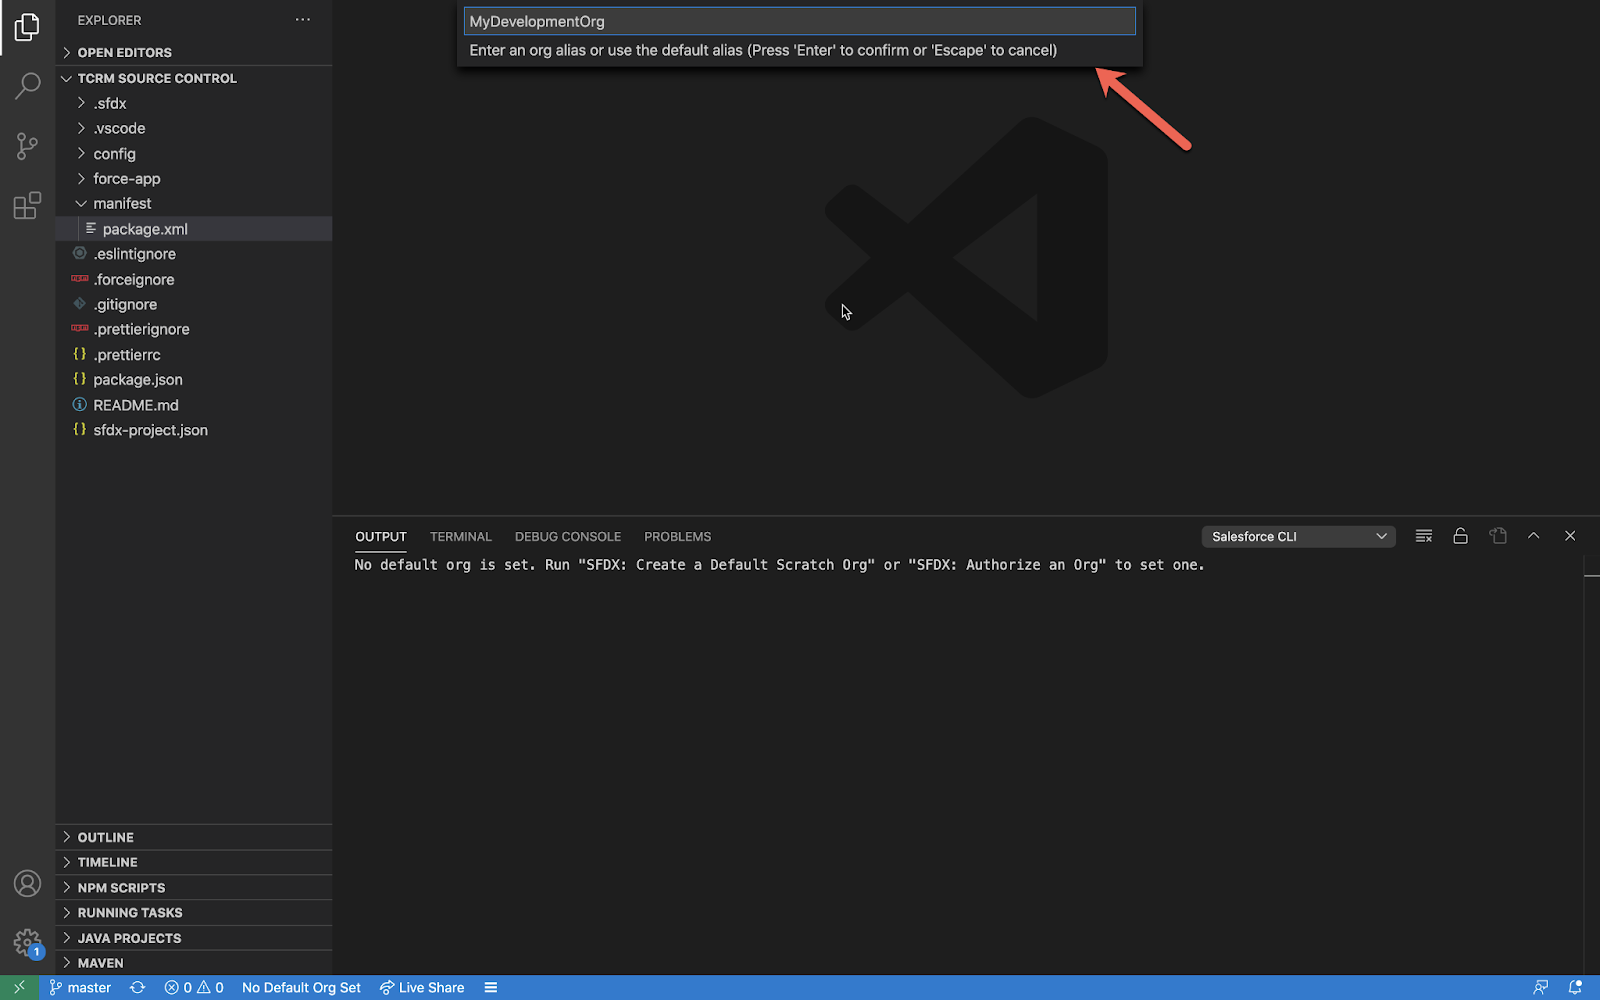
Next, choose a name for the org that you are authorizing. This is just a local reference, this will have no impact on the org itself.
You will be redirected to a page on the web browser to authenticate. After you authenticate, you will be asked to authorize VS Code to access Salesforce org. Accepting it would enable VS Code to import and deploy assets.

After successful authentication and authorization, you will see a message in VS Code, as marked in the below screenshot. You can also see the org you target at the bottom left (find MyDevelopmentOrg at the bottom left).

Deploying TCRM Assets to a Specific Org
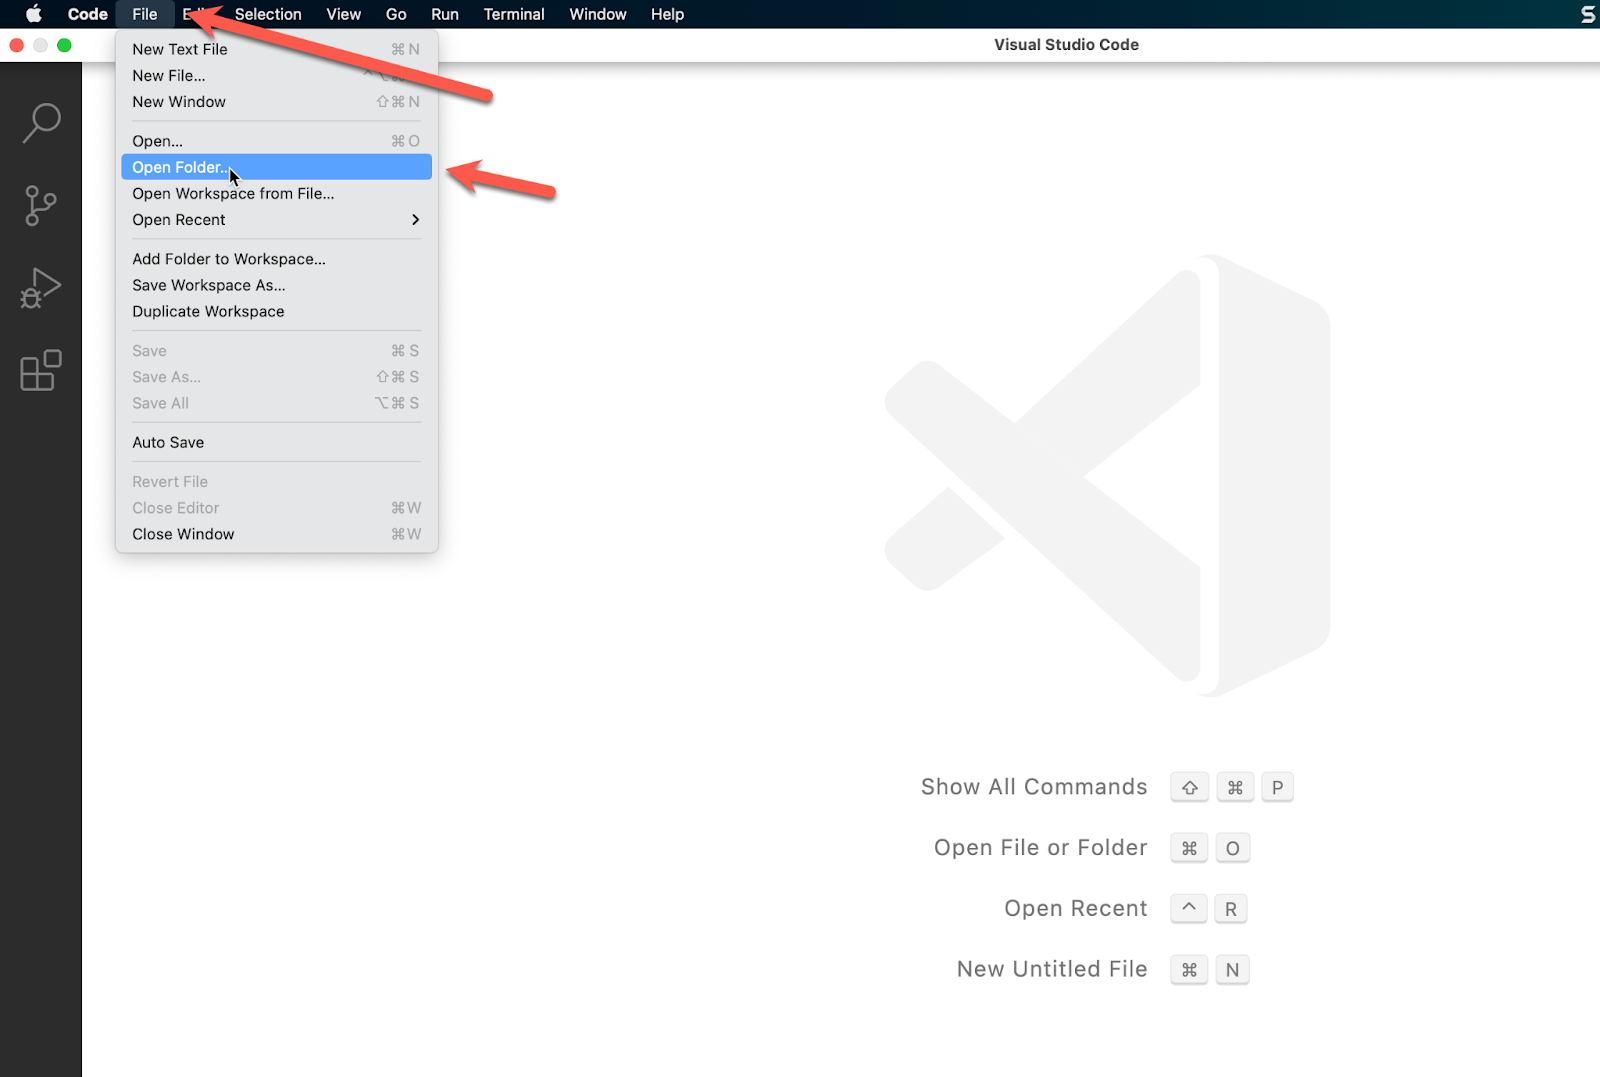
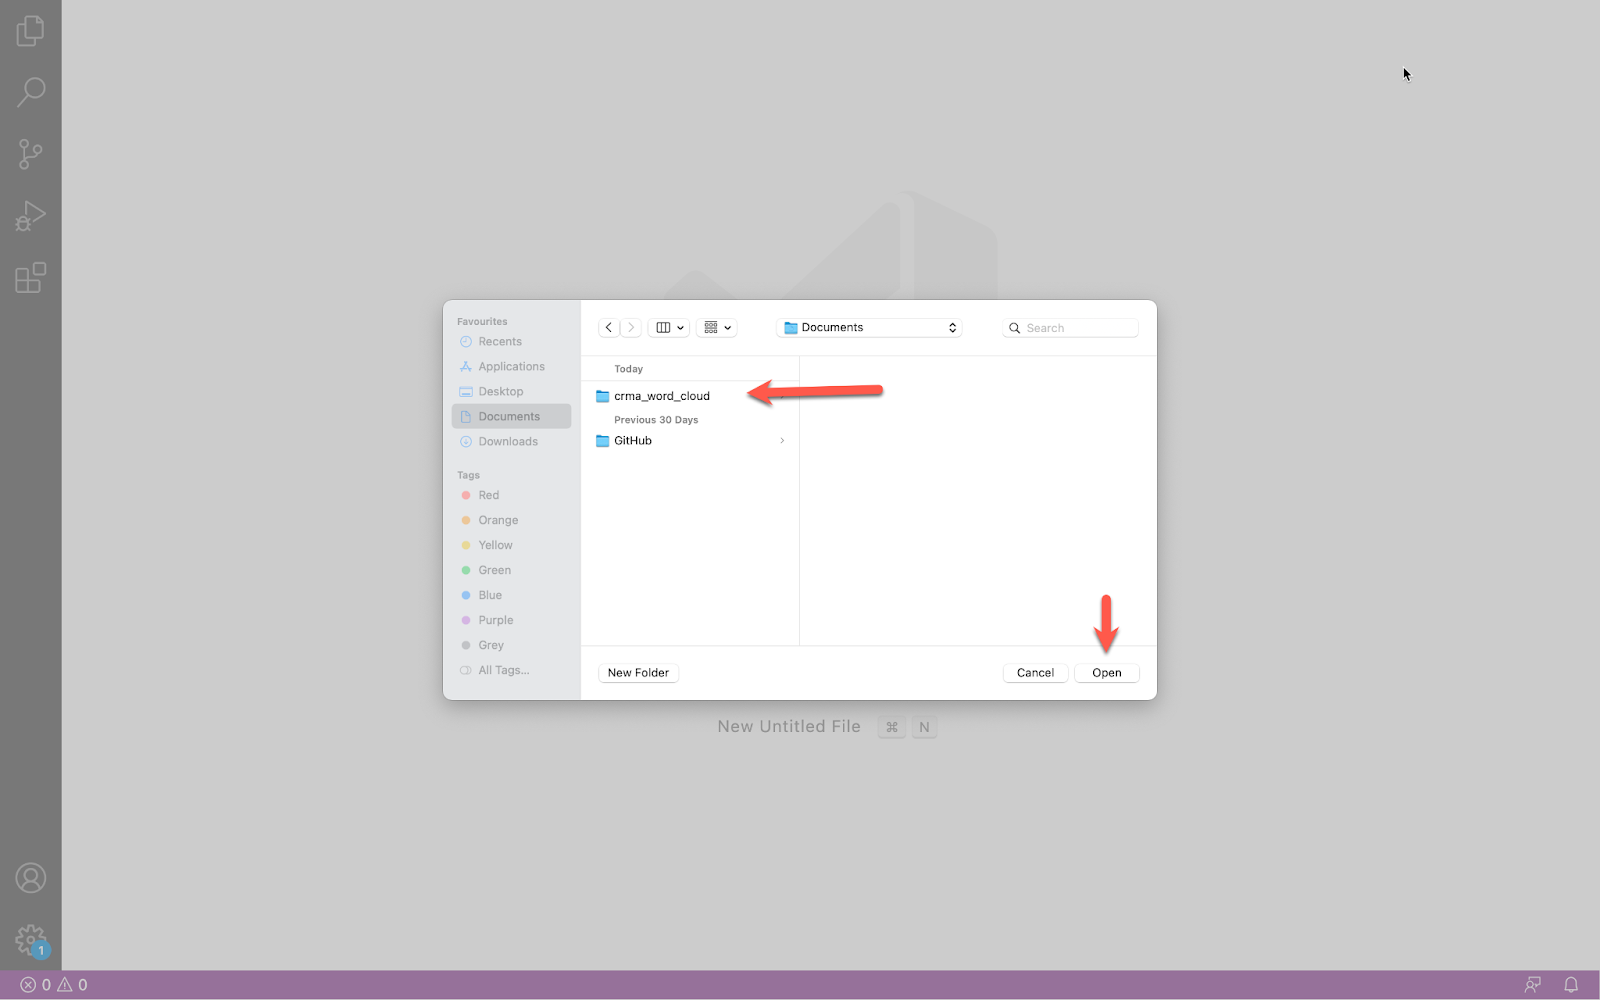
Now that we have authenticated and authorized an org, next, explore the project we have downloaded from Github in VS Code. First, launch VS Code then click on the File menu → Open Folder
Select the folder we extracted the project from Github and click Open
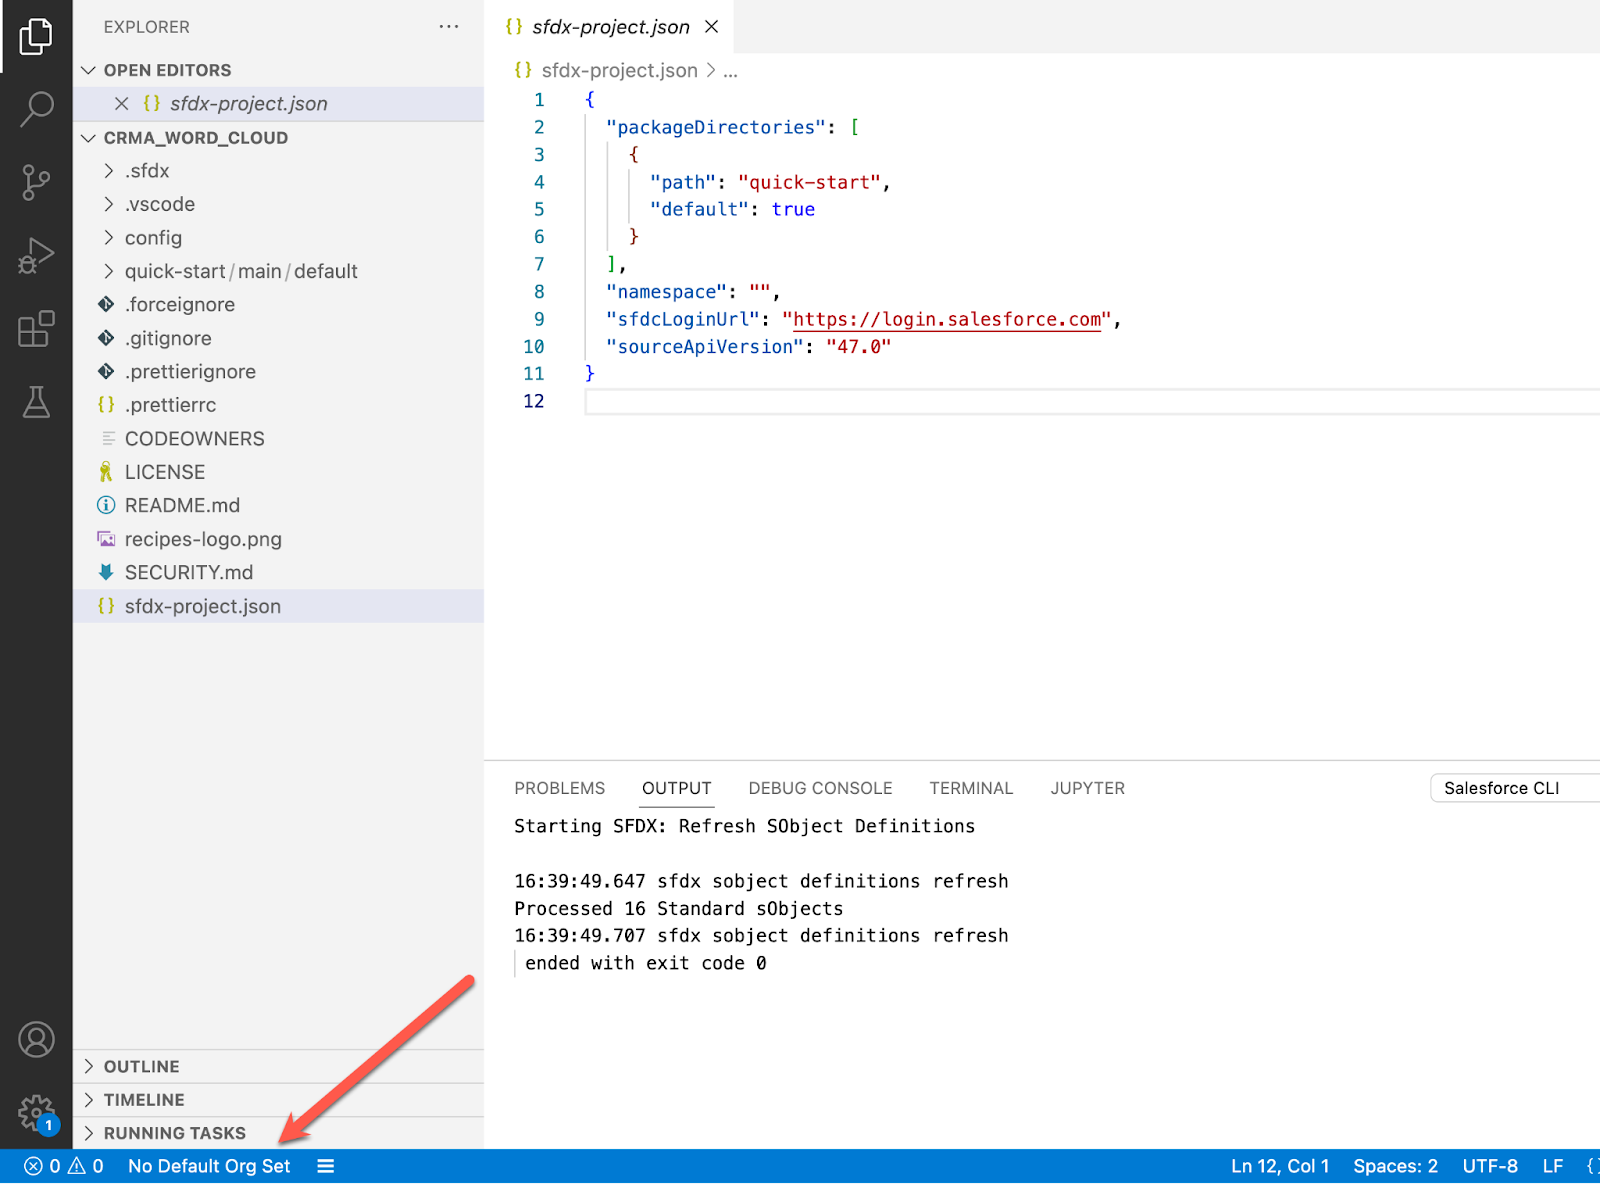
Now, you can see the project in VS Code. Make sure you select the org to which you have authenticated earlier by Clicking on the text “No Default Org Set” at the bottom left corner.
If you already see the right org alias displayed there, you don’t need to follow the next step.
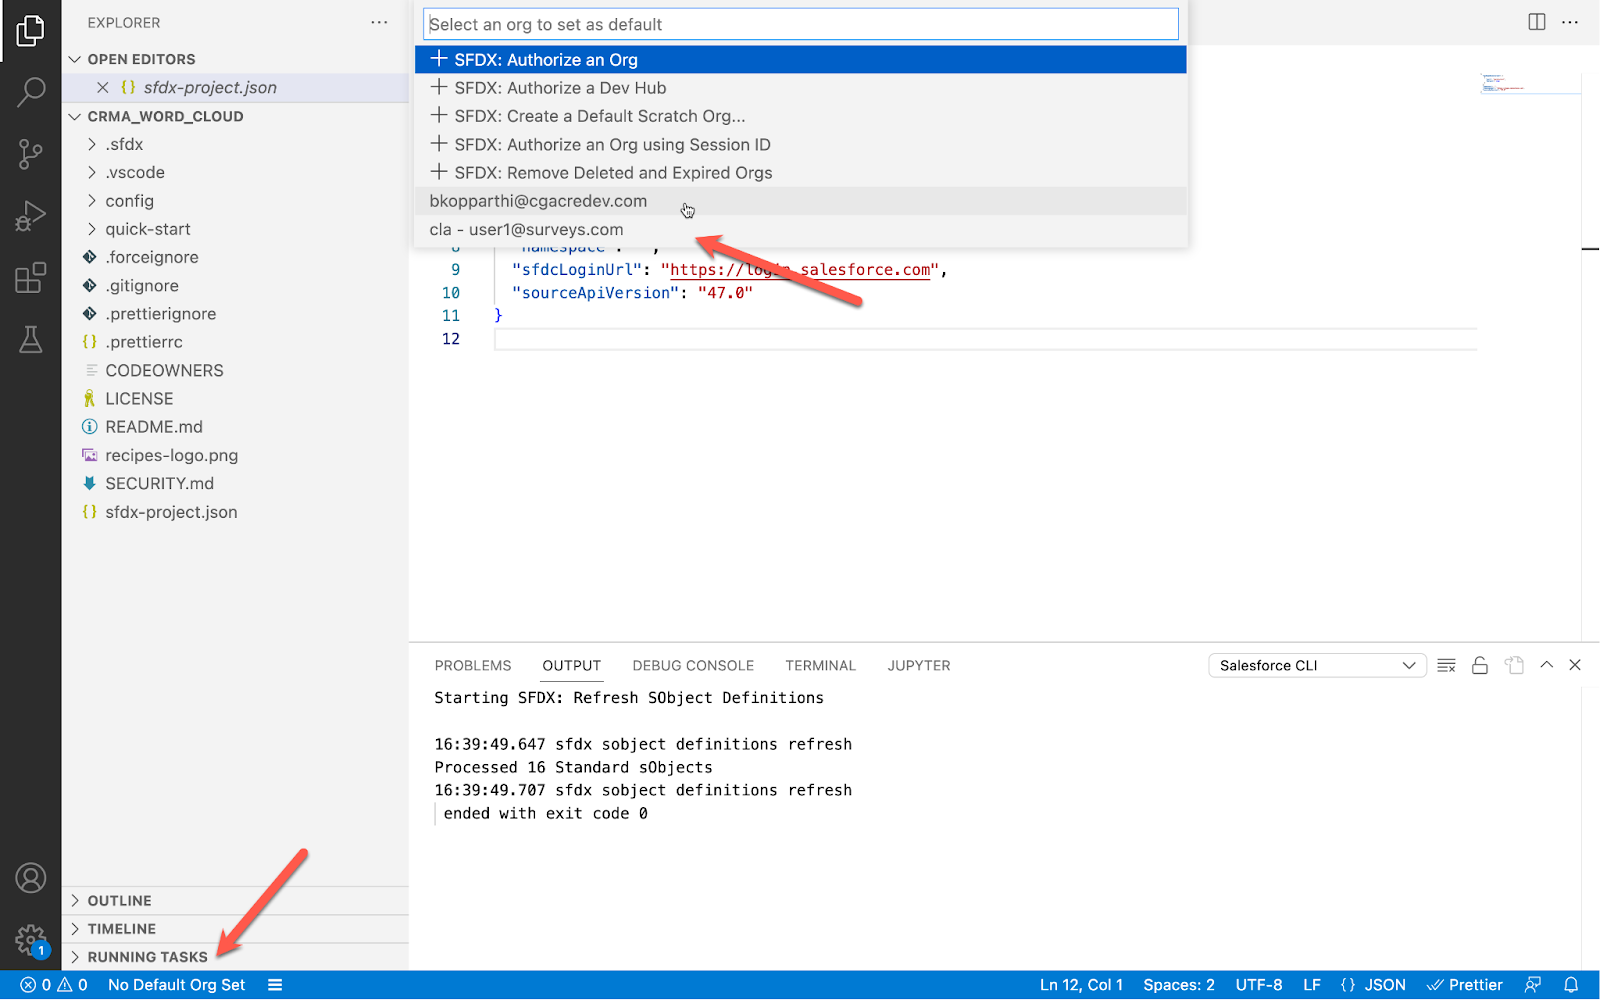
In my case, no org is set as default to the project, So I will have to manually set an org for this project. First, Click on the text that says “No Default Org Set“ then choose the right org at the top menu. I would be using the org aliased ”cla”.
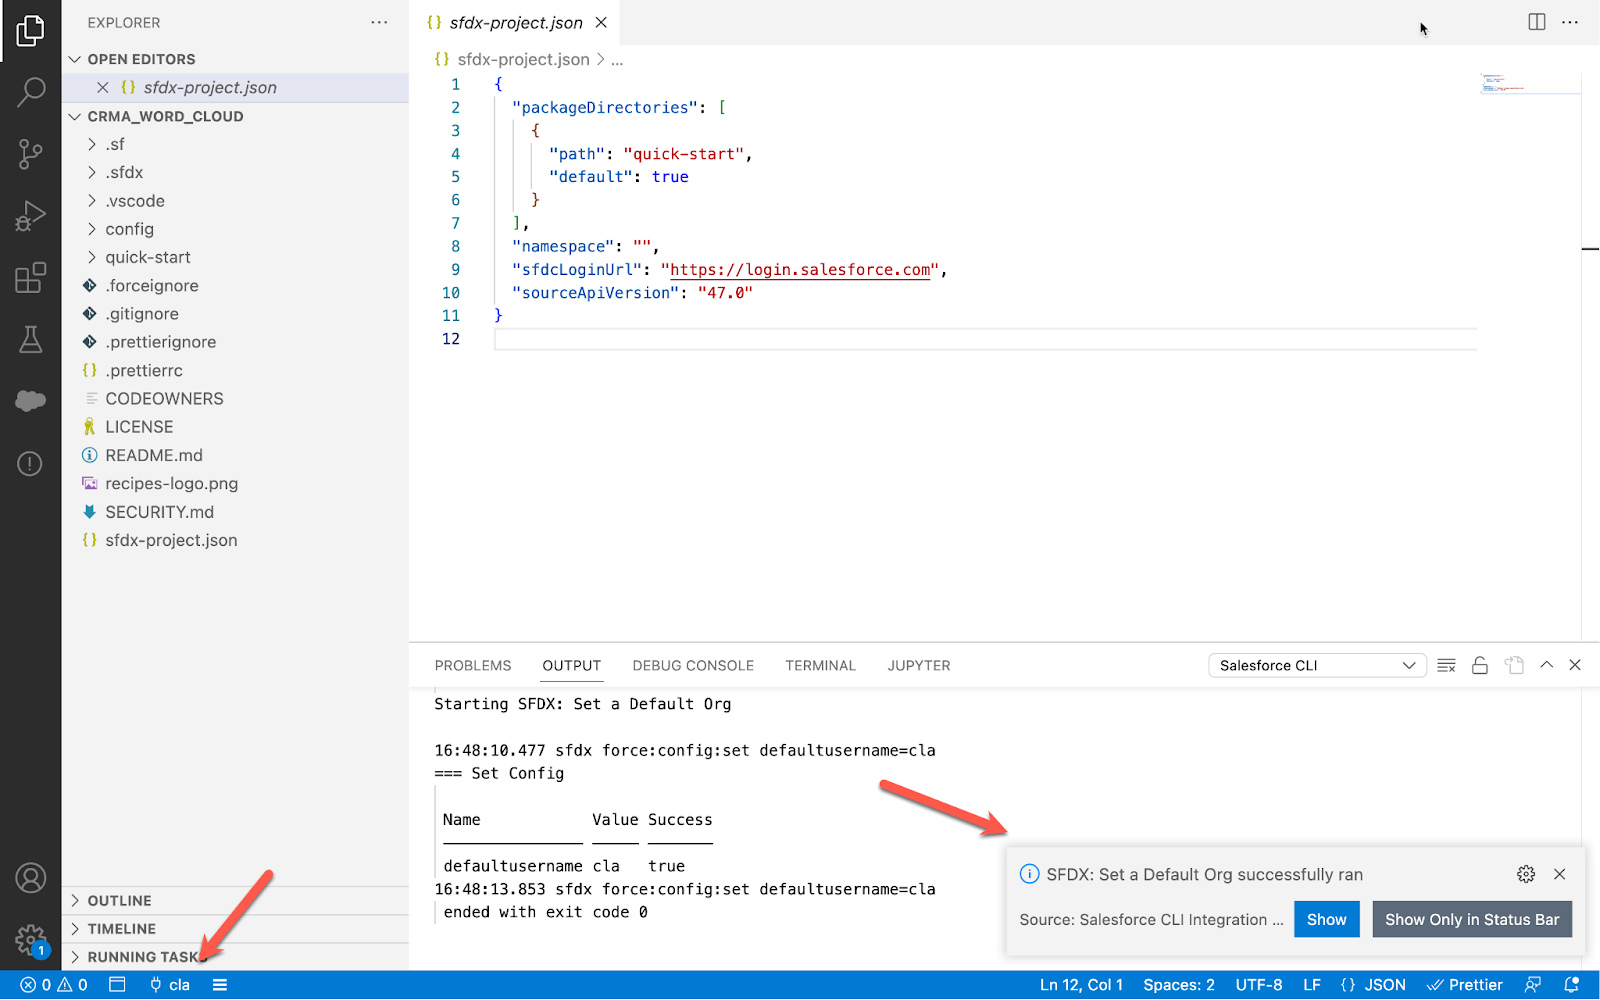
Once done, you can see the message saying SFDX: Set a Default Org successfully ran and view the org name on the bottom left corner of VS Code.
Next, right-click the ‘quick-start’ folder in the project and choose SFDX: Deploy Source to Org
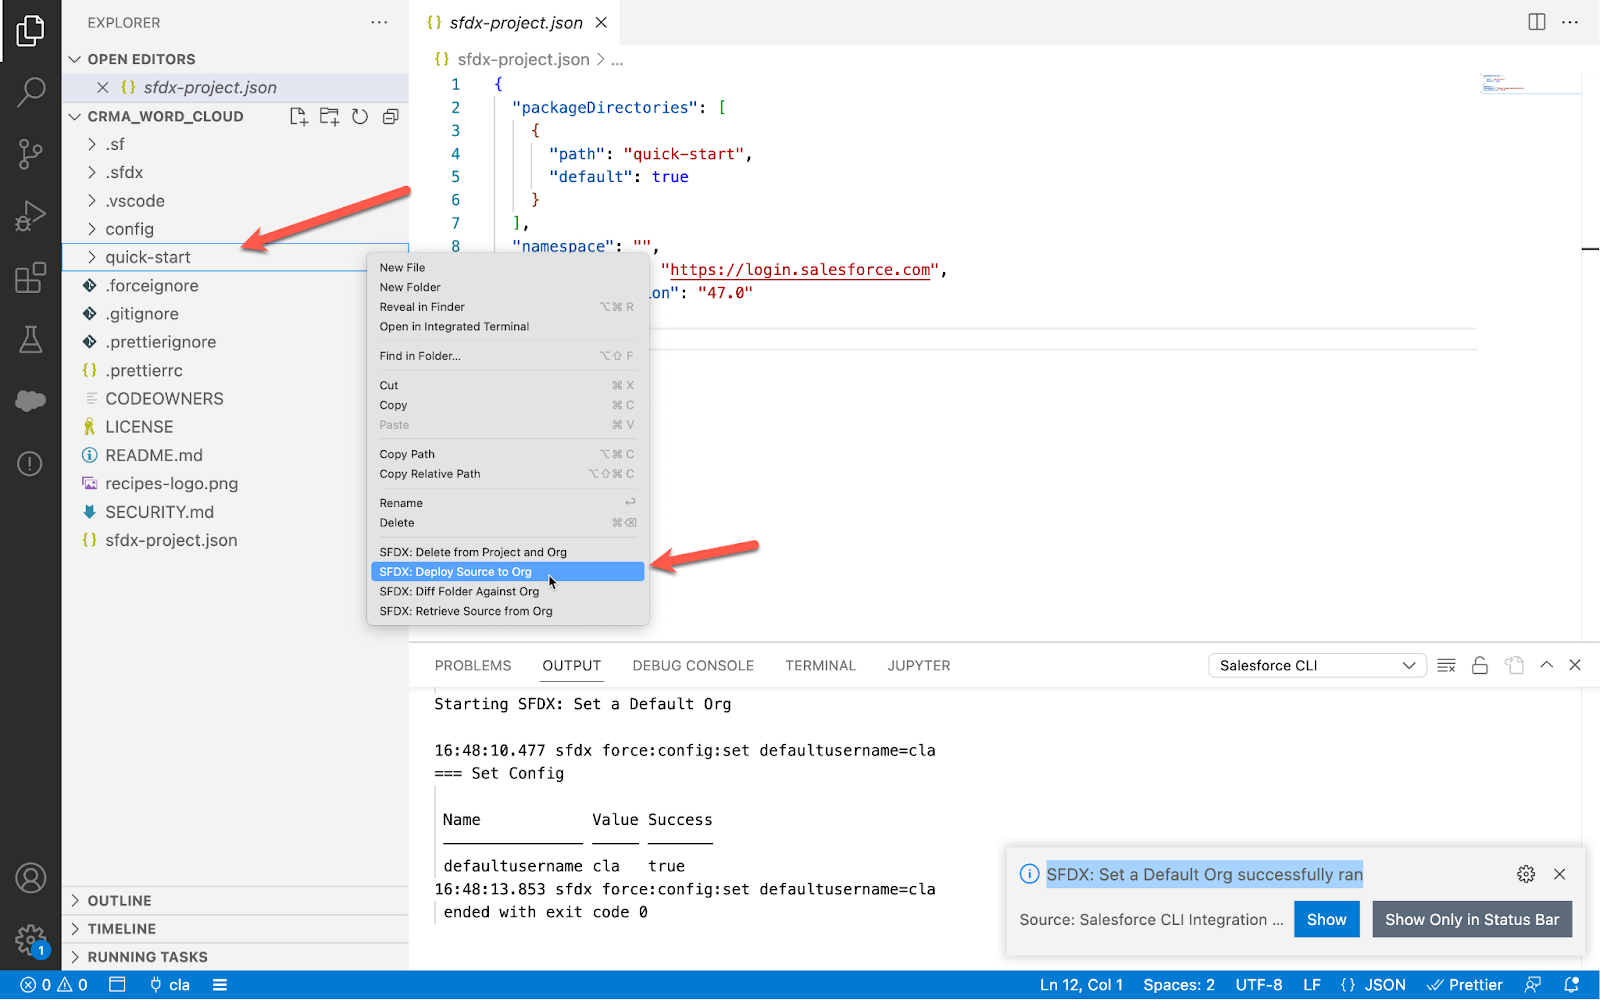
Now, wait for the deployment to finish. Once you see the message SFDX: Deploy Source to Org successfully ran, you have successfully deployed the LWC and are ready to use it in your dashboard.
How to Use the Dashboard?
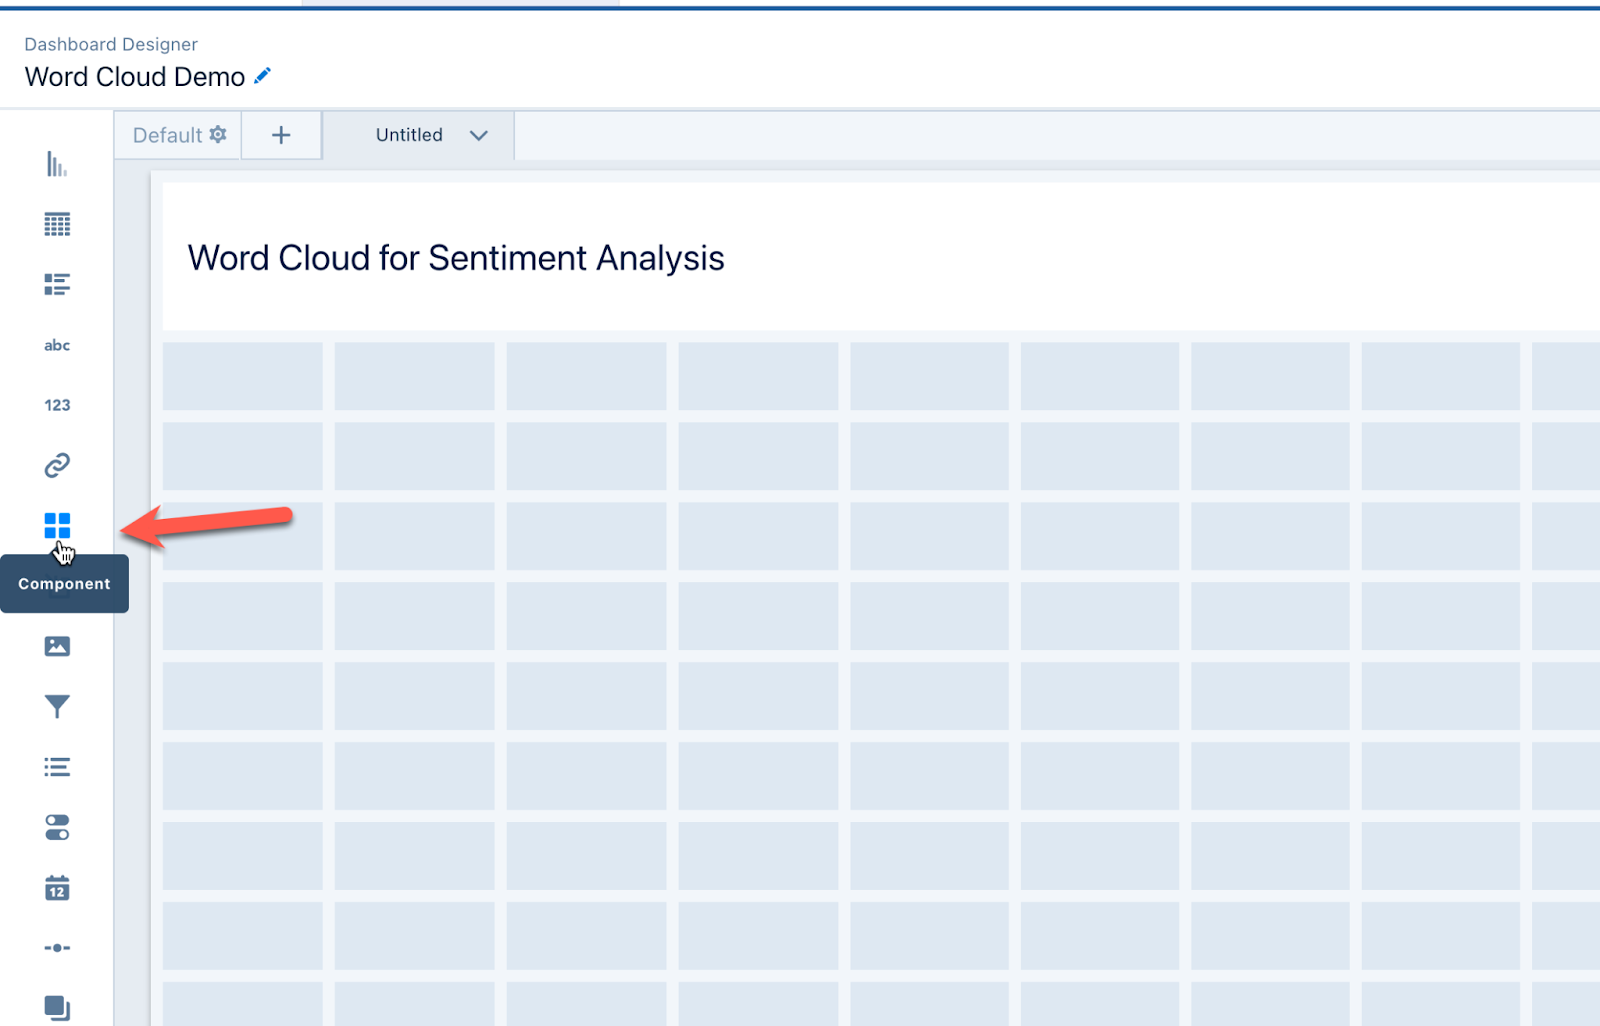
Using the Word Cloud Lightning Web Component in CRM Analytics is quite simple. You can start by creating a new dashboard or opening an existing one. Next, drag the component widget onto the canvas.
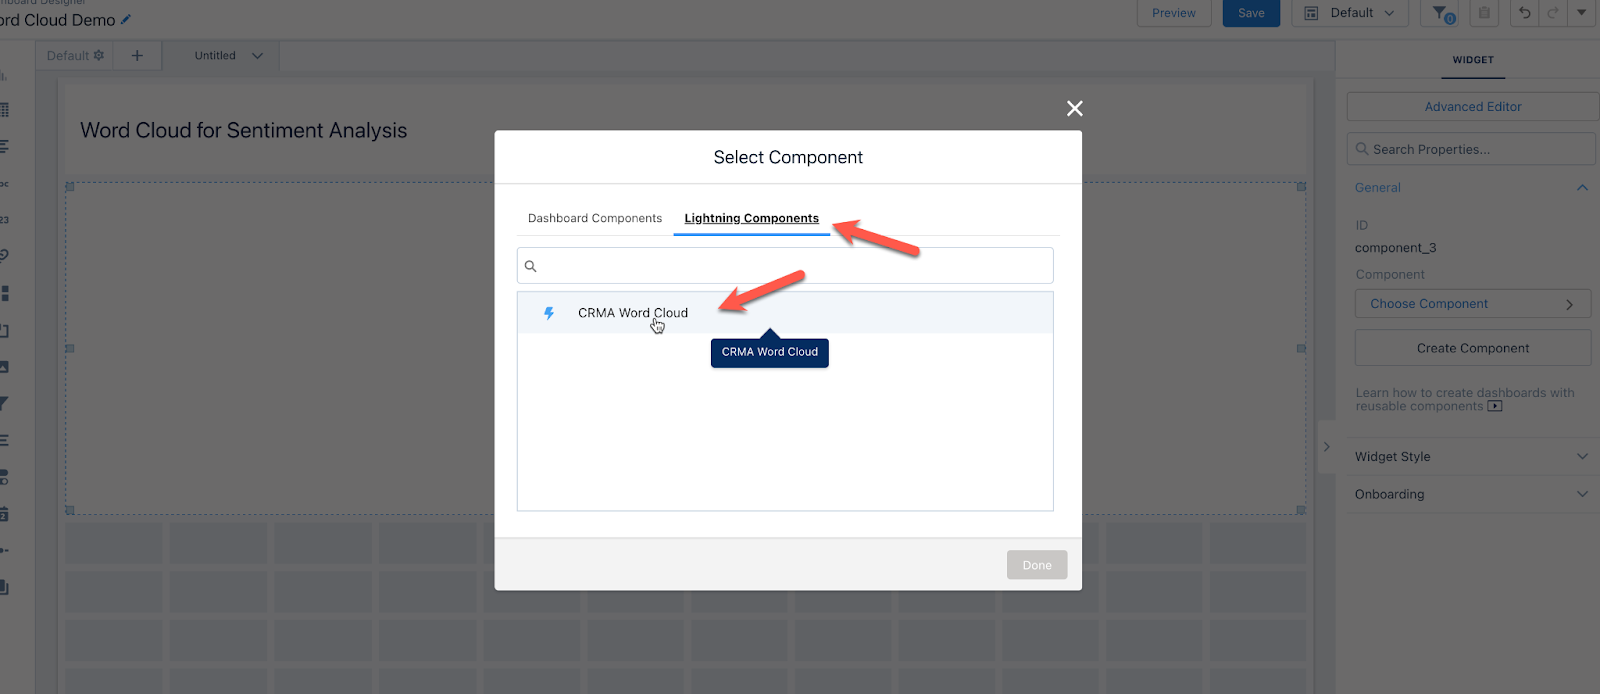
Select Lightning Components → CRMA Word Cloud
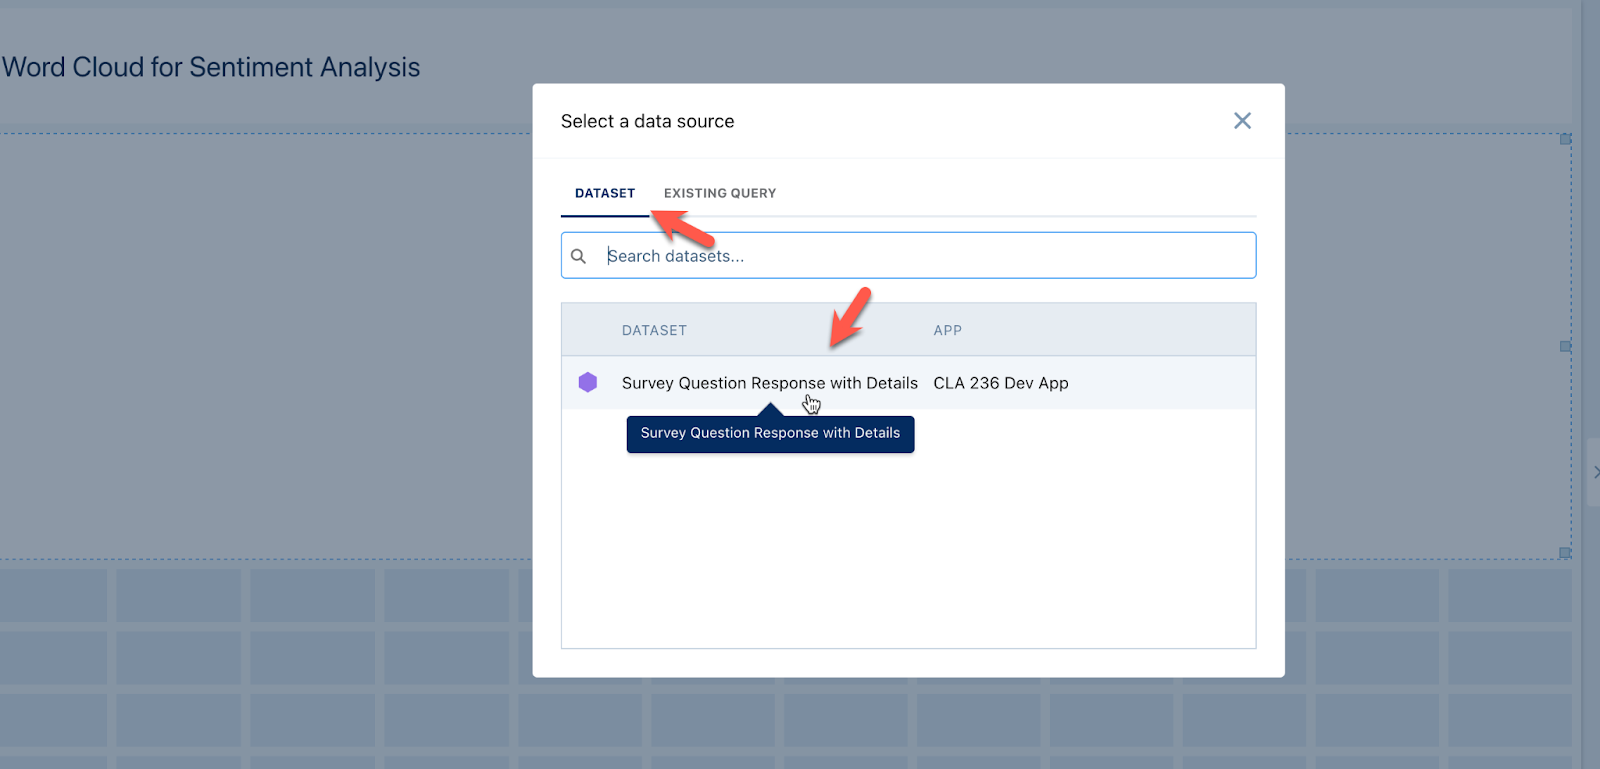
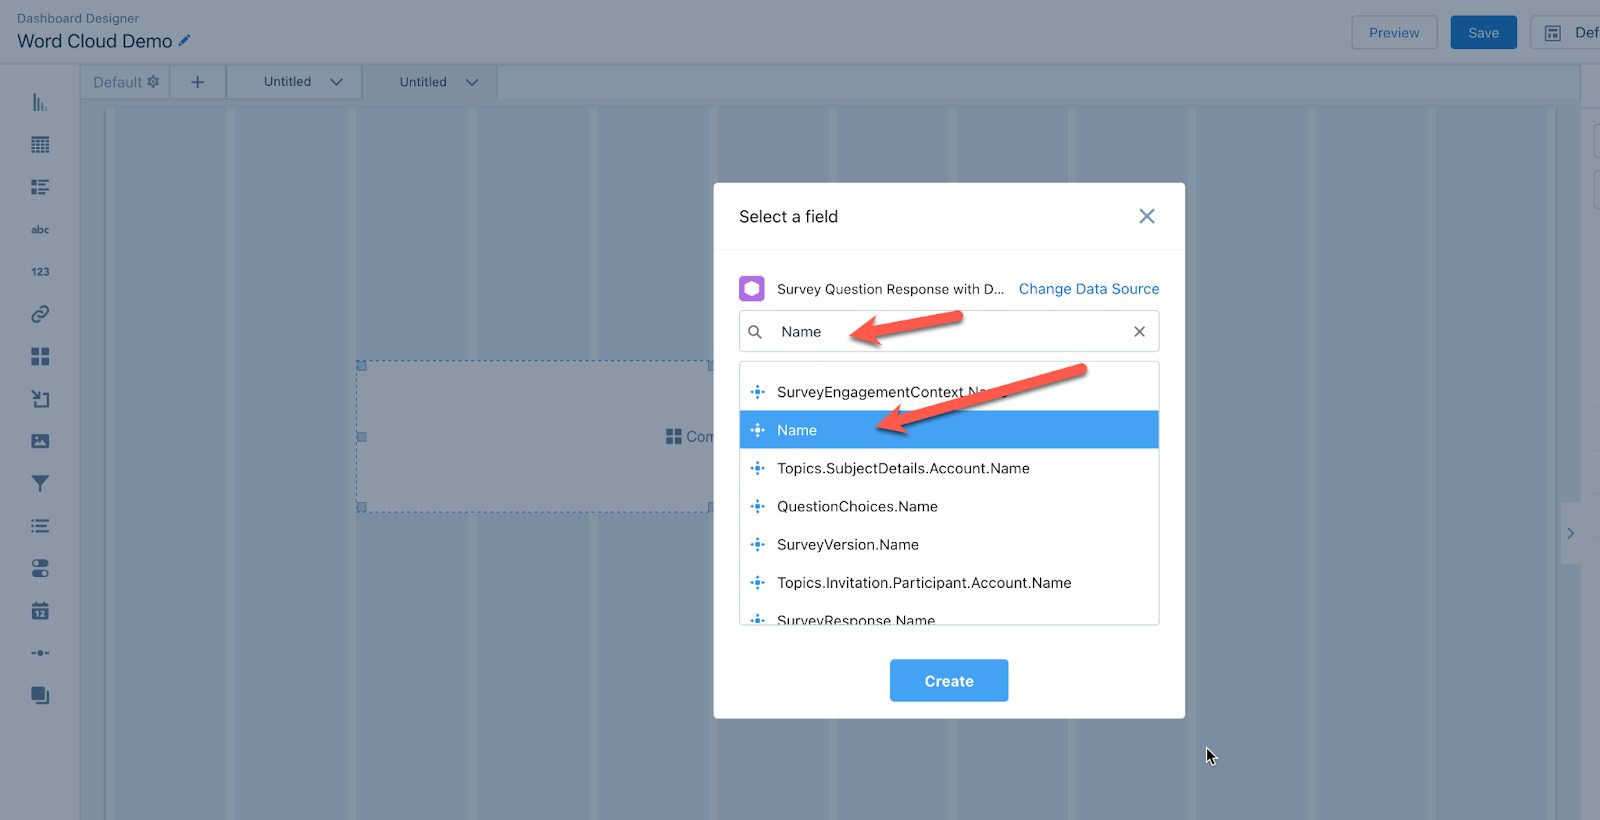
Select a dataset to be associated with this component. For this use case, we use the Survey Question Response with Details dataset.
Select the field with response text, on which we can plot the word cloud. Search and choose the field, Name, which has the survey response short text.
Next, configure the attributes. Word Cloud components require a few attributes to be set before they can be utilized in a dashboard. Find the full description of the attributes here: Component Attribute Definition.
On completing the configuration, the dashboard lights up with Word Cloud visualization, as below.

If you have sentiment Insights turned on, you can configure it to filter to a particular sentiment as well, to get deeper insights. To enable it, drag and drop a List filter on the canvas and choose the Sentiment field.

And, select the sentiment value for which you want to refine the word cloud using the List filter.

Component Attribute Definition
Words
This field should contain the text on which the word cloud should be plotted.
Measure Column
This field should be a measure that defines the size of the word in the word cloud.
Parts of Speech
This is a comma-separated list of parts of speech that you want to include in the word cloud. The complete list of supported tags is given here.
Height
Use this attribute to adjust the height of the component.
Width
Use this attribute to adjust the width of the component.
Min Text Size
This attribute defines the minimum font size of the words in the word cloud.