
Invoke a MuleSoft RPA Process from Flow using External Services
MuleSoft Robotic Process Automation (RPA) gives you the power to automate business processes that usually require human input and interact with systems that don’t have an API, extending the reach of Salesforce’s process automation capabilities by integrating these RPA processes into flows in Salesforce as of Winter ’23!
Use MuleSoft RPA Manager to publish REST APIs for your RPA processes to Anypoint Exchange, which you can then register as External Services in Salesforce and invoke from low-code tools like Flow Builder.
This post describes the configuration steps necessary to invoke a MuleSoft RPA Process in Flow Builder. It assumes familiarity with MuleSoft RPA, Named Credentials and External Credentials, Permission Sets, External Services, and Flow Builder.

Step 0: MuleSoft RPA Pre-requisites
- Configure the connection between MuleSoft Anypoint platform and your org to import MuleSoft RPA APIs.
- In MuleSoft RPA Manager, publish the RPA process as a REST API to Anypoint Exchange.
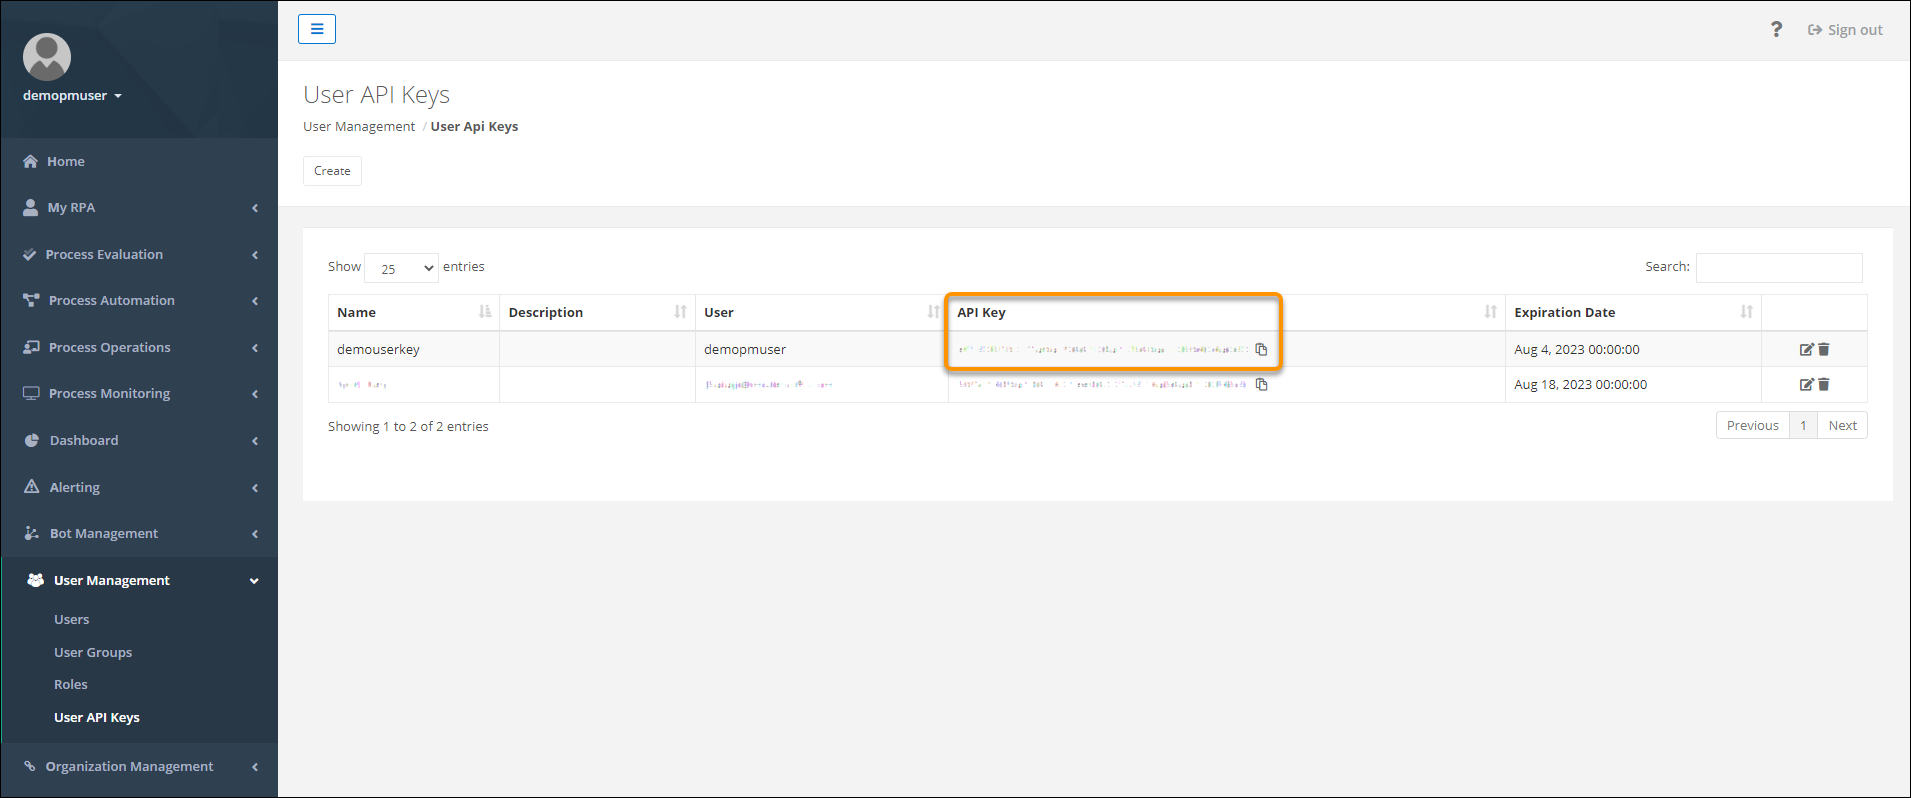
- In MuleSoft RPA Manager, copy the API key from the User Management | User API Keys page.
MuleSoft RPA Manager: User Management page
Steps 1-3: Connect Salesforce to MuleSoft Anypoint Platform
These steps create the initial connection between MuleSoft Anypoint platform and your org:
- Step 1: Create a Connected App in MuleSoft Anypoint Platform – A connected app in MuleSoft Anypoint platform allows Salesforce to call MuleSoft APIs.
- Step 2: Create an Authentication Provider – Use the ID and the secret from your MuleSoft Anypoint Platform connected app to create an authentication provider.
- Step 2b: Update Your MuleSoft Anypoint Platform Connected App – Use the Salesforce authentication provider callback URL to update your MuleSoft Anypoint Platform connected app.
- Step 3: Create a Legacy Named Credential (Retrieve APIs) – Create a legacy named credential to access/authenticate into your MuleSoft Anypoint Platform connected app from Salesforce and retrieve the APIs published to MuleSoft Anypoint Exchange. The legacy named credential stores the URL for MuleSoft Anypoint Platform. External Services uses the legacy named credential when listing the MuleSoft APIs available for import.
Note: the ability to create a ‘Legacy’ named credential is still supported, although it will be discontinued in a future release, at which point, this portion of the instructions will be updated to reflect the new capability.
Salesforce: Named Credentials Home Page

Step 4: Create a Named Credential (Runtime) and External Credential
Note: MuleSoft RPA authenticates clients invoking RPA processes through API keys. The Salesforce Winter ’23 release includes new functionality in Named Credentials and External Credentials that supports this type of authentication.
- Create an external credential, permission set mapping and custom header
- Overview
- Create a second named credential that stores the endpoint for MuleSoft RPA Manager. External Services uses the second named credential when invoking “runtime” the MuleSoft RPA process in a flow.
- External credential:
- Before creating a second named credential, first create an external credential.
- Create an external credential to capture the API key and other authentication details.
- Then create a named credential to store the actual endpoint.
- This allows for multiple endpoints to be addressed with the same authentication configuration.
- After entering the details for the external credential, click Save. You’re taken to the Named Credentials screen. Now you need to create a permission set mapping for this new external credential. This mapping ensures that only the correct users get access to these credentials.
- Before creating a second named credential, first create an external credential.
- Permission set mappings:
- Click External Credential and select the external credential you created.
- Scroll to Permission Sets Mappings so you can link the external credential to a user’s permission set.
- Click New to create a permission set mapping for this external credential using the details below for an external credential that uses ‘Custom’ as the authentication protocol.
- Custom headers:
- Lastly, create a custom header for this external credential using the the details below as guidance for how to create a custom header.
- Overview

Example
Salesforce: External Credentials Detail Page

- Create a named credential
- Now that you have an external credential, create a named credential and then link it to the external credential you just created in the previous step. As mentioned before, this second named credential stores the endpoint for MuleSoft RPA Manager. External Services uses the second named credential when invoking “runtime” the MuleSoft RPA process in a flow. Use the details below for how to create a named credential.

Example
Salesforce: New Named Credential Window

- Verify that the external credential and the named credential you just created are linked
- From the Named Credentials page, click External Credentials.
- Click the name of the external credential from this list and confirm that the named credential you just created appears in the Related Named Credentials area shown in the example below.
- As a reminder:
- The Named Credential stores the MuleSoft RPA Endpoint
- The External Credential stores the MuleSoft RPA API Key + Authentication details
Example
Salesforce: External Credentials Detail Page

Step 5: Register the MuleSoft RPA API as an External Service
As you are configuring the external service, recall that you created two named credentials.
- Legacy named credential (Retrieve APIs) – this named credential stores the MuleSoft Anypoint platform URL and is used to retrieve the APIs published to MuleSoft Anypoint Exchange. Use this named credential in the “Select a MuleSoft Anypoint Platform Account” screen.
Example

- Named credential (Runtime) – this named credential stores the MuleSoft RPA Manager URL and is used when invoking “runtime” the MuleSoft RPA process in a flow. Use this named credential in the “Configure your MuleSoft Anypoint Platform Service” screen.
Example

- Note: In step 6 of the Register the MuleSoft RPA API as an External Service help documentation, ensure that you select the
startProcessandgetProcessExecutionStatusoperations for the MuleSoft RPA API.
Example


Step 6: Invoke a MuleSoft RPA Process in a Flow
- Now you are ready to start and check the status of the MuleSoft RPA process from a flow.
- If you follow the steps outlined in the help docs Invoke a MuleSoft RPA Process in a Flow, listed below are a few additional tips to help guide you through the flow configuration.
Create Resource for RPA Process Input Variables
Tip: In step 2, when creating a New Resource to store the input variables for the RPA process, you can obtain the External Service Name and Apex Class Name from the External Services Detail Page to help configure the New Resource
Salesforce: External Services Detail Page

Assign Values to RPA Process Input Variables
Tip: In step 3, you can obtain the information about each variable/input parameter that needs to be defined in the above Apex class from the External Services Detail Page as well as the OpenAPI specification (a few examples shown below).
RPA Process OpenAPI Specification

OperationId: startProcess > ProcessExecutionWithExecutionId

ProcessExecutionWithExecutionId > ProcessExecution

ProcessExecution > inputArguments
