
From Chris Albanese: Summer 21 Feature: Get Resources and Available Time Slots Through New Apex Methods
Salesforce Scheduler introduced a new feature in the Summer ’21 Release which allows developers to easily make custom time slot screen flow components that interact with external systems. The new Apex methods call the Get Appointment Candidates and Get Appointment Slots APIs. This capability helps you easily get all the service resources and available time slots or get available slots for a resource.
With this new feature developers have the choice of using the Scheduler REST APIs and the Scheduler Apex methods. The REST APIs are a powerful tool that allows you to develop custom user interfaces and applications that run on your own websites. The Apex methods offer a great option for developers building custom UI components and processes that are run by users that are already logged into Salesforce, such as running a Lightning Flow launched from a button on the Account Screen or viewing a page inside of a Salesforce Experience site.
Check this out below.
Calling the Scheduler Get Appointment Candidates API with Apex
Here’s a little concept illustrator to show you how easy it is to call the API using Apex.
Let’s say you want to ask Scheduler to return the next time slot available for a Work Type Group and Territory. The user is a call center user, talking to a customer and the customer says “give me your next available appointment please”.
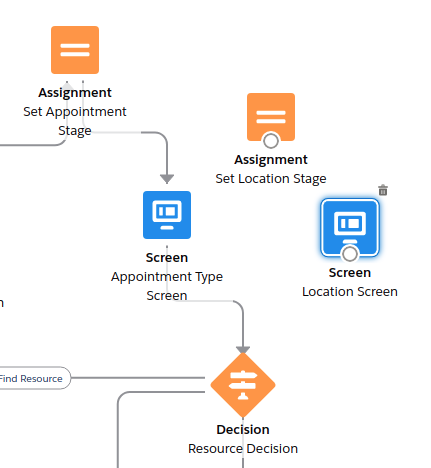
Solution Architecture
- A simple Flow embedded on the account page
- The flow calls an @invocableMethod which uses the new API
- The method returns the 1st time slot found
- The flow creates a service appointment using the time slot returned
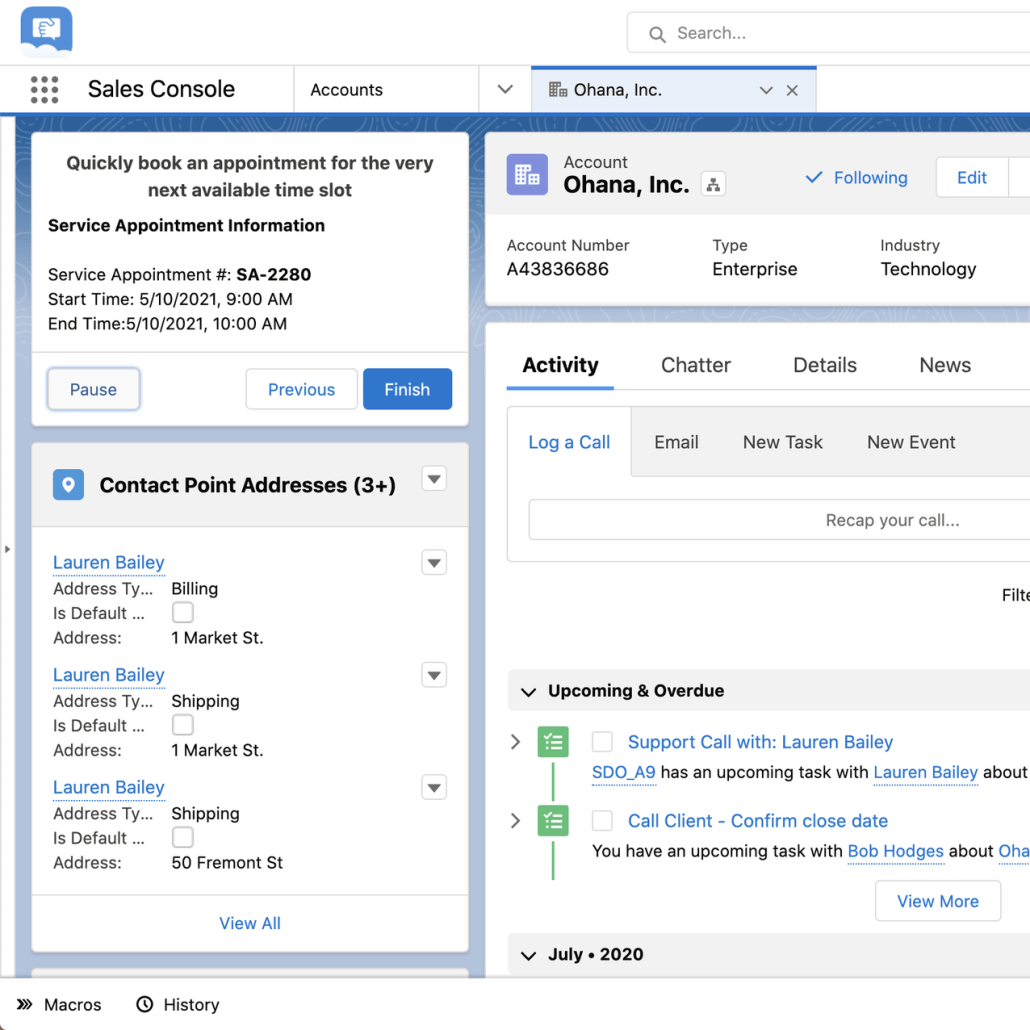
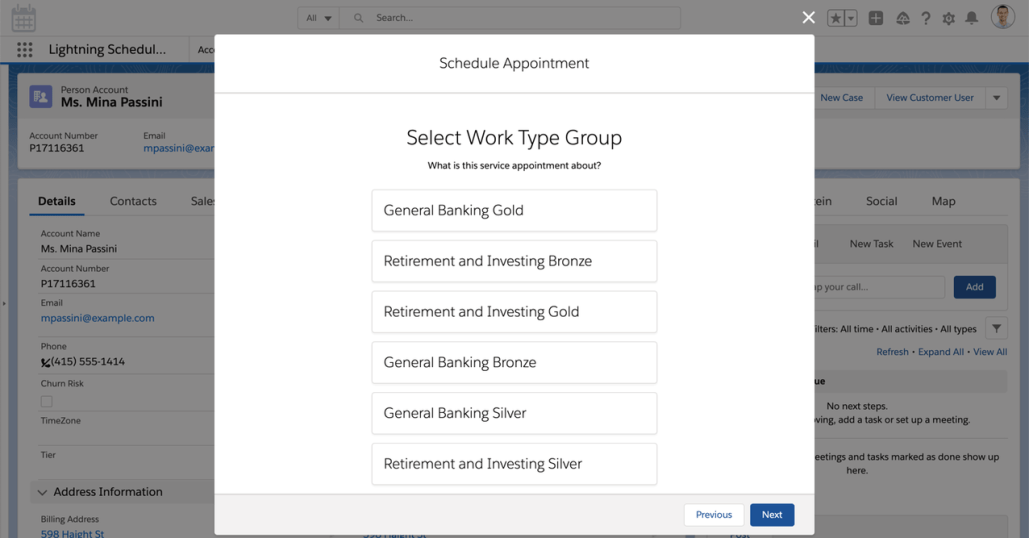
User Experience
The top left of the 2 screen shots below illustrate how the call center user can ask the scheduler to return the next available time slots and create a service appointment.

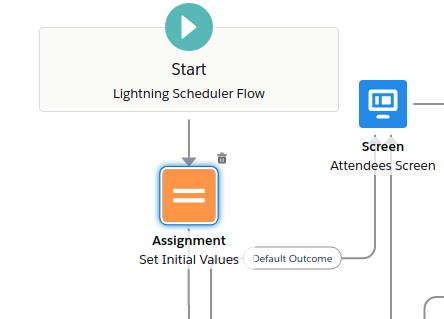
Screen Flow
As you can see in the screen shot below, the flow is pretty simple. It takes in the account id from the Account Page. It prompts the user for Work Type Group, Territory and Earliest Start Time. It passes these parameters into the Apex Action. If a slot is returned, it creates a service appointment, if not, an informational message is displayed.

Apex Class
As you probably already know, you can call Apex Methods from a Lightning Flow using the Action component. There are lots of great articles and tips on building @invocableMethods, which I won’t go into here. For this example, the method I created takes in the parameters, calls the Scheduler Apex Method named lxscheduler.SchedulerResources.getAppointmentCandidates, and returns the first result found, or returns nothing if no slots are found.
Receiving the Input Parameters from the Flow
In the example code below, to accept the input parameters from the flow, I created a class called payloadIn. It contains variables for Work Type Group Id, Service Territory Id, Scheduling Policy Id, Account Id and Start Date Time. We use these values to call the Scheduler Method. Variables like Account Id are not mandatory, I’ve just included it in my example.
Setting the Input Parameters in the Apex Method
The Get Appointment Candidates API provides an easy to use class to set the parameters that you want to pass to the Get Appointment Candidates API, lxscheduler.GetAppointmentCandidatesInput. As you can see in the example code, I simply set the parameters to the values passed in from the flow. I’ve hard coded the EndTime to be the Start Time plus 3 days. You can of course change this to be more dynamic.
Calling the Apex Method
It is super simple and is represented by this line in the example code:
String response = lxscheduler.SchedulerResources.getAppointmentCandidates(input);
Note, that no authentication code, connected apps, named credentials and other items are required to call the Apex Method. Since the running user is already authenticated, they can call the Scheduler API, just like they can call any other Apex Method they have access to.
Hooray! This is what is so awesome about this new API and makes code based development for Scheduler so much easier for these types of use cases.
Parsing the Results – they’re different from the REST API results
The method returns the results as a JSON string. I won’t go into the ins and outs of JSON and you can certainly find out more with a quick web search, but what you need to know is that the results from the lxscheduler.SchedulerResources.getAppointmentCandidates call are slightly different from the REST API call.
The REST API call for getAppointmentCandidates returns this format:
{
"candidates" : [ {
"endTime" : "2019-01-23T19:15:00.000+0000",
"resources" : [ "0HnB0000000D2DsKAK" ],
"startTime" : "2019-01-23T16:15:00.000+0000",
"territoryId" : "0HhB0000000TO9WKAW"
}, {
"endTime" : "2019-01-23T19:30:00.000+0000",
"resources" : [ "0HnB0000000D2DsKAK" ],
"startTime" : "2019-01-23T16:30:00.000+0000",
"territoryId" : "0HhB0000000TO9WKAW"
}, {
"endTime" : "2019-01-23T19:45:00.000+0000",
"resources" : [ "0HnB0000000D2DsKAK" ],
"startTime" : "2019-01-23T16:45:00.000+0000",
"territoryId" : "0HhB0000000TO9WKAW"
}]
}
The Apex Method for getAppointmentCandidates returns this format:
{{
"endTime" : "2019-01-23T19:15:00.000+0000",
"resources" : [ "0HnB0000000D2DsKAK" ],
"startTime" : "2019-01-23T16:15:00.000+0000",
"territoryId" : "0HhB0000000TO9WKAW"
}, {
"endTime" : "2019-01-23T19:30:00.000+0000",
"resources" : [ "0HnB0000000D2DsKAK" ],
"startTime" : "2019-01-23T16:30:00.000+0000",
"territoryId" : "0HhB0000000TO9WKAW"
}, {
"endTime" : "2019-01-23T19:45:00.000+0000",
"resources" : [ "0HnB0000000D2DsKAK" ],
"startTime" : "2019-01-23T16:45:00.000+0000",
"territoryId" : "0HhB0000000TO9WKAW"
}
}
Did you notice the difference? The outer wrapper for “candidates: [ …]” is missing from the results, so you need to make sure you deserialize the results using the proper format.
Here’s the class I used to deserialize the results:
public class schedulerCandidates {

    public datetime startTime;
    public datetime endTime;
    public List<String> resources;
    public String territoryId;


    public static list<schedulerCandidates> parse(String json) {
        return (list<schedulerCandidates>) System.JSON.deserialize(json, list<schedulerCandidates>.class);
    }
}
Example Code
public with sharing class LXScheduleFirstAvailable {

    @invocableMethod(label='Schedule to First Available' description='Schedule to whomever is next')
    public static list<event> ScheduleIt(list<payloadIn> payloadList ){
        if(payloadList == null || payloadList.size() <> 1) return null;
        payloadIn pl = payloadList[0];
        lxscheduler.GetAppointmentCandidatesInput input = new lxscheduler.GetAppointmentCandidatesInputBuilder()
            .setWorkTypeGroupId(pl.workTypeGroupId)
            .setTerritoryIds(new List<String>{pl.serviceTerritoryId})
            .setStartTime(pl.startDateTime.format('yyyy-MM-dd\'T\'HH:mm:ssZ'))
            .setEndTime(pl.startDateTime.addDays(3).format('yyyy-MM-dd\'T\'HH:mm:ssZ'))
            .setAccountId(pl.accountId)
            .setSchedulingPolicyId(pl.schedulingPolicyId)
            .setApiVersion(Double.valueOf('50.0'))
            .build();
        //call the Apex Method - no REST API authentication or API user needed!!!
        String response = lxscheduler.SchedulerResources.getAppointmentCandidates(input);
        //parse the results using JSON.deserialize
        if(response==null) return null;
        list<schedulerCandidates> allslots = schedulerCandidates.parse(response);
        //slots found, return just the first one
        if(allslots!=null) {
            event thisevent = new event();
            thisevent.startdatetime = allslots[0].startTime;
            thisevent.enddatetime = allslots[0].endTime;
            thisevent.description = allslots[0].territoryId;
            thisevent.whoid = allslots[0].resources[0];
            return new list<event>{thisevent};
        }
        //no slots found, return null
        return null;
    }
    public class payloadIn{
        @invocableVariable(required=true)
        public string workTypeGroupId;
        @invocableVariable(required=true)
        public string serviceTerritoryId;
        @invocableVariable(required=true)
        public string schedulingPolicyId;
        @invocableVariable(required=true)
        public string accountId;
        @invocableVariable(required=true)
        public datetime startDateTime;
    }

}
Example Code Test Method
@isTest
private class LXSchedulerFirstAvailableTest {
    static testMethod void getAppCandidatesTest() {
        String expectedResponse = '[' +
        '  {' +
        '    \"startTime\": \"2021-03-18T16:00:00.000+0000\",' +
        '    \"endTime\": \"2021-03-18T17:00:00.000+0000\",' +
        '    \"resources\": [' +
        '      \"0HnRM0000000Fxv0AE\"' +
        '    ],' +
        '    \"territoryId\": \"0HhRM0000000G8W0AU\"' +
        '  },' +
        '  {' +
        '    \"startTime\": \"2021-03-18T19:00:00.000+0000\",' +
        '    \"endTime\": \"2021-03-18T20:00:00.000+0000\",' +
        '    \"resources\": [' +
        '      \"0HnRM0000000Fxv0AE\"' +
        '    ],' +
        '    \"territoryId\": \"0HhRM0000000G8W0AU\"' +
        '  }' +
        ']';
        lxscheduler.SchedulerResources.setAppointmentCandidatesMock(expectedResponse);
        Test.startTest();
            LXScheduleFirstAvailable.payloadIn pl = new LXScheduleFirstAvailable.payloadIn();
            pl.workTypeGroupId = '0VSB0000000LB9TOAW';
            pl.serviceTerritoryId ='0HhB0000000TrsdKAC';
            pl.startDateTime = datetime.now();
            pl.accountId = '001B000001KYUM3IAP';
            pl.schedulingPolicyId = '0VrB0000000Kz6Z';
            list<LXScheduleFirstAvailable.payloadIn> plList = new list<LXScheduleFirstAvailable.payloadIn>();
            plList.add(pl);
            List<event> candidateList = LXScheduleFirstAvailable.ScheduleIt(plList);
            System.assertEquals(1, candidateList.size(), 'Should return only 1 record!');
        Test.stopTest();
    }
}
Summary
This new Apex API is awesome and simplifies calling the Scheduler API for use cases where the user is already logged into Salesforce.
Additional Notes about this Example
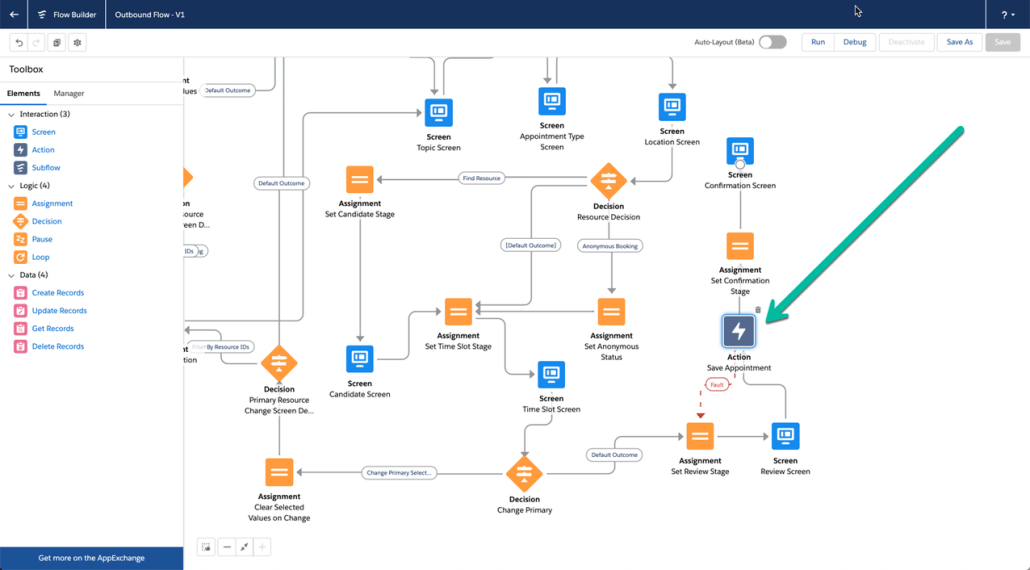
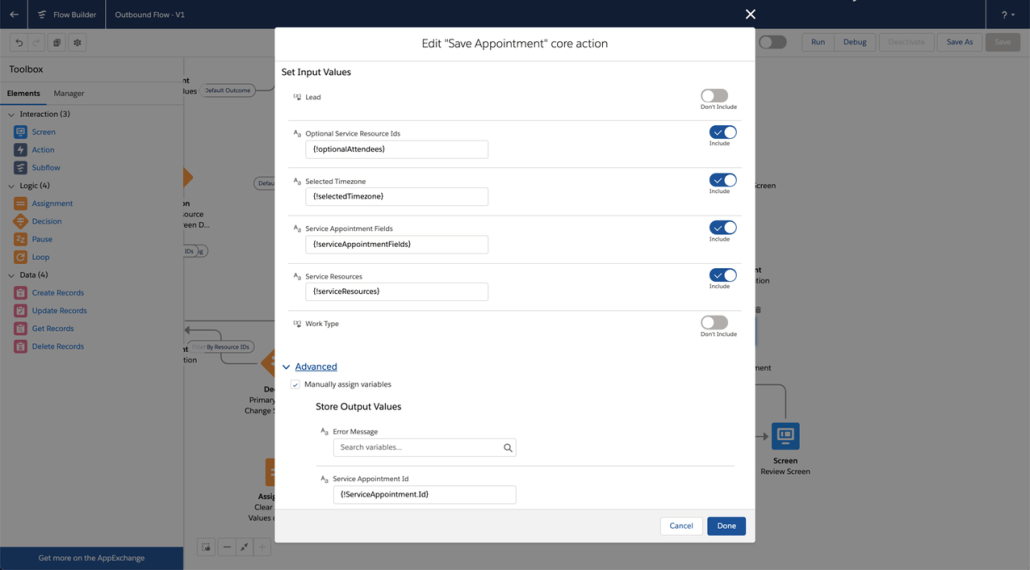
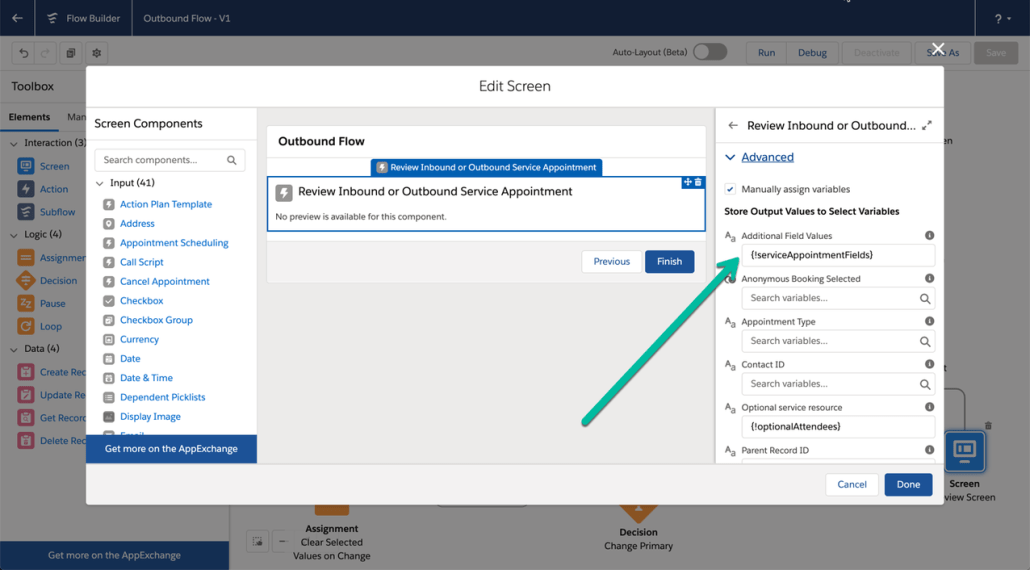
In my example flow, I’m using 2 create record steps to create the Service Appointment and Assigned Resource. In production, you probably want to use the Scheduler flow component called Save Appointment. I’ve described how to use that component here. This component gives you added capabilities to ensure that the time slot selected is still available at the time of record save.


