You can perform insert, update and delete operations in Salesforce Flow. Most of the time, they are enough but what if you want to undelete records from the recycle bin? There isn’t undelete records operation in Flow. However, you can achieve this using this Invocable Apex Action.
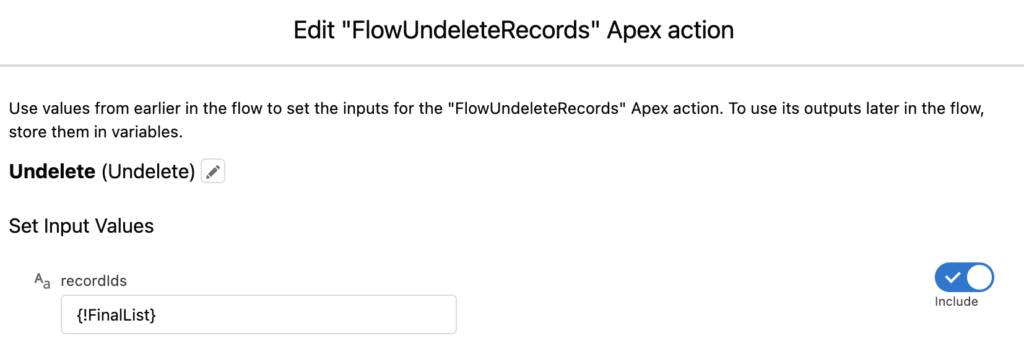
recordIds – Enter a text collection of record Ids to undelete.
CONSIDERATIONS
This Invocable Apex Action undeletes the records from the Recycle Bin. If the record is permanently deleted, which means that it is not in the Recycle Bin anymore, you cannot undelete it.
HOW TO USE
Add an Action element from the Toolbox and search for FlowUndeleteRecords. Pass the text collection of the record Ids to the input parameter called recordIds. Even if you want to pass a single record Id, you still need to create a text collection and pass it as the input value.
Read this post to learn how to find the deleted record Ids and see an example of undeleting records using this Invocable Apex Action.
DEMO
https://unofficialsf.com/wp-content/uploads/2022/09/largeUCSF-300x133.png00Yumi Ibrahimzadehttps://unofficialsf.com/wp-content/uploads/2022/09/largeUCSF-300x133.pngYumi Ibrahimzade2021-12-07 11:19:282021-12-07 11:19:34Undeleting Records with Flow
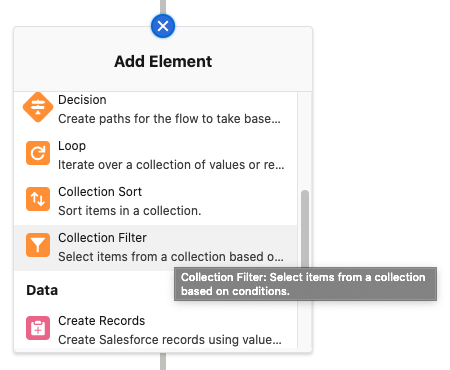
A new out of the box collection processor element joins the fray! With the new Collection Filter element you will be able to pass in a collection of records and filter it down. But that’s not all. This element has a few superpowers:
Simplified Flows: It allows the removal of loops, enabling simpler flows
Very Large Record Sets: It works with very large sets of records, extending the upward limits of Flow
Enhanced Condition Specification: It allows direct inline formulas with the ability to traverse to parents
1. Simplifying flows by replacing loops
Here’s an example of how filtering is typically done today (on the left) and how it can be done in Spring ’22 (on the right):
Finding records in a collection with loops
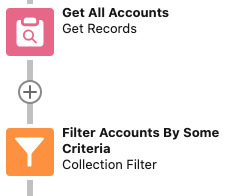
Finding records with the new Filter element
2. Much higher processing limits
In the above three element loop example above, there’s a limit of 2,000 element ‘iterations’ or ‘hits’ in a single flow, which effectively caps the number of records you can process to about 700. Go beyond that and you get the ‘ITERATION_LIMIT_EXCEEDED’ error.
With the new Collection Filter, however, you’ll no longer be bound by this limit. We’ve been able to filter collections of upwards of 50,000 records within seconds! Win.
3. Enhanced condition specification
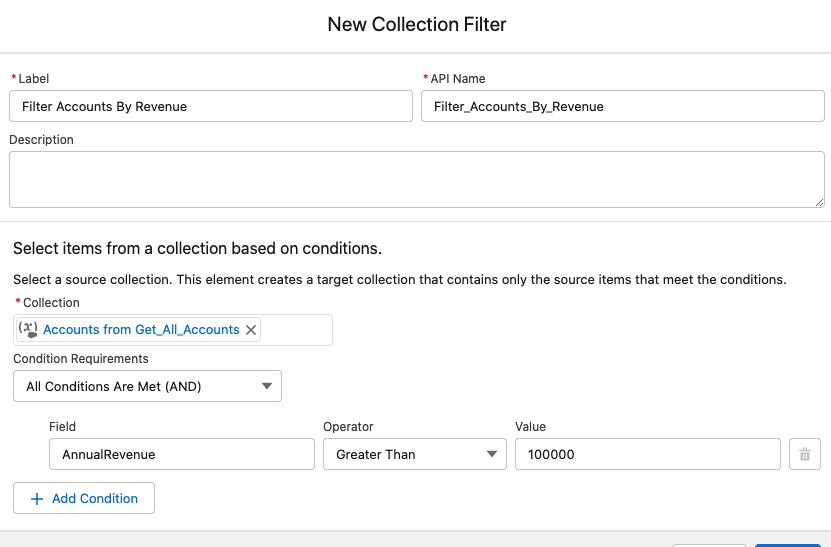
Let’s first look at how conditions are specified. This will be quite familiar. Suppose you want to filter out all of the members of a collection of Accounts that have AnnualRevenue < 100,000. You can do that easily by setting conditions:
However, you can also choose to filter using an inline formula. Take for example an extension of the above scenario where you need to filter a collection of 12,000 accounts with complex criteria not currently supported by ‘Get Records’. Imagine in this fictitious scenario you need to filter by a combination of RecordType, Account Owner criteria, and Parent Account details.
Using the Formula Expression capabilities of the new Filter element you can now do that:
Additional Usage Notes
Filter Collection Saves a New Collection Instead of Overwriting the Existing One
While the ‘Sort Collection’ element overwrites the collection you pass in, the new Filter Collection creates a new one. We did this so you could have the flexibility to create multiple collections from a source collection of records, giving you more flexibility in how you control how your data ‘flows’.
The CurrentItem Variable Persists After Collection Filter is Removed
When the new Filter Collection element is inserted into a flow, a record variable called CurrentItem_FilterElementName is automatically generated and added to the flow to provide a way to use formulas and expressions for filtration.
If the Collection Filter element is deleted from the flow, the CurrentItem variable will be left as a resource in the flow and will need to be deleted manually.
Formula Performance Impact
Note that complex formulas with large amounts of records will impact performance, but by and large it will still be faster than your standard flow looping.
If you can use Conditions instead of a Formula Evaluation to drive your filter logic, you should always use Conditions due to the performance gains. The performance impact is relatively minimal for <500 records but you may start seeing a difference when you exceed 5,000 to 10,000 records.
Advanced Use Case: Avoid ‘Getting’ in Your Loops
For you intermediate to Jedi level Flownatics out there, this one’s for you! One powerful use case of Filter is that you’ll be able to achieve more efficient looping within your Flows. Note the below example could be solved a million ways, we just wanted to show you a creative way to utilize this new element.
Suppose you have a Flow that updates the Sales Price on a Product Line Item based on a discount determined in a set of Product Discount records. Your discount values are stored as records in Salesforce and you already have the discount records in your flow available to you. You just need to apply the discount for that particular product to the Product Line Item.
When the Opportunity is changed to a stage of ‘Proposal/Price Quote’ you want all of the Product Line Items to get the max discount possible applied. For each of the products tied to the opportunity, you do not want to do a a ‘Get’ inside of your loop to retrieve the relevant Product Discount records because you want to be a good ‘Governor Limit Citizen’.
The two big pieces here are the Collection Filter and Collection Sort elements. Here we are ‘Filtering’ the Discount records we grabbed in the beginning and finding discounts that are related to the product in our line item, then we are sorting it by the biggest Discount Percentage and reducing/limiting the collection to 1 record. In this fictitious scenario we had 2 possible discount records, but we only wanted the one with the biggest discount, hence the ‘LIMIT 1’. We then grab the single record stored in the results of the sort by using a quick loop.
The assignment here is: {!Loop_Over_Line_Items.UnitPrice} Equals {!numDiscountPercentage} * {!Loop_Over_Line_Items.UnitPrice}
The possibilities are endless! We’d love to hear how you’re using the new element when this starts rolling out.
Co-Authored by Adam White and Alex Edelstein
https://unofficialsf.com/wp-content/uploads/2022/09/largeUCSF-300x133.png00Alex Edelsteinhttps://unofficialsf.com/wp-content/uploads/2022/09/largeUCSF-300x133.pngAlex Edelstein2021-12-06 14:06:262021-12-06 14:23:27Sneak Preview: The New ‘Collection Filter’ Element
When this feature works properly, you can see it displayed here:
In certain situations, as described here, you can follow the steps but you won’t see the ‘else Approve’. One combination is when the previous step has an Auto-Skip pathway, as shown below. The first step has ‘else Next Step’ and the second step fails to show the ‘else Approve’:
Workaround
The workaround for this bug involves creating an special User account that automatically approves every approval requests it receives, and adding a step that calls that ‘autoapprover’ if the conditions warrant.
Here’s the general flow:
Preparing Your Approval Process For AutoApproval
Let’s go back to our example from above. We have a step that we want to enter if the industry is not Agricultural. If it is Agricultural we want an automatic approval: However, the bug in approval processes prevents the auto approval:
For our workaround, we need to add a step that causes immediate approval if the step gets executed. We’ll do this by adding a new step 2 called Autoapprove Agricultural Accounts that executes immediately before our malfunctioning step. Note that 1) its criteria is set up to be the exact opposite of the original step 2, and it uses ‘go to next step’:
Importantly, We also modify our original step 2 so that it also uses ‘go to next step’. If we leave it on ‘approve record’ it will actually reject the record, which may not be what we want. Basically, since ‘Approve Record’ is broken, you don’t want it in any part of your process.
Assigning the Step to a Special AutoApproval User
We assign our new Autoapprove Agricultural Account step to the newly created User called Autoapprover User:
This is just a normal User, but it has a special email address:
We’ll touch on that in a moment. First, let’s review what we’ve done so far. After Step 1, our new Step 2 gets evaluated. If the industry is Agricultural, Step 2 will execute as normal and send an email notification to the AutoApprover User’s email account. Otherwise, the approval process will carry on to the original Step 2.
Adding an AutoApproval Capability to your Org
If our new Step 2 gets entered, we want it to cause the request to immediately be approved. To do this, our AutoApprover User uses as its email address a special Salesforce Apex Email Service Address that you’ll generate by setting up an Apex Email Service. This service provides an email address and will auto-process email received at that address.
Normally, you give each Email Service the name of an Apex Class that you’ve coded up to handle the incoming email. But we don’t want users to need to write code, so we’re going to use a Flow extension that provides Email Services with an Apex Class that knows how to take the incoming email and pass it to a flow.
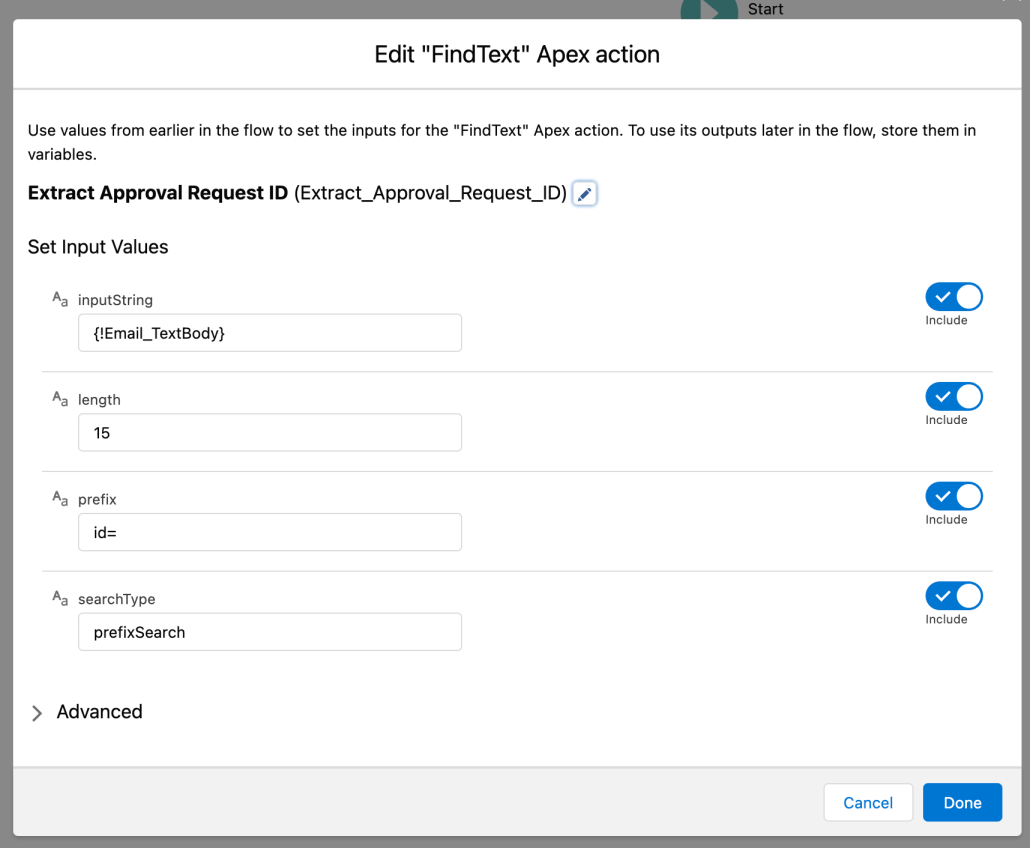
Below, you’ll see instructions to create a flow called Auto Approve Request that is designed to be passed an email body by an Email Service. The flow then uses the Find Text action to extract the id of the Approval Process and then uses a new Resolve Approval Process action to approve the request. Here’s what Resolve Approval Process looks like: (UPDATE: this action now also has the input fields ‘objectName’ and ‘recordId’, and you can pass those values in instead of an approvalRequestId, if you wish. This improvement is courtesy of Adityaonmove)
When this action executes, the request will be approved.
This is needed to extract the recordId from the email notification that approval processes send out. Here, you can see the id that we need to extract:
Step 3: Generate the ‘Resolve Approval Process’ Invocable Action
Follow the instructions here to generate a Resolve Approval Process action that can be used when the AutoApprover User is assigned a step.
Step 4: Create an autolaunched flow that will autoapprove an approval request
This flow uses the Find Text and Resolve Approval Process actions from the steps above:
To create this flow, do the following:
4.1 – create the following input variable to receive the body of the email notifications:
4.2 – configure the Find Text action to extract the 15 character ID of the approval process from the email notification
4.3 Configure the Resolve Approval Process to carry out an automatic approval
Note the the ‘foundString’ output from the Find Text action is mapped into the ‘approvalRequestId’ input here.
4.4 Don’t forget to activate the flow.
You might want to test it out at this point by passing it an email body and verifying that it approves the specified approval request.
Step 5 Update the the Email2Flow apex class to point to your newly created autoapproval flow
When you installed EmailToFlow in Step 1 above, the package included an apex class called EmailToFlow that gets called by the Email Service and invokes a specified flow. As installed, that class attempts to call a test flow called ‘EmailController’. You need to hand-edit the Apex class in two places to point it at the flow you created above in Step 4. Here’s an example of a class that has been modified to point to a flow called Auto_Approve_Request:
At this point, you can carry out final testing.
Appendix – Troubleshooting
It can be a little tricky to assign an Email Service generated email address to a Salesforce User because of the various confirmation emails that can get sent out. You often need to look at error messages or debug text to find important links or codes. In the following image, when an existing user had their email address changed to be an Email Service address, a confirmation message was sent which generated an error email. Clicking the debug link made it possible to find the necessary confirmation link:
If you have too much difficulty getting this to work, an alternative is to give the auto approver User a free public email address or a corporate email address and then have that account auto forward emails to the Email Service account.
https://unofficialsf.com/wp-content/uploads/2022/09/largeUCSF-300x133.png00Alex Edelsteinhttps://unofficialsf.com/wp-content/uploads/2022/09/largeUCSF-300x133.pngAlex Edelstein2021-11-28 12:24:012022-07-16 06:53:35Using Flow to Process Approval Requests Automatically
You can create a Resolve Approval Request action that allows your flows to approve, reject or remove Salesforce approval processes. The action looks like this:
Input Attributes
action
Supported values: Approve, Reject, and Removed (See this for more info).
approvalRequestId
This can be extracted from email notifications. See this.
comments
Text provided here will be saved in Approval Activity History
Instead of installing a package, you’ll need to copy this apex code and add it to your org as a new Apex class ( It’s not currently possible to package actions that use Approval Process apis.) You can create the class using Developer Console or Setup -> Custom Code -> Apex Classes. After creating the action, you can create a flow like this:
In the example flow above, the first action is the Find Text action . It’s used in this specific example to extract the id of the approval process from an email notification. In other use cases, you’ll be able to get the approval process id in other ways.
This test class will help pass the Resolve Approval Requests to production. Unfortunately, a lot of hardcoding had to be done as Process Instances, and Process Definitions can not have a DML insert function. So you’ll need to inspect this test class and replace various strings to match them up with your org.
When using this test class, you will need to create the following:
An Account with the name “Acme (Sample).”
An Approval Process on the Account object with a Developer Name “Test_Process_Definition.”
Activate the Approval Process
Submit for Approval the Acme (Sample) account. Leave it as pending, as that is what the code looks for.
If you want, you could make these changes within the test class to fit your orgs’ test records, but this will need to be done for this class to run. You then will get a 93% code coverage.
https://unofficialsf.com/wp-content/uploads/2022/09/largeUCSF-300x133.png00Alex Edelsteinhttps://unofficialsf.com/wp-content/uploads/2022/09/largeUCSF-300x133.pngAlex Edelstein2021-11-27 12:32:272022-09-18 13:11:03Use Flow to Approve, Reject and Cancel Approval Processes
Please click this link to approve or reject this record.
Thank you, Salesforce”
…and you need to extract that recordId. In the scenario that inspired FindText, the goal was to use Flow to auto-approve the approval request represented by that recordId.
If you’re comfortable with formula functions, you can use them to pull the string out. We wanted to make it a little easier, so we created FindText. This initial version of FindText is quite limited as it will only find a string of a specified length that follows a specified prefix string. So in our example, we’re able to pass in the string along with these specific values:
This action, when passed the above email body, returns ’04i0U000000e9je‘.
The action outputs two values:
foundString &
foundStringCollection
foundString will contain the first hit and is useful if you’re only expecting a single hit. foundStringCollection will contain all of the hits.
Searching by length and prefix is only one of hundreds of ways you might want to extract substrings. Feel free to request other modes of query in the comments here.
Developer Notes
This action uses Salesforce Apex regex. Ideally, it will become the friendly way for flow creators to tap into the power of regex
https://unofficialsf.com/wp-content/uploads/2022/09/largeUCSF-300x133.png00Alex Edelsteinhttps://unofficialsf.com/wp-content/uploads/2022/09/largeUCSF-300x133.pngAlex Edelstein2021-11-27 12:24:102022-02-19 11:43:29Easily Extract Substrings & Tap the Power of Regex with FindText
Two recent articles highlight new tools to connect AI predictions to Flow. This one is by Salesforce Director of Product Manager Bobby Brill:
This one by Salesforce engineer Alex Rich focuses on the use of the PREDICT formula function. His example shows PREDICT being used in Validation Rules, but the same use case is pertinent to the use of formulas in Flow:
https://unofficialsf.com/wp-content/uploads/2022/09/largeUCSF-300x133.png00Alex Edelsteinhttps://unofficialsf.com/wp-content/uploads/2022/09/largeUCSF-300x133.pngAlex Edelstein2021-11-14 12:45:292021-11-14 12:47:38Connect Powerful Einstein Discovery AI To Your Flows
Jessie Rymph over at her blog on Unhandled Sunshine posted a nice tutorial on how you can create a flow that lets users upload a contact photo or display their existing photo in a nice, clean, code free way utilizing Narender Singh’s File Preview component.
https://unofficialsf.com/wp-content/uploads/2022/09/largeUCSF-300x133.png00Adam Whitehttps://unofficialsf.com/wp-content/uploads/2022/09/largeUCSF-300x133.pngAdam White2021-11-12 07:00:062021-11-12 07:00:11From Jessie Rymph: How to display or upload a contact photo using Flow
Currently there are two ways you can launch a flow orchestration: using a record trigger, or auto launch from Apex, But what if I want to be able to launch an orchestration from a button and mimic the good old “Submit for Approval” button? I looked at alternative ways to start orchestrations, and this is what I found: 1. Launching an orchestration from a URL button was not user friendly as the user was presented with a blank auto launched flow screen and was not redirected back to the record when finished even if the the return URL was part of the button definition. Overall, while this may work, the user experience was not smooth 2. Trying to include the submit flow as an interactive step assigned to the current user, resulted in a warning when saving the flow and an error during execution saying that no assigned user was found
I ended up with the following solution that worked well and gave a smooth user experience:
1. An action button to launch the submit flow on the record page 2. A submit screen flow that will update a field on the record to indicate the record was submitted and who the approver is 3. An orchestration that will listen to the field updated by the submit flow and will run the approval flow, routing to the approver that was updated on the record by the submit flow 4. The approval flow will update the record again with the final approval status
Here is an illustration of the overall process:
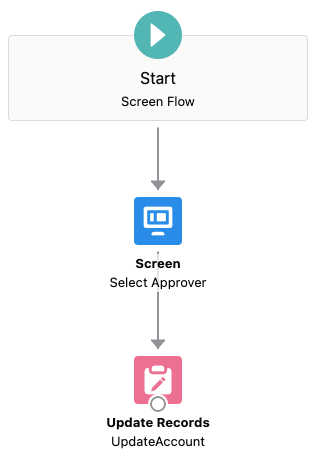
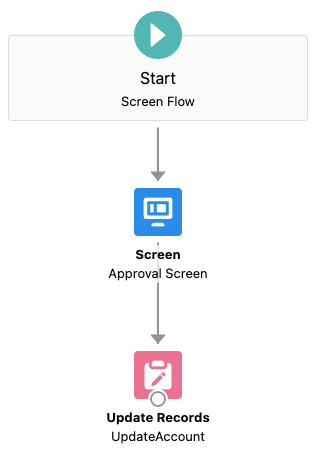
Both the submit and approve flows are very simple and only have one screen followed by an update records step
Submit Flow
Launch the submit flow from an action button added to the page layout
Action ButtonApproval Flow
The flow orchestration only has one stage and one step
Orchestration Flow
It starts when the record’s approval status is updated to submitted
And routes the approval to the username that was updated on the record by the submit flow
Here is a short video demonstrating the complete process
Some notes about the flows:
1. The submit flow clears any previous approval status and rejection notes 2. The approval flow only displays rejection notes if the user selects to reject, using a visibility rule 3. In both flows, I’m using a record input variable and this saves having a get records element in the flow as the whole record gets passed in from the button or from the orchestration step
Possible enhancements:
1. The approval request flow can include a message with approval details to the approval request flow by using a display text with merge fields from the record and related records information 2. The submit flow can select the approver automatically by using criteria from the record or an approval matrix stored in custom metadata 3. The submit flow can also be used to recall or not allow to submit an approval by displaying another screen based on the approval status
Launching an orchestration from a button opens up a lot of possibilities, please share if you come up with other use cases.
https://unofficialsf.com/wp-content/uploads/2022/09/largeUCSF-300x133.png00Tamar Erlichhttps://unofficialsf.com/wp-content/uploads/2022/09/largeUCSF-300x133.pngTamar Erlich2021-11-08 08:23:512021-11-08 08:23:54From Tamar Erlich – Submit an orchestration from a button
From Ryan Mercer: “I’m excited to release my next sprint of File Upload Improved. Thank you to everyone for your feature suggestions, I really enjoy working through your great ideas! Please continue to keep them coming.”
This release’s features include…
Show files below the component
By default, the files will show above the File Upload Component. If you’d prefer they be shown below the component, set this to TRUE.
Restrict users from uploading multiple files
Allow the user to upload multiple files. If this is not TRUE, then once the user uploads one file, the file upload component will not allow any additional files to be uploaded.
Control whether uploaded files are visible to all users
By default, when an internal user uploads a file, the file is only visible to other internal users (meaning community users can’t see it). If you’d like to make the uploaded file visible to all users, set this to TRUE. When a community user uploads a file, the file is already visible to all users.
From a technical perspective, this sets ContentDocumentLink.Visibilty = AllUsers.
Modify or Enhance The Names of Uploaded Files
The file name of the uploaded files defaults to the actual name of the file. If you’d prefer to override the default file name, you can specify the new file name here.
You can do funky things here like using a Text Template (remember to View as Plain Text) or even using a Flow Formula
Show Existing Files Related to Record Id
If you’d like to show the existing files associated with the Related Record Id (in addition to the ones that the user may upload), set this to TRUE. Be aware that sharing rules are NOT enforced, so the user could see files that they wouldn’t normally have access to.
Plus other general performance and architectural improvements
It’s always great to see someone like Tom go deep on the use of Flow for a particular corner of Salesforce. Enterprise Territory Management is a core element of Sales Cloud, and this Automation Hour shows how to automate easily.




 However, the bug in approval processes prevents the auto approval: