Robert Anderson on Handling Defaults in Picklists
This solid post has a nice comparison of standard picklist behavior and QuickChoice behavior.
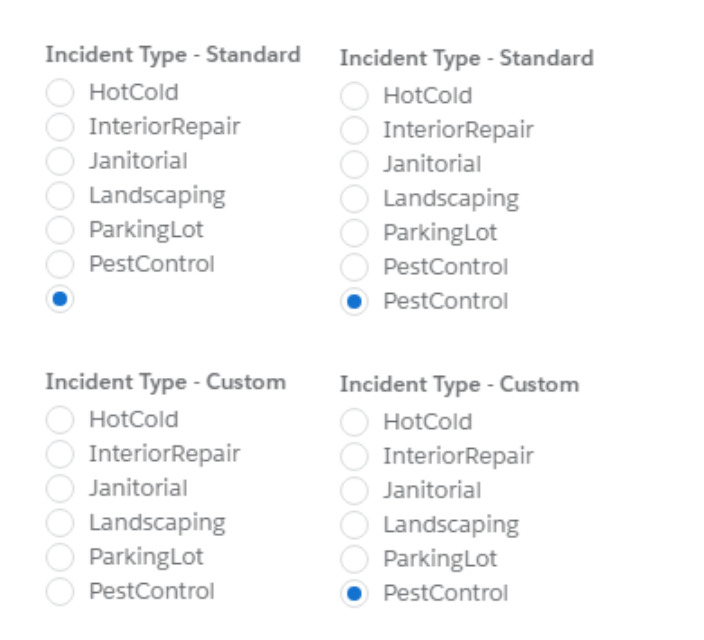

This solid post has a nice comparison of standard picklist behavior and QuickChoice behavior.
Setup and Installation steps (View Part 1 for demo video and details on the building blocks)
STEP 1: Install package
OR
STEP 2: Setup the environment

STEP 3: Create Users of the app.
STEP 4: Assign permissions

STEP 5: Add Data to custom objects

| Name | Description | Action Reference | Acceptance Label | Rejection Label | ||
| 1 | Priority Message: Tax Day | Tax day is in 6 weeks! Get more detail. | Tax_Flow | Accept | Reject | |
| 2 | Priority Message: Well Being Survey | Our records indicate that you have not taken the Well Being Survey. Please take a few minutes to complete it. | Well_Being_Survey_Flow | Accept | Reject | |
| 3 | Work.com Contact Risk Alert | Alert! You have recently come in contact with someone who has tested positive for COVID -19. Please contact the health center for more details. | Contact_Risk | Accept | Reject | |
| 4 | Return to Work Shift Days | Shift_Flow | Accept | Reject | ||
| 5 | Training Recommendation | Your manager has identified that you will benefit from the Great Salesforce Leaders training. Click to enroll. | Enrollment_Flow | Accept | Reject |
STEP 6: Set up the flow component to accept input for which messages and their respective priorities to be surfaced on the NBS Component


Drag a flow component.Choose the manage tactical plan. activate it for the org default

Also set component visibility , add filter, Save and Activate.

[If the following error message displays then do this additional step below]

This step maybe required on a non-scratch org - go to Setup - My Domain →Register a domain →Login →Deploy to users.

Once done go back to UserProfile

Order priorities(these are passed in from the flow) - these are all messages that are available.
Once ordered - it gets saved on the EmployeeDailyTacticalPlan record as shown below

STEP 7: Set up the NBA component (This is another flow component with a custom LWC -NOT THE STANDARD NBA COMPONENT)
We use a custom component here to show the modularity of the strategy builder. This demo can also be built with the standard NBA component and that is not covered here.

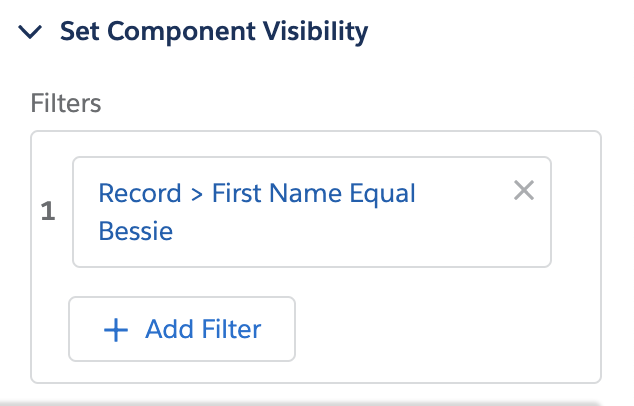
Set component visibility so it is viewed by the second user
STEP 8: Login and test the component

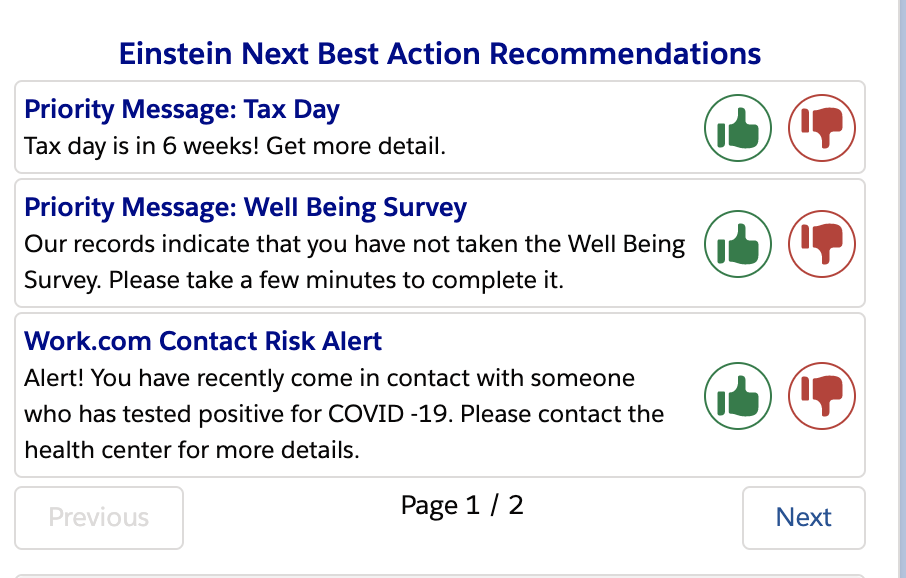

Employee experience is the new HR superpower. Customer experience is no longer only for customers, with the Salesforce Platform you can not only seamlessly create amazing digital experiences for employees but also deliver them personalized and optimized. Especially in light of the new ‘work anywhere’ normal that fused home and work life, digital employee experience plays a key role in not just productivity but also employee motivation.
On this employee experienced focussed app, Einstein NBA can be leveraged to deliver
and much more. Powered with the insights from Einstein prediction builder – NBA combines data, business rules and AI to provide relevant and real time individualized recommendations.
Note: Prediction builder is not integrated in the app below but simulated with prediction scores.
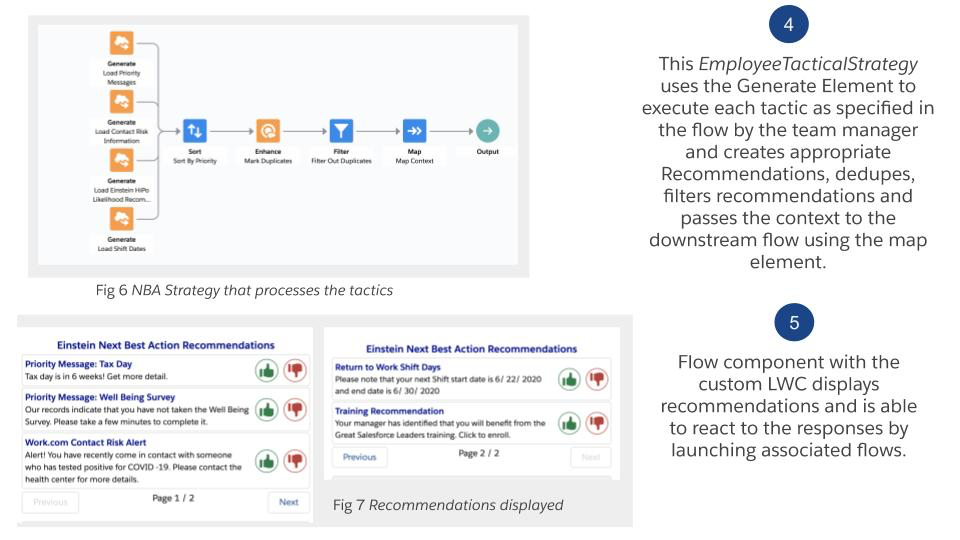
This app also showcases how Lightning flows can be used in conjunction with Next Best Action. There are numerous applications of how flow and NBA can be integrated into apps for powerful outcomes such as the one in this example. The example also shows a custom LWC component to display Recommendations and not the standard display component -this illustrates the modularity of the strategy builder and how it can be used with a custom component because it is exposed as a service.
This sample application uses a sophisticated pattern to provide team managers with a simple flow that they can use for prioritization, while enabling IT to add or subtract recommendation tactics behind the scenes. This is a powerful way to address the desire of customers to mix backend power with business user configuration.
The individual tactics are modeled as Apex classes. The same example can be extended for several use cases of how system integrators can use Next Best Action to provide increased value by making use of Apex to create tooling that team managers can use to cater to the specific use case.
(View setup and installation steps in Part-2 of the blog)


Very detailed and effective blog post. Check it Out!

As Vihor writes, “If you are not in love with Flows already it is probably because you haven’t started using and playing around with them. I was in the same club till 3 months back. But since I have started using them I cant imagine myself not using them for most of the automations nowadays.”

Ryan Cox is a Technical Architect here at Salesforce, and he has built some very sweet Flow functionality. The FlowButton is a button that launches Flows. Simple concept, but no one has ever really shown what you can do with this.
Let’s start with what you can do when you put a FlowButton on a Lightning Page:
You can already add Flows to Lightning Pages either via the Flow page component or a Quick Action button. Both are powerful but both also have drawbacks. The Flow component takes up a lot of space on the screen and you can’t easily turn it on or off. The Quick Action buttons take up only a little space, but they pop up as modals in a form factor that often isn’t quite the right size.
What Ryan figured out is one of those things that seems incredibly obvious in hindsight: you could have the best of both words if you build a lightning page component that has two modes. It starts out as a small button that looks like this:

but when you click the button, it expands like a window shade and becomes an inline Flow:

If you want, you can have the flow pop up as a modal. You also get some powerful css-based formatting options for the button’s appearance:

You can insert FlowButtons into lightning components, but sadly only aura components. the lightning:flow runtime component is only available in aura, and lwc components can’t embed aura components (although I’d love to see someone experiment with doing this via an iframe).
<c:RC_FlowButton buttonLabel="Submit"
    variant="BRAND"
    flowToLaunch="Create_Contact"
    showFlowInModal="true"
/>Like the existing components Custom Footer Button and Navigation Button, FlowButton can control the movement of flow screens, triggering a Next or Previous transition:

You can have a set of these buttons that navigate to different parts of your Flow. Set this up by having the buttons update a flow variable, and then use that variable in a decision element:


Subflows are a powerful way to increase your reuse, but they have a major weakness in that the Subflow element requires the name of the subflow to be chosen at the time the flow is built, instead of when the flow is run.
Last year, UnofficialSF published a method for dynamically launching subflows. FlowButton improves on that method in two useful ways:
This creates a seamless experience for the user. To configure the button to be used in this mode, configure it to hide the button, automatically launch a flow on init, and progress the parent flow when the subflow completes.

If you want the master flow to transition after the subflow completes, set ‘Do Flow Action When Subflow Completes’ to true.
There is available demo content in the full package, which is available here. The install link at the bottom of the page will only install the FlowButton component itself. (Note that to see the below example content, you’ll need to go into your profile and make visible both the Flow Components App and the Test-Flow Button Custom Tab.)

This screen shows some of the styling options:

If the button is placed on a record detail page, the recordId will be passed to the Flow.


Two example flows for dynamically launching subflows are the Flow Router and Case Status Router.


The Case Status Router flow is configured on the Case record page.


Some examples of how I’ve used this component in demos and VTO projects.


This shows a modification of the Salesforce Labs Trekkr app where the steps of an onboarding trail are completed by launching a flow. More details on this are here: Trekkr: launch flows for steps


Version 1.0 Unmanaged (component only)
Version 1.0 Unmanaged (full examples)
Two very substantial new guides have just been published. They are the product of a huge internal effort spearheaded by Salesforce Flow Product Managers Sam Reynard and Tim Peng. Check it Out!
Introduction to the Architect’s Guide

Summer ’20 provides a new trigger: Start your Flow when a record is created or changed, just like Process Builder. Gidi’s post shows how you can use this to prevent unexpected values from being set on picklist fields.

Note that Gidi’s solution features a workaround that allows the Flow to use ‘IsChanged’ functionality:

As discussed in the Email Templates section of the Send Rich Email action, Salesforce Lightning Email Templates have an ability to merge data in dynamically, but it’s limited. You can only merge in fields from a core set of supported Standard records: Lead, Contact, User:

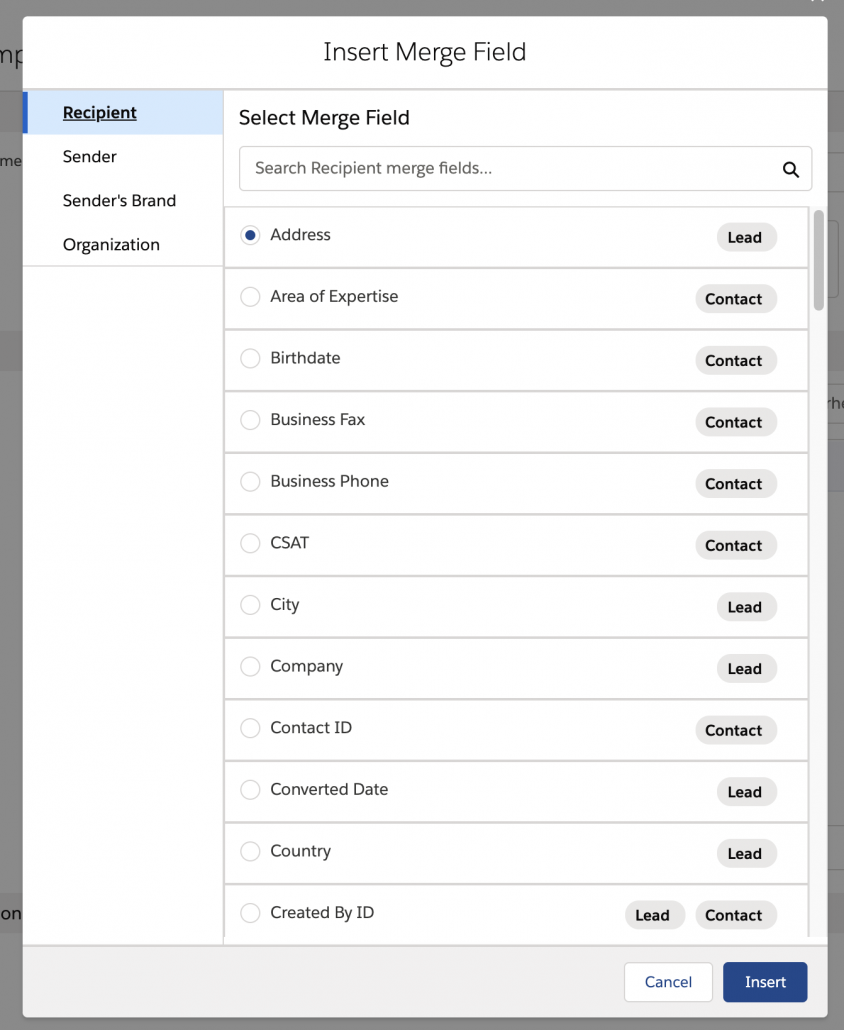
What if you want to merge in additional dynamic data? You can do it using Flow.
The basic idea is that you create one or more custom fields on Lead, Contact, or User to serve as temporary holding pens for dynamic data. Then in the same Flow that you use to send the email, you update the record with your dynamic data. After you send the email, you can choose to erase the data from the custom field.
Example: you want to add a Price quote to an Email that’s sent to Contacts. You add a custom field to Contact. You could be specific and call it PriceQuote__c but we’ll be more general purpose and call it FlowMergeField1__c so we can use it for different purposes. Over in Lightning Email Template, add the field to your email body or subject:


In the Flow, take the contact record and do an Update Records setting the value of FlowMergeField1__c to the price you want inserted in the email.
You then need to make sure that the database commits your change before you call Send Email. Any Screen will cause a commit, so you could insert a screen that says “Click next to send”, and it would commit your update. You can eliminate that step with the Commit Transaction action if you’re using a Screen flow, and with a Pause element set to a zero time duration if you’re using an Autolaunched flow. Without this step, it still might work some of the time, but do this for reliability.
Then call your Send Rich Email action, passing it the ID of the template.
Michael Schmidt-Korth from Salesforce has published a nice updated comparison, complete with updated polar charts. Check it Out!
